Title: '71 Hits the Paint Booth
Post by: 71charger_fan on October 25, 2014, 10:06:06 AM
Post by: 71charger_fan on October 25, 2014, 10:06:06 AM
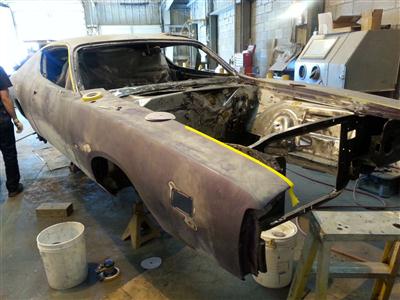
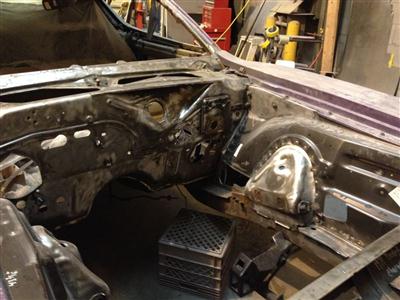
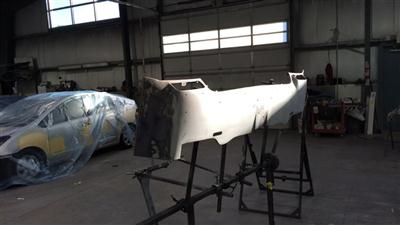
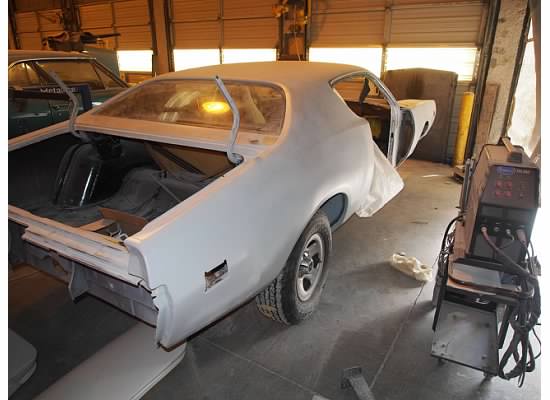
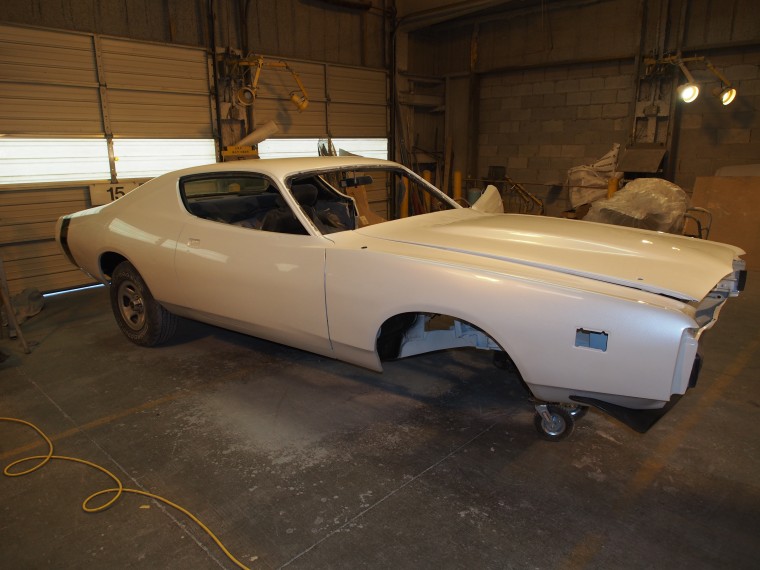
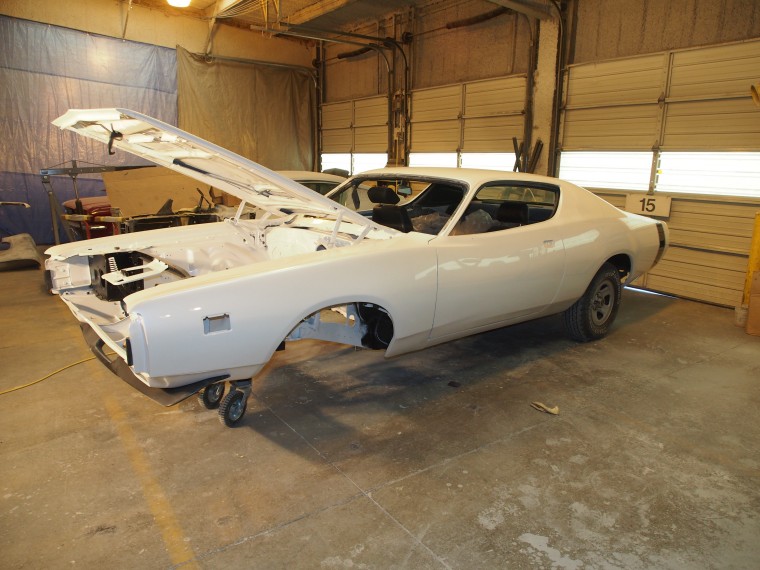
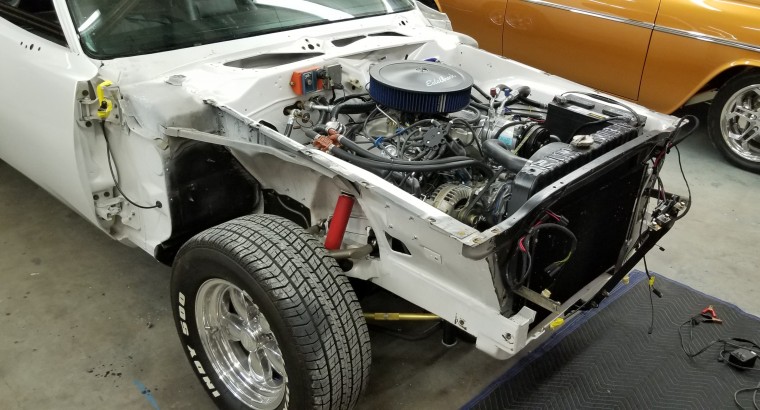
After much prep, frame rail repair, and some rust repair, my '71 has moved into the paint booth. I'm glad I had some old Jeep wheels to throw on it for its time in the body shop.


Title: Re: '71 Hits the Paint Booth
Post by: 71charger_fan on October 25, 2014, 10:07:59 AM
Post by: 71charger_fan on October 25, 2014, 10:07:59 AM
More
Title: Re: '71 Hits the Paint Booth
Post by: 71charger_fan on October 25, 2014, 10:10:15 AM
Post by: 71charger_fan on October 25, 2014, 10:10:15 AM
More

Title: Re: '71 Hits the Paint Booth
Post by: 71charger_fan on October 25, 2014, 10:19:34 AM
Post by: 71charger_fan on October 25, 2014, 10:19:34 AM
More
Title: Re: '71 Hits the Paint Booth
Post by: 71charger_fan on October 25, 2014, 10:24:58 AM
Post by: 71charger_fan on October 25, 2014, 10:24:58 AM
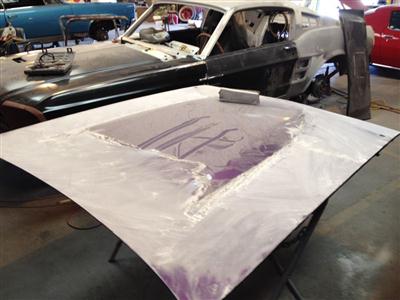
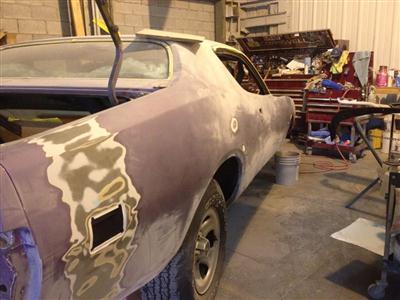
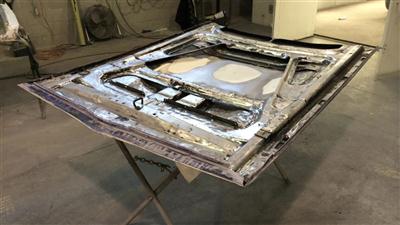
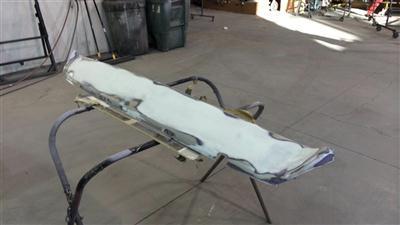
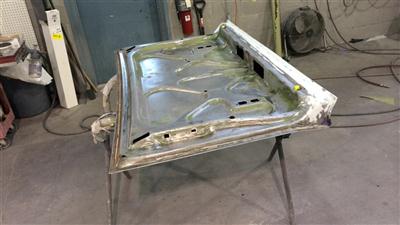
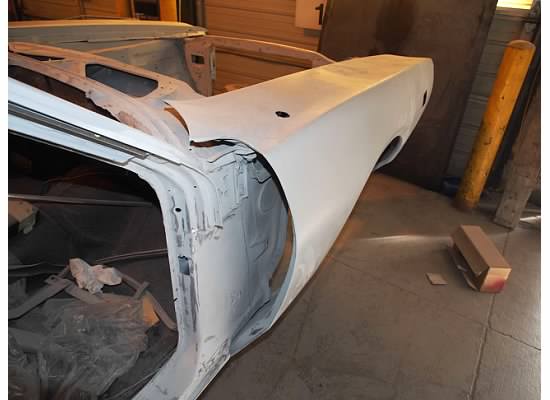
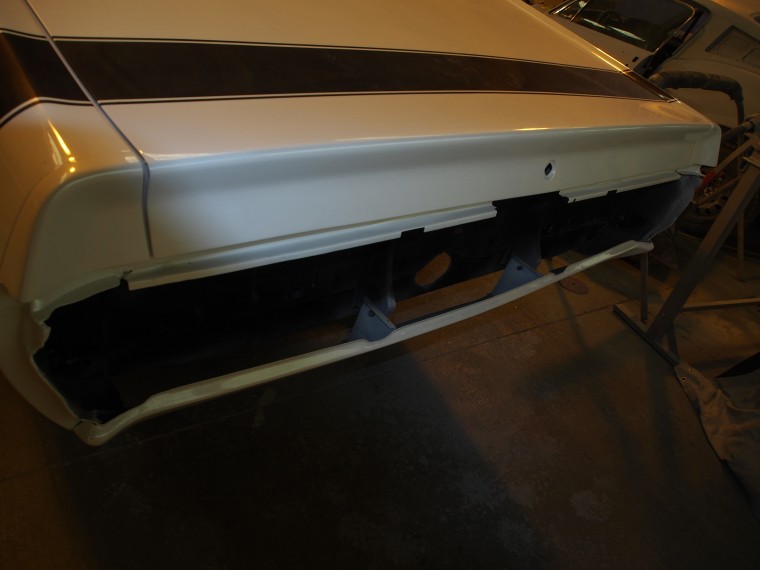
More. I had forgotten the trunk had come off of a green parts car until I saw it stripped; it's been Plum Crazy for almost 20 years. Soon, it'll be Ivory Tri-Coat Pearl.
Title: Re: '71 Hits the Paint Booth
Post by: JB400 on October 25, 2014, 12:45:11 PM
Post by: JB400 on October 25, 2014, 12:45:11 PM
:popcrn: :popcrn: :popcrn:
Title: Re: '71 Hits the Paint Booth
Post by: 71charger_fan on October 26, 2014, 12:45:33 PM
Post by: 71charger_fan on October 26, 2014, 12:45:33 PM
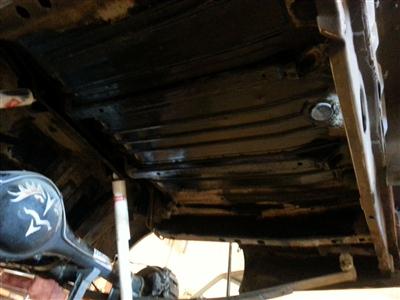
Frame repair


Title: Re: '71 Hits the Paint Booth
Post by: 71charger_fan on October 29, 2014, 11:51:10 AM
Post by: 71charger_fan on October 29, 2014, 11:51:10 AM
I've got a new home for it in work. I wanted to build a bigger one, but zoning got in the way. This is the biggest detached garage I'm allowed.

Title: Re: '71 Hits the Paint Booth
Post by: 71charger_fan on November 25, 2014, 12:28:50 PM
Post by: 71charger_fan on November 25, 2014, 12:28:50 PM
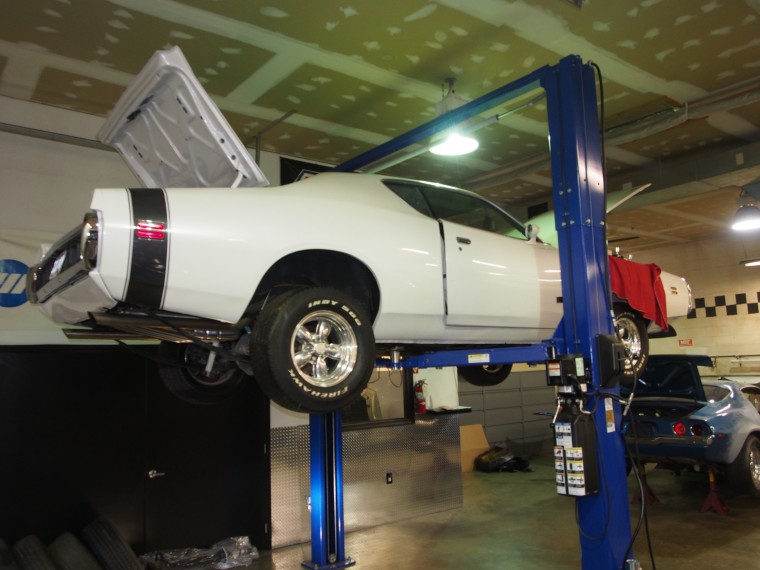
Getting closer. Other projects in the way, might not actually get painted before January.

Title: Re: '71 Hits the Paint Booth
Post by: 71charger_fan on November 25, 2014, 12:31:31 PM
Post by: 71charger_fan on November 25, 2014, 12:31:31 PM
And another

Title: Re: '71 Hits the Paint Booth
Post by: tan top on November 25, 2014, 03:46:01 PM
Post by: tan top on November 25, 2014, 03:46:01 PM
:coolgleamA: looking good :yesnod: :popcrn:
Title: Re: '71 Hits the Paint Booth
Post by: hemi-hampton on November 25, 2014, 07:55:44 PM
Post by: hemi-hampton on November 25, 2014, 07:55:44 PM
Are you painting it in the garage? Don't remember seeing to many old Mopars in Pearl white. LEON.
Title: Re: '71 Hits the Paint Booth
Post by: 71charger_fan on November 25, 2014, 09:36:09 PM
Post by: 71charger_fan on November 25, 2014, 09:36:09 PM
I'm not painting it. A local collision shop maintains a separate restoration facility. They're tackling the prep and painting.
Title: Re: '71 Hits the Paint Booth
Post by: Silver R/T on November 30, 2014, 10:58:05 AM
Post by: Silver R/T on November 30, 2014, 10:58:05 AM
Looks like it's coming along just fine. Always like seeing these progress pics.
Title: Re: '71 Hits the Paint Booth
Post by: 71charger_fan on December 02, 2014, 08:44:04 PM
Post by: 71charger_fan on December 02, 2014, 08:44:04 PM
I had added an Electric-Life power window kit, but the wires kept binding in the door jambs. So, I've put in door jamb contacts. It's nice to now get it painted which should eliminate the hacked-in aspect of cutting in those jamb switch holes.
Title: Re: '71 Hits the Paint Booth
Post by: 71charger_fan on March 03, 2015, 11:50:13 AM
Post by: 71charger_fan on March 03, 2015, 11:50:13 AM
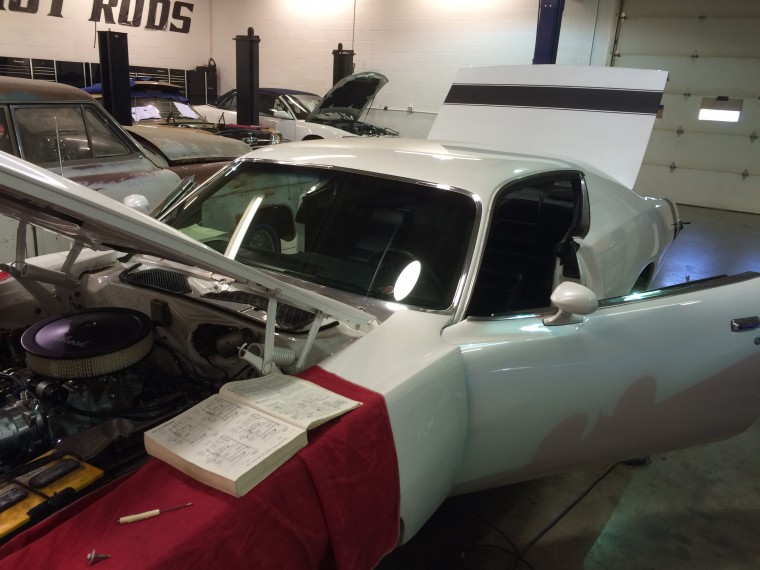
New paint was smooth. Too bad I couldn't see the blotchy pearl in the shop lighting.
Title: Re: '71 Hits the Paint Booth
Post by: lukedukem on March 03, 2015, 12:34:34 PM
Post by: lukedukem on March 03, 2015, 12:34:34 PM
nice.
luke
luke
Title: Re: '71 Hits the Paint Booth
Post by: 71charger_fan on March 03, 2015, 12:44:05 PM
Post by: 71charger_fan on March 03, 2015, 12:44:05 PM
I can't wait to see it in the sun to see the pearl pop.
Title: Re: '71 Hits the Paint Booth
Post by: Cncguy on March 03, 2015, 01:12:57 PM
Post by: Cncguy on March 03, 2015, 01:12:57 PM
Looking good! Now the fun part of reassembly.
Title: Re: '71 Hits the Paint Booth
Post by: tan top on March 03, 2015, 09:05:16 PM
Post by: tan top on March 03, 2015, 09:05:16 PM
:2thumbs: looks good ! :2thumbs: :yesnod: :coolgleamA:
Title: Re: '71 Hits the Paint Booth
Post by: Dino on March 03, 2015, 09:15:58 PM
Post by: Dino on March 03, 2015, 09:15:58 PM
Awesome!
Title: Re: '71 Hits the Paint Booth
Post by: 71charger_fan on March 04, 2015, 07:55:13 AM
Post by: 71charger_fan on March 04, 2015, 07:55:13 AM
Another

Title: Re: '71 Hits the Paint Booth
Post by: Patronus on March 04, 2015, 01:03:21 PM
Post by: Patronus on March 04, 2015, 01:03:21 PM
I like it too. What's the plan?
:popcrn:
:popcrn:
Title: Re: '71 Hits the Paint Booth
Post by: ACUDANUT on March 04, 2015, 02:38:49 PM
Post by: ACUDANUT on March 04, 2015, 02:38:49 PM
:cheers:
Title: Re: '71 Hits the Paint Booth
Post by: hemi-hampton on March 04, 2015, 07:01:21 PM
Post by: hemi-hampton on March 04, 2015, 07:01:21 PM
Looks good. Congrats :2thumbs: LEON.
Title: Re: '71 Hits the Paint Booth
Post by: 71charger_fan on March 13, 2015, 12:14:32 PM
Post by: 71charger_fan on March 13, 2015, 12:14:32 PM
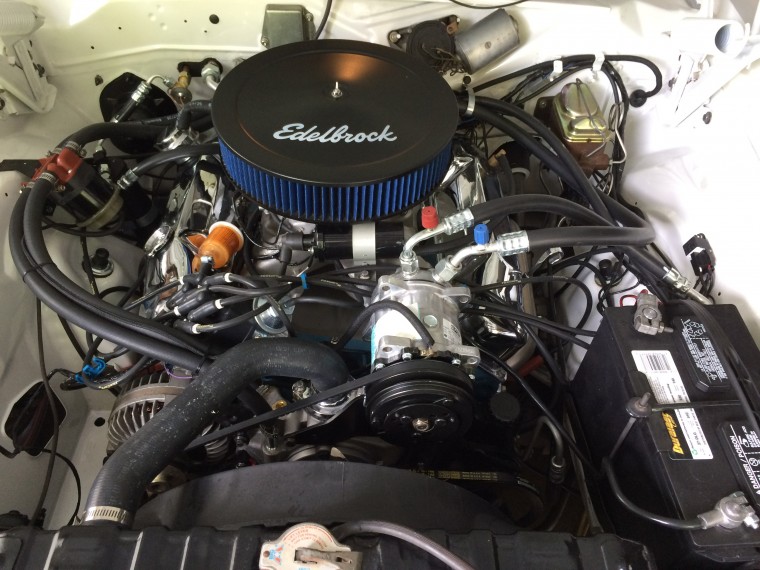
The plan, such as it is, is to get it from the paint shop back to the hot rod shop and get the reassembly underway. The engine's been cleaned up and painted and I have all new rubber parts waiting their turn to go back on it.
Title: Re: '71 Hits the Paint Booth
Post by: Wicked72 on March 15, 2015, 07:46:35 PM
Post by: Wicked72 on March 15, 2015, 07:46:35 PM
where did you get your new rubbers?
Title: Re: '71 Hits the Paint Booth
Post by: 71charger_fan on March 16, 2015, 08:51:09 AM
Post by: 71charger_fan on March 16, 2015, 08:51:09 AM
I bought everything Dixie Restoration Parts had to fit my car a few years ago at Carlisle and have pieced together the rest from various sources including Detroit Muscle Technologies.
Title: Re: '71 Hits the Paint Booth
Post by: 71charger_fan on December 04, 2015, 08:39:39 AM
Post by: 71charger_fan on December 04, 2015, 08:39:39 AM
Finally getting close.
Title: Re: '71 Hits the Paint Booth
Post by: areibel on December 21, 2015, 09:44:03 AM
Post by: areibel on December 21, 2015, 09:44:03 AM
Beautiful! :2thumbs:
Title: Re: '71 Hits the Paint Booth
Post by: ACUDANUT on December 21, 2015, 03:07:01 PM
Post by: ACUDANUT on December 21, 2015, 03:07:01 PM
Nice. :cheers:
Title: Re: '71 Hits the Paint Booth
Post by: 71charger_fan on December 22, 2015, 09:02:39 AM
Post by: 71charger_fan on December 22, 2015, 09:02:39 AM
Still running down little (and a few big) things that went missing over the months it was blown apart. At this point, I've pretty much exhausted my in-house supply of spares and have fortunately found everything through the online vendors, the for sale section here, and ebay.
Title: Re: '71 Hits the Paint Booth
Post by: 71charger_fan on January 07, 2016, 09:16:01 AM
Post by: 71charger_fan on January 07, 2016, 09:16:01 AM
After about 2 years, I finally have a windshield back in it. This is the AMD piece.
Title: Re: '71 Hits the Paint Booth
Post by: tan top on January 07, 2016, 09:34:57 AM
Post by: tan top on January 07, 2016, 09:34:57 AM
:coolgleamA: :2thumbs:
Title: Re: '71 Hits the Paint Booth
Post by: 71charger_fan on April 05, 2016, 08:30:55 AM
Post by: 71charger_fan on April 05, 2016, 08:30:55 AM
Good to have it home. Still a bit of troubleshooting to do, but it's nice to have it back in my own garage.


Title: Re: '71 Hits the Paint Booth
Post by: ACUDANUT on April 05, 2016, 12:06:22 PM
Post by: ACUDANUT on April 05, 2016, 12:06:22 PM
AMD sells windshields ? Don't places like safelight carry these ? :shruggy:
Title: Re: '71 Hits the Paint Booth
Post by: 71charger_fan on April 05, 2016, 01:38:58 PM
Post by: 71charger_fan on April 05, 2016, 01:38:58 PM
Probably, but I was overseas at the time ordering off the internet and having them shipped to my friend's shop. Picking up an AMD piece was easiest for me at that time.
Title: Re: '71 Hits the Paint Booth
Post by: Brian L on April 30, 2016, 08:24:26 PM
Post by: Brian L on April 30, 2016, 08:24:26 PM
Great looking car! Can I ask you your wheel and tire sizes? Getting ready to put some on my 71 and I want to make sure they won't rub. Yours looks like the right setup. Thanks!
Title: Re: '71 Hits the Paint Booth
Post by: 71charger_fan on May 01, 2016, 08:43:43 AM
Post by: 71charger_fan on May 01, 2016, 08:43:43 AM
Rears are 15x8 with 275/60 and fronts are 15x7 with 255/60. I forget the offsets. I think it was about 4 in the back and 3 3/4 in the front, but can't say for sure.
Title: Re: '71 Hits the Paint Booth
Post by: Brian L on May 04, 2016, 12:53:42 PM
Post by: Brian L on May 04, 2016, 12:53:42 PM
:2thumbs: Thanks!
Title: Re: '71 Hits the Paint Booth
Post by: 71charger_fan on July 13, 2016, 08:45:43 AM
Post by: 71charger_fan on July 13, 2016, 08:45:43 AM
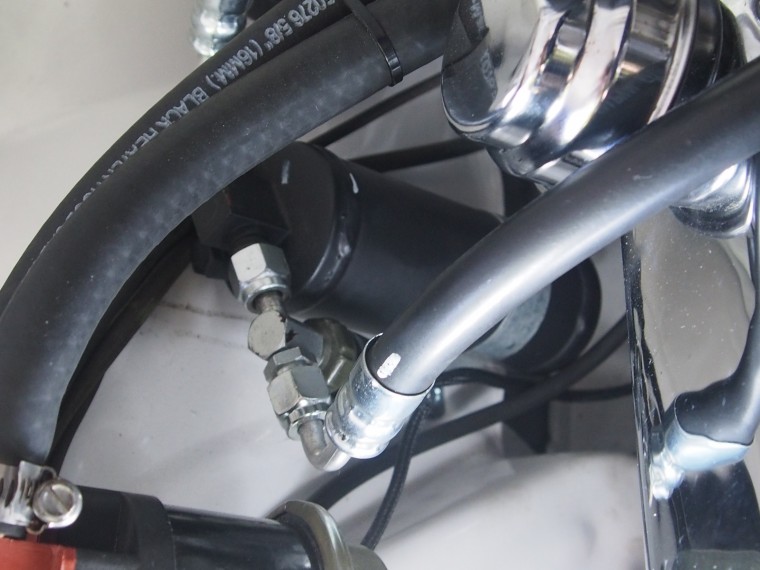
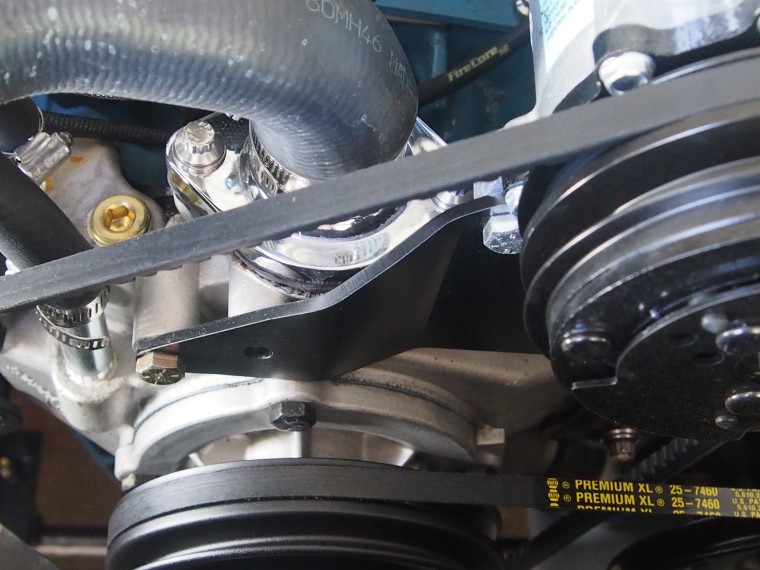
Finally got the Classic Auto Air system charged yesterday. With Carlisle this coming weekend, I didn't want to put it off any longer in case there was going to be troubleshooting involved. There was one refrigerant line connection that had been left loose. After tightening that, the system easily held 30in of vacuum and I was very pleasantly surprised when the compressor kicked on and cool air started coming out of the vents. I do have cool air coming out of the defrost vents when set to A/C. I'm not sure if it's worth the bother of troubleshooting that.
Title: Re: '71 Hits the Paint Booth
Post by: 71charger_fan on July 13, 2016, 08:47:56 AM
Post by: 71charger_fan on July 13, 2016, 08:47:56 AM
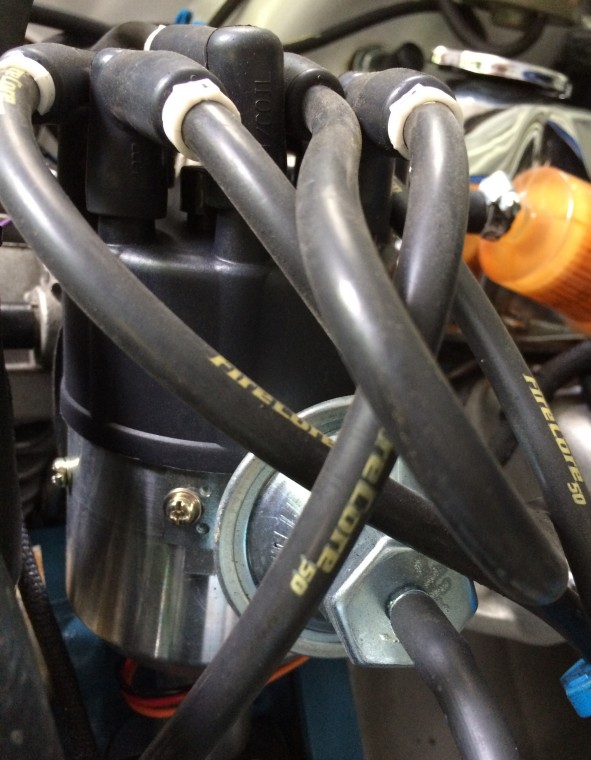
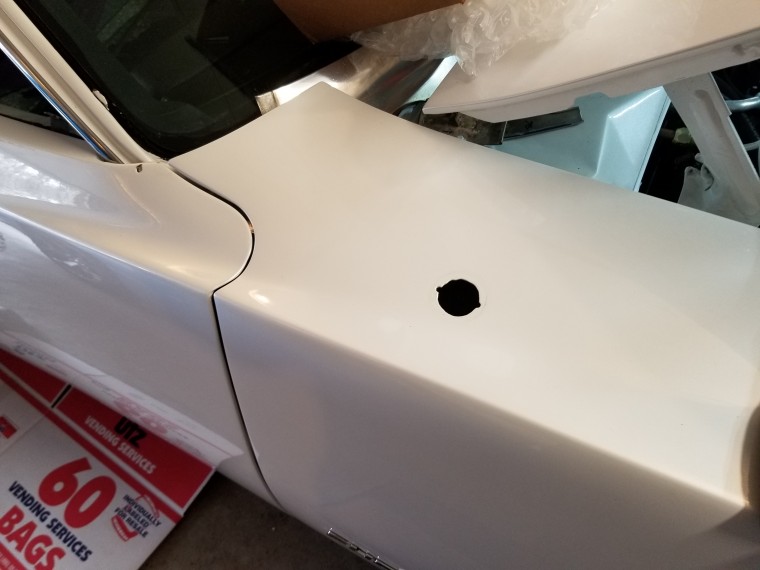
Deciding to switch to the Firecore RTR distributor after the body and paint work was done left me with some extra holes in the firewall.

Title: Re: '71 Hits the Paint Booth
Post by: 71charger_fan on July 13, 2016, 08:57:46 AM
Post by: 71charger_fan on July 13, 2016, 08:57:46 AM
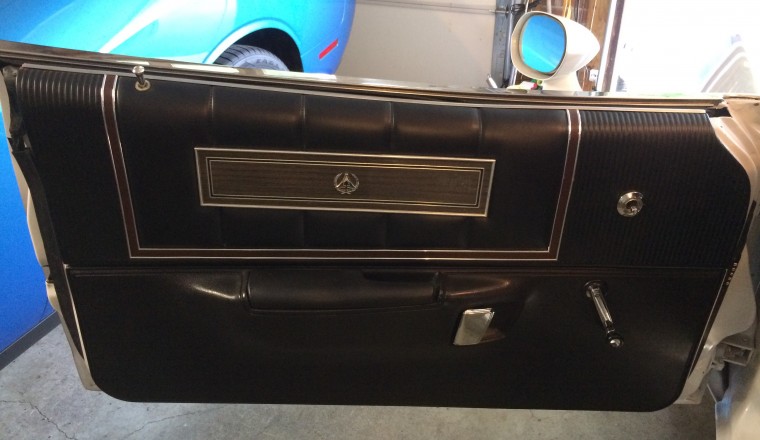
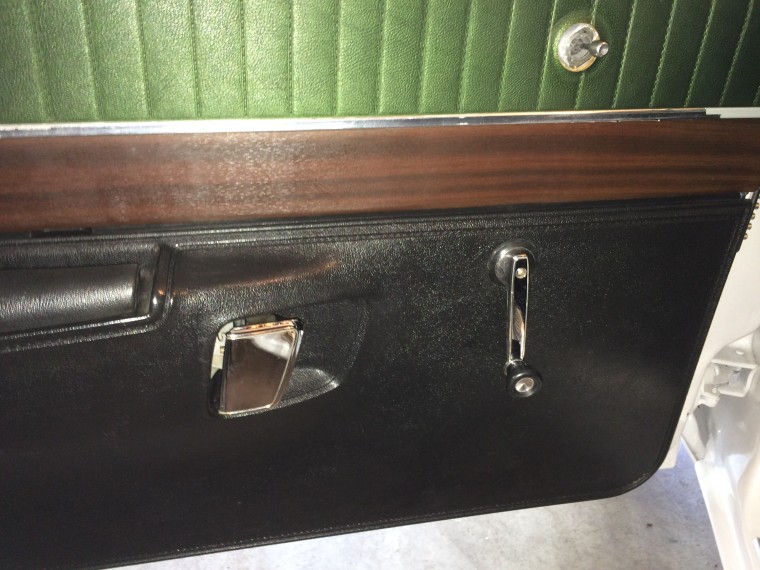
I got my upper door panels back from Legendary and installed. It was nice to switch out the somewhat ratty green ones I had in there as placeholders.
Title: Re: '71 Hits the Paint Booth
Post by: 71charger_fan on July 13, 2016, 09:10:55 AM
Post by: 71charger_fan on July 13, 2016, 09:10:55 AM
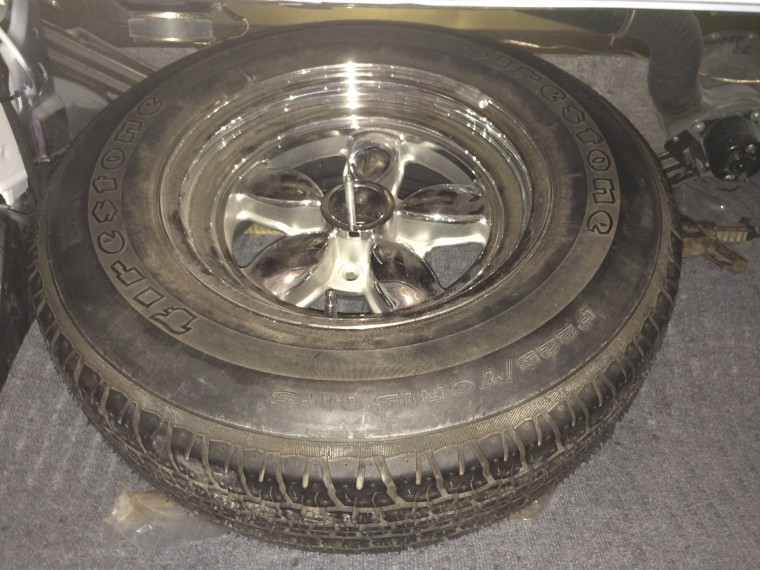
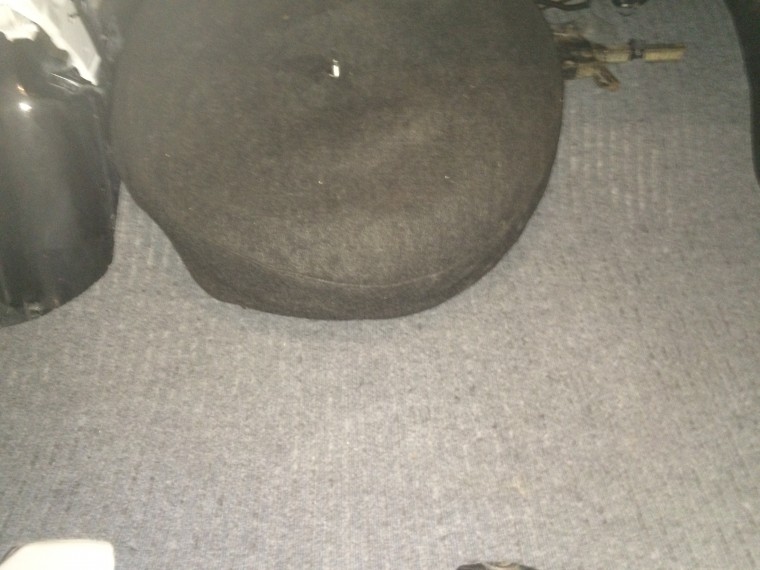
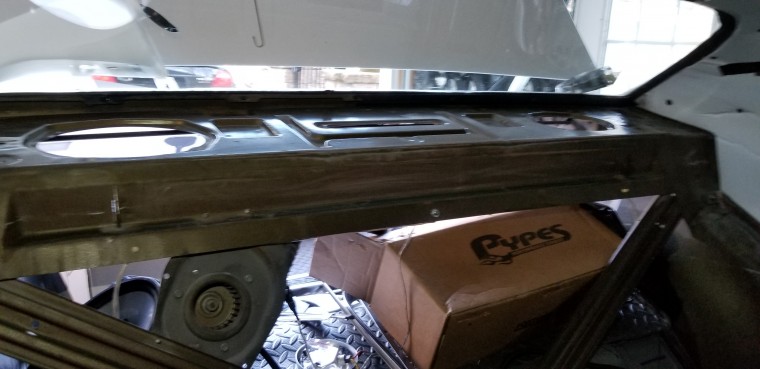
I used some foam flooring from Harbor Freight and some indoor/outdoor carpet from COSTCO to make a trunk mat. I have patterns for the trunk dress-up panels, but am not sure what material to use to try and reproduce those.

Title: Re: '71 Hits the Paint Booth
Post by: 71charger_fan on July 14, 2016, 01:50:11 PM
Post by: 71charger_fan on July 14, 2016, 01:50:11 PM
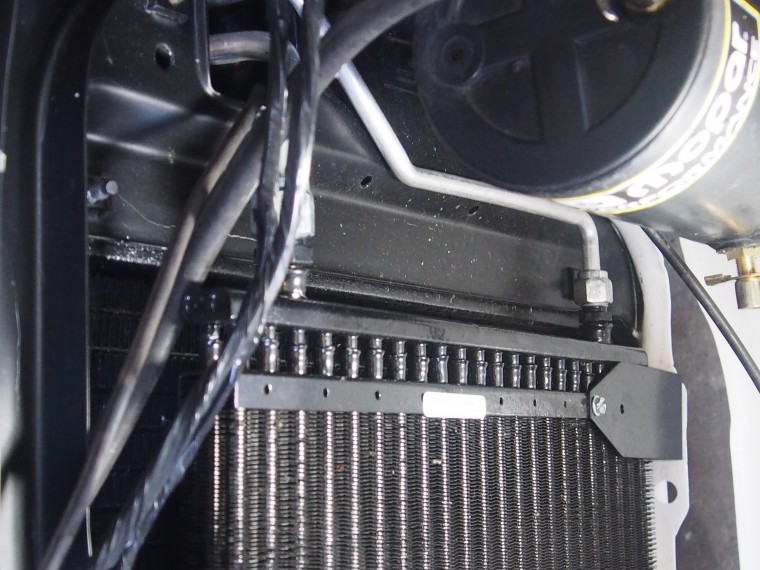
Some more up close photos of the Classic Auto Air system installed in a B-engined '71 B-body.

Title: Re: '71 Hits the Paint Booth
Post by: Dino on July 14, 2016, 01:52:36 PM
Post by: Dino on July 14, 2016, 01:52:36 PM
Wow this all turned out really nice! Getting the A/C working again in my car was one of the best repairs. So nice to have ice cold air on the hot days. :2thumbs:
Title: Re: '71 Hits the Paint Booth
Post by: 71charger_fan on July 14, 2016, 09:21:45 PM
Post by: 71charger_fan on July 14, 2016, 09:21:45 PM
I've had the car for 30 years. Although it's an original A/C car, until this week, I've never had working A/C.
Title: Re: '71 Hits the Paint Booth
Post by: 71charger_fan on December 22, 2017, 03:06:44 PM
Post by: 71charger_fan on December 22, 2017, 03:06:44 PM
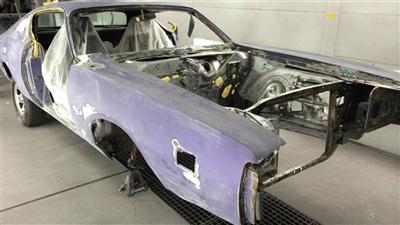
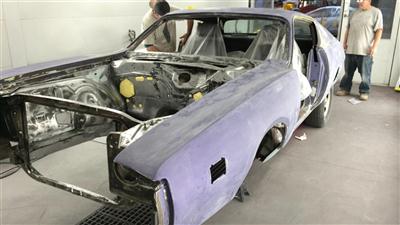
Once I got the car out in the sun and really got a chance to look at it closely, I realized the paint job wasn't of the quality I paid for. I even got it back with a chip in the quarter panel. I had decided to just live with it. However, my wife told me if I'm really that unhappy with it, I should find the right paint shop and get it done again. So, after a couple of years of looking, I've got the right guy this time. So, I've started stripping it down for another go. Not positive what the new color will be, but I want to erase as much as possible the memories of getting screwed on the current paint so there will definitely be a color change. The paint shop won't be ready for it until probably mid-February, but might as well get started. Why pay them to do simple disassembly?


Title: Re: '71 Hits the Paint Booth
Post by: NHCharger on December 24, 2017, 08:40:57 PM
Post by: NHCharger on December 24, 2017, 08:40:57 PM
Terry. Sorry to hear about that. Did they try any additional wet sanding and buffing? Or were the problems worse than that?
Title: Re: '71 Hits the Paint Booth
Post by: 71charger_fan on December 25, 2017, 08:35:33 PM
Post by: 71charger_fan on December 25, 2017, 08:35:33 PM
More wet sanding and buffing would likely fix a couple of the runs, but the uneven pearl on the major color and the blotchy metallic on the stripe are just half-assed and unfixable except through a repaint. I was just going to eat it and live with it but my wife convinced me that if I was that unhappy with it, I should just get it redone.
Title: Re: '71 Hits the Paint Booth
Post by: randy73 on December 26, 2017, 12:59:28 PM
Post by: randy73 on December 26, 2017, 12:59:28 PM
Out of curiosity where in Maryland do you live?
BTW: I would keep it white, there are so few white cars around, it just makes the car stand out in a crowd.
BTW: I would keep it white, there are so few white cars around, it just makes the car stand out in a crowd.
Title: Re: '71 Hits the Paint Booth
Post by: 71charger_fan on December 26, 2017, 04:45:25 PM
Post by: 71charger_fan on December 26, 2017, 04:45:25 PM
I'm just outside Frederick. I thought white would help make it pop, but it actually seems to make it blend into the background at car shows.
Title: Re: '71 Hits the Paint Booth
Post by: NHCharger on December 26, 2017, 08:44:36 PM
Post by: NHCharger on December 26, 2017, 08:44:36 PM
Unfortunately you are right about white cars at car shows. When I first got my 68 Charger on the road four years ago I went to several car shows with a friend who had a immaculate white 68 Charger. Looked straight out of the showroom. He never got a trophy. I won several which really irritated him since mine is a resto mod.
Title: Re: '71 Hits the Paint Booth
Post by: ACUDANUT on December 27, 2017, 07:11:25 AM
Post by: ACUDANUT on December 27, 2017, 07:11:25 AM
In the end, who cares about a worthless trophy. Be happy and enjoy your car, for tomorrow you and this car will gone forever.
Title: Re: '71 Hits the Paint Booth
Post by: NHCharger on December 27, 2017, 07:38:14 AM
Post by: NHCharger on December 27, 2017, 07:38:14 AM
Quote from: ACUDANUT on December 27, 2017, 07:11:25 AM
In the end, who cares about a worthless trophy. Be happy and enjoy your car, for tomorrow you and this car will gone forever.
That's true. I actually intend to give all the ones I have collected over the years to the Boy Scouts. My friend Jim was a trophy whore so I always got a good laugh when he would complain the voting was rigged.
Title: Re: '71 Hits the Paint Booth
Post by: 71charger_fan on December 27, 2017, 09:20:40 AM
Post by: 71charger_fan on December 27, 2017, 09:20:40 AM
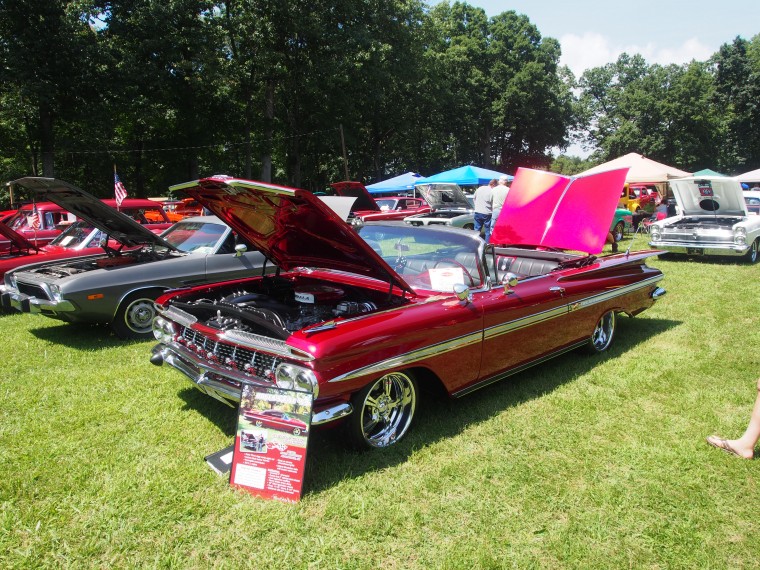
In the end, I'm just very unhappy with the quality of the paint work I received. Especially after they billed me significantly more than the estimate. I want another color change to try and forget as best I can how badly I was screwed. At a local show, I saw a '59 Chevy convertible with gorgeous paint. I estimated he had to have at least $50k in paint work. He told me it was $18k, so I got the painter's card. I've since seen a few other cars this guy's painted and they're all that good. Plus, he said I can come to his shop and help out to cut down on billable labor hours. He didn't give me an estimate in dollars, he just told me it would cost me between 200 and 300 hours. So, the more disassembly I do, the less I pay him to do. At this point, it's a matter of waiting for him to have space to take the car in and settling on a new color.
Title: Re: '71 Hits the Paint Booth
Post by: ACUDANUT on December 27, 2017, 11:11:02 AM
Post by: ACUDANUT on December 27, 2017, 11:11:02 AM
Paint and body work cost Big Bucks these days. Hell, a 1k car can cost you 12K and yet people just don't get it.
Title: Re: '71 Hits the Paint Booth
Post by: NHCharger on December 27, 2017, 12:56:03 PM
Post by: NHCharger on December 27, 2017, 12:56:03 PM
The bodyshop guy that did my 72 Charger was a professional drunk, so you can imagine how that one turned out. The guy that painted my 71 did an awesome job. That car is now in Ohio and the owner said he's always getting asked who painted the car. On my 71 I did the same thing you are doing to save a ton of money. Over the years I have got more and more into doing my own work to the point where I do all the bodywork including the paint.
Picking a color for the 68 and wheel selection was the two toughest decisions to make.
Picking a color for the 68 and wheel selection was the two toughest decisions to make.
Title: Re: '71 Hits the Paint Booth
Post by: 71charger_fan on December 27, 2017, 03:49:12 PM
Post by: 71charger_fan on December 27, 2017, 03:49:12 PM
Right now, I'm waiting for this blast of arctic temperatures to pass. Too cold to be out in that unheated garage. At this point, probably all that's remaining that I'll do will be pulling the front valance and bumper/grills, the antenna, and weatherstripping. I'm debating with myself as to whether or not to buy a new forward light harness. Mine's in pretty good shape but with everything else I'm going to be putting into this car (again), I'm thinking I might as well replace that and possibly the engine harness too.
Title: Re: '71 Hits the Paint Booth
Post by: NHCharger on December 27, 2017, 07:43:41 PM
Post by: NHCharger on December 27, 2017, 07:43:41 PM
I replaced all the harnesses except the dash harness in my 68 and all of them in my current moneypit. I waited for Y.O. to have a 30% off sale with free shipping. The nice thing about the Y.O. harnesses is that they are an exact duplicate of the factory harness.
Title: Re: '71 Hits the Paint Booth
Post by: 71charger_fan on December 27, 2017, 09:04:59 PM
Post by: 71charger_fan on December 27, 2017, 09:04:59 PM
Last time I ordered a harness from Year One, it was backordered for so long, the car was done and back on the road for months before it finally arrived. I'd probably just go straight to Evans.
Title: Re: '71 Hits the Paint Booth
Post by: randy73 on December 28, 2017, 11:55:51 AM
Post by: randy73 on December 28, 2017, 11:55:51 AM
M&H make all mopar harnesses, you can go on there website to search and then order from year one. There tech support is great.
Good luck!
Good luck!
Title: Re: '71 Hits the Paint Booth
Post by: 71charger_fan on December 29, 2017, 09:30:18 PM
Post by: 71charger_fan on December 29, 2017, 09:30:18 PM
I got a 30% off coupon code in the mail today. I'll probably go ahead and order a forward lamp harness and an engine harness.
Title: Re: '71 Hits the Paint Booth
Post by: ACUDANUT on December 30, 2017, 09:43:37 AM
Post by: ACUDANUT on December 30, 2017, 09:43:37 AM
Really, what's the code ?? :cheers:
Title: Re: '71 Hits the Paint Booth
Post by: 71charger_fan on December 30, 2017, 10:10:38 AM
Post by: 71charger_fan on December 30, 2017, 10:10:38 AM
Save 30%* until midnight Monday
Use Code: NY18
Use Code: NY18
Title: Re: '71 Hits the Paint Booth
Post by: ACUDANUT on December 30, 2017, 10:14:19 AM
Post by: ACUDANUT on December 30, 2017, 10:14:19 AM
Dang, I hate it when there is only a small window for these codes. :brickwall:
Title: Re: '71 Hits the Paint Booth
Post by: 71charger_fan on December 30, 2017, 04:49:13 PM
Post by: 71charger_fan on December 30, 2017, 04:49:13 PM
I saw a code for "up to 35% off" at Classic Industries. So, I put the harnesses I needed in my carts at both Year One and Classic Industries. YO was over $100 cheaper as they were a straight 30% off. The discount that was applied to my Classic Industries cart worked out to 5.9%. So, I have new harnesses on order from Year One. I was going to get a new package tray. With the discount, it was about $21. However, it added $18 to the shipping. I can make my own if I decide I really need one.
Title: Re: '71 Hits the Paint Booth
Post by: 71charger_fan on January 10, 2018, 08:45:18 PM
Post by: 71charger_fan on January 10, 2018, 08:45:18 PM
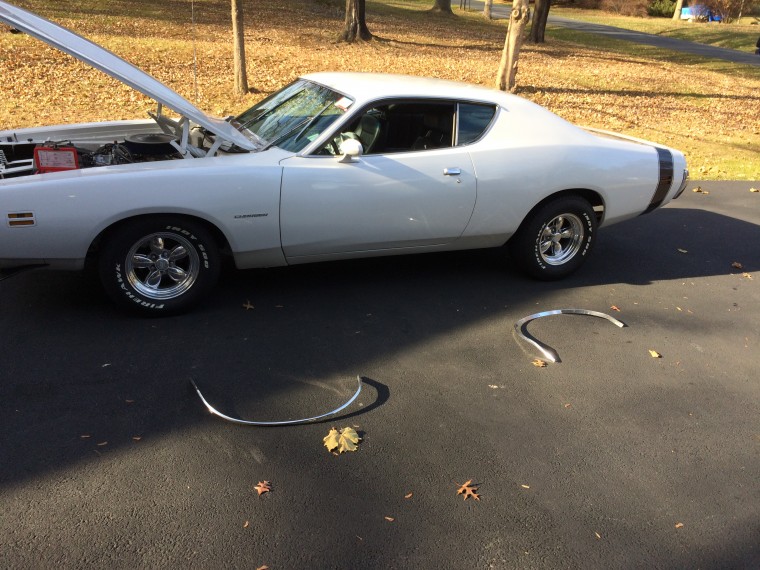
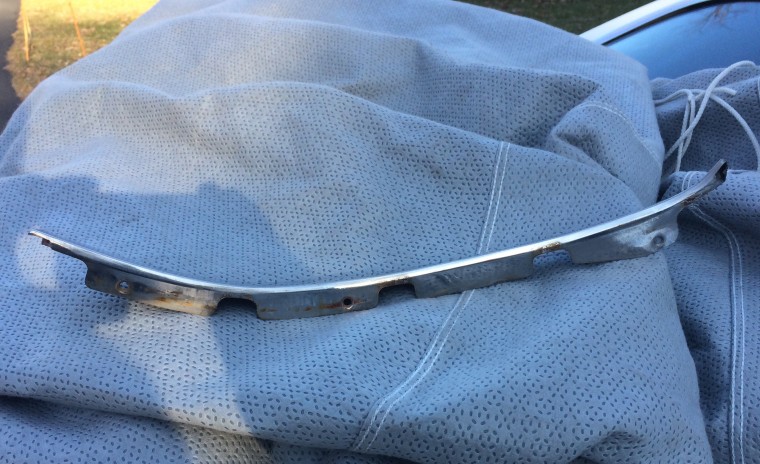
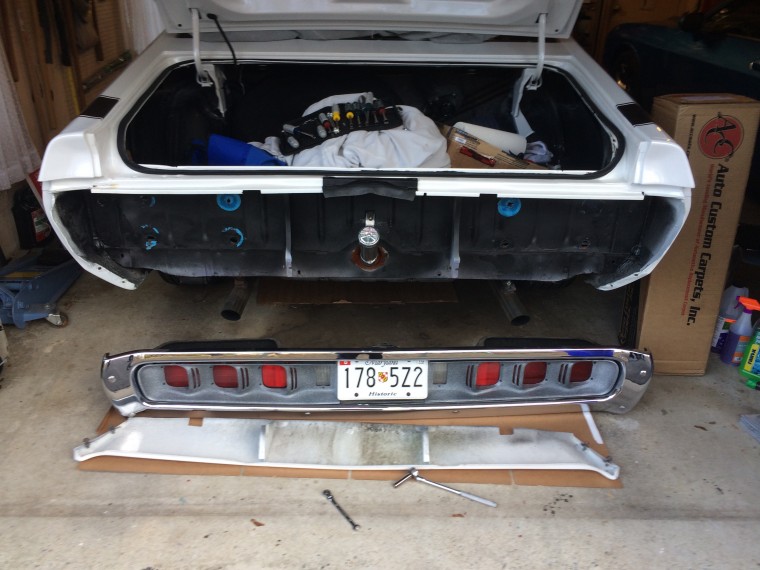
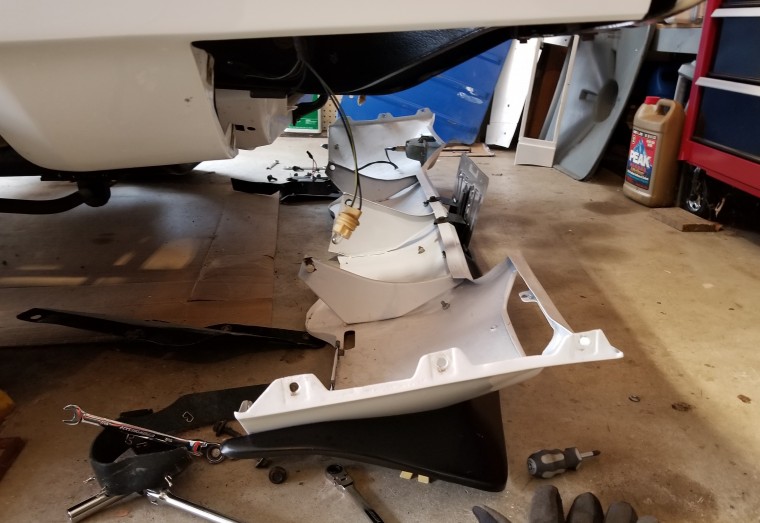
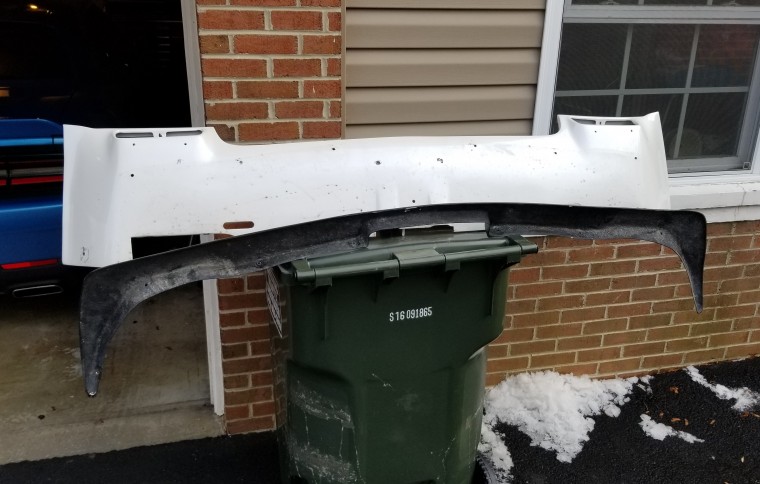
Today, I took advantage of the warmer weather finally moving in and got back out in the garage. I pulled and disassembled the front valance.
Title: Re: '71 Hits the Paint Booth
Post by: randy73 on January 11, 2018, 10:21:37 AM
Post by: randy73 on January 11, 2018, 10:21:37 AM
where did you get the chin spoiler?
Title: Re: '71 Hits the Paint Booth
Post by: 71charger_fan on January 11, 2018, 12:27:55 PM
Post by: 71charger_fan on January 11, 2018, 12:27:55 PM
It's a fiberglass repro I've had for over 20 years. I probably bought it from Year One, but am not certain anymore.
Title: Re: '71 Hits the Paint Booth
Post by: 71charger_fan on January 11, 2018, 03:35:48 PM
Post by: 71charger_fan on January 11, 2018, 03:35:48 PM
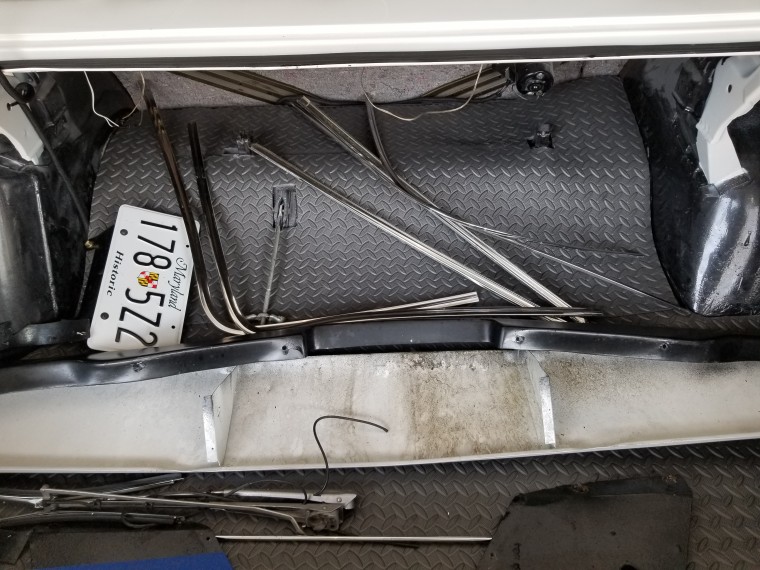
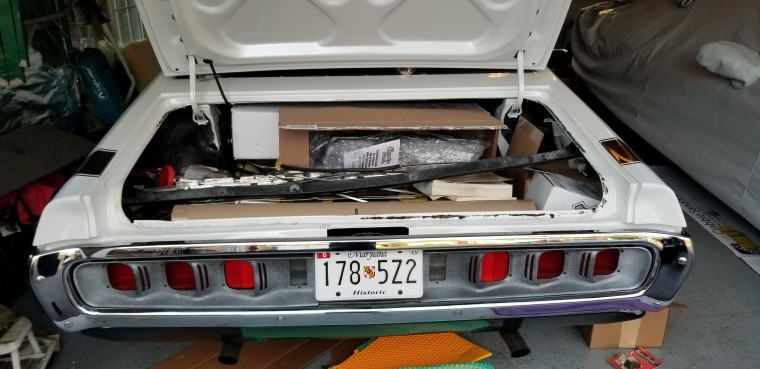
Today, I pulled the antenna, cleaned out the trunk, and organized the parts that have come off.
Title: Re: '71 Hits the Paint Booth
Post by: aifilaw on January 12, 2018, 12:21:22 PM
Post by: aifilaw on January 12, 2018, 12:21:22 PM
Looks sharp, love that year
Title: Re: '71 Hits the Paint Booth
Post by: randy73 on January 12, 2018, 04:04:33 PM
Post by: randy73 on January 12, 2018, 04:04:33 PM
Does look good. :yesnod:
Title: Re: '71 Hits the Paint Booth
Post by: Simonic on January 13, 2018, 03:02:11 AM
Post by: Simonic on January 13, 2018, 03:02:11 AM
Quote from: 71charger_fan on January 11, 2018, 12:27:55 PMI bought a pair of spoilers for my 71 last year.... Ordered them thru YearOne. They arrived in boxes from 'Dales Cuda Shop' :Twocents:
It's a fiberglass repro I've had for over 20 years. I probably bought it from Year One, but am not certain anymore.
Title: Re: '71 Hits the Paint Booth
Post by: 71charger_fan on January 15, 2018, 02:36:52 PM
Post by: 71charger_fan on January 15, 2018, 02:36:52 PM
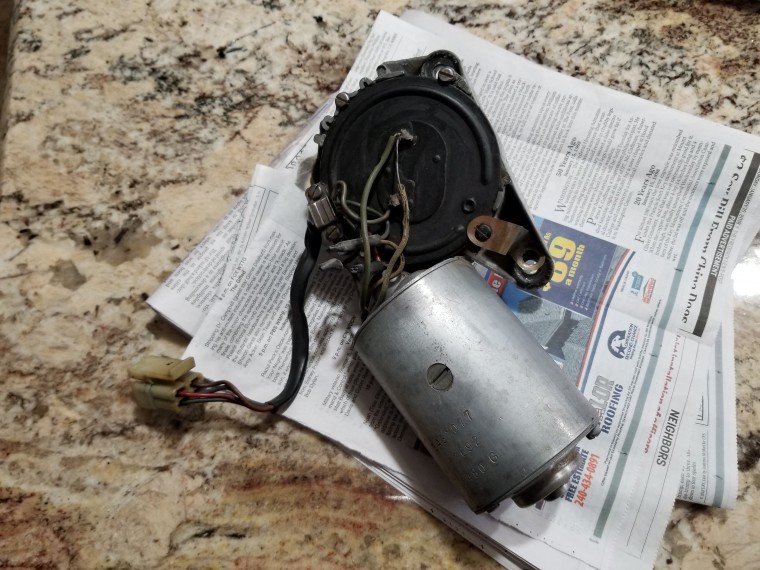
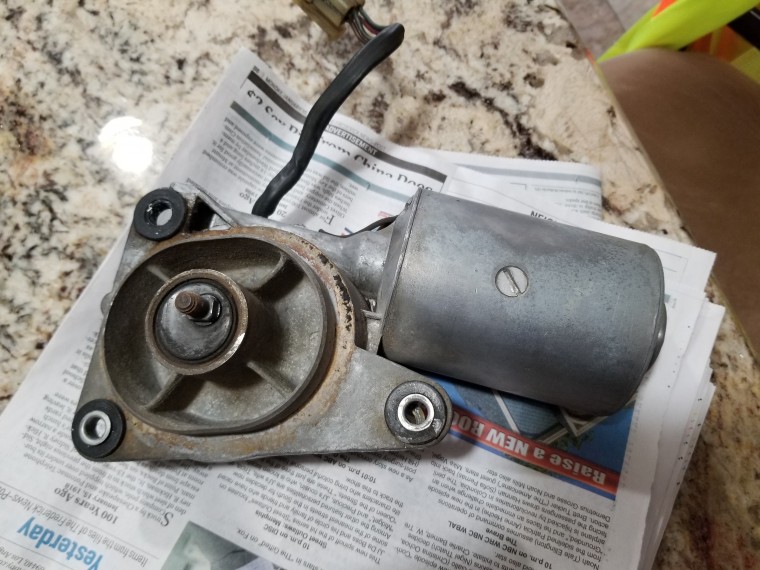
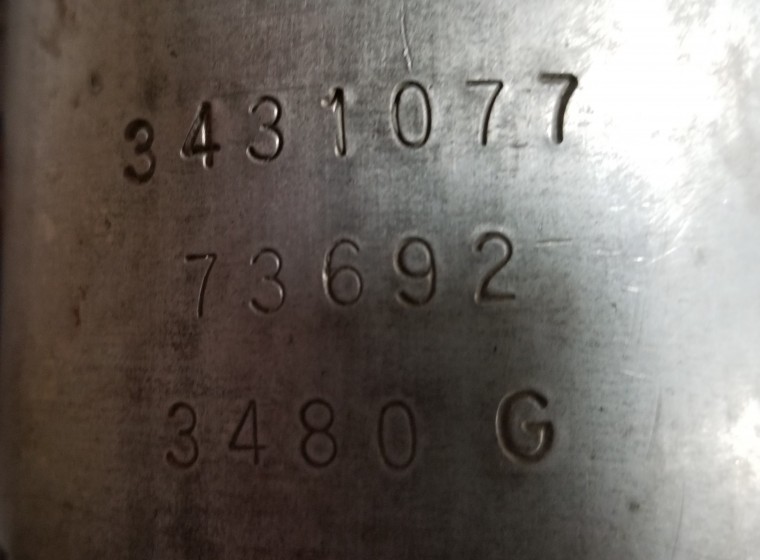
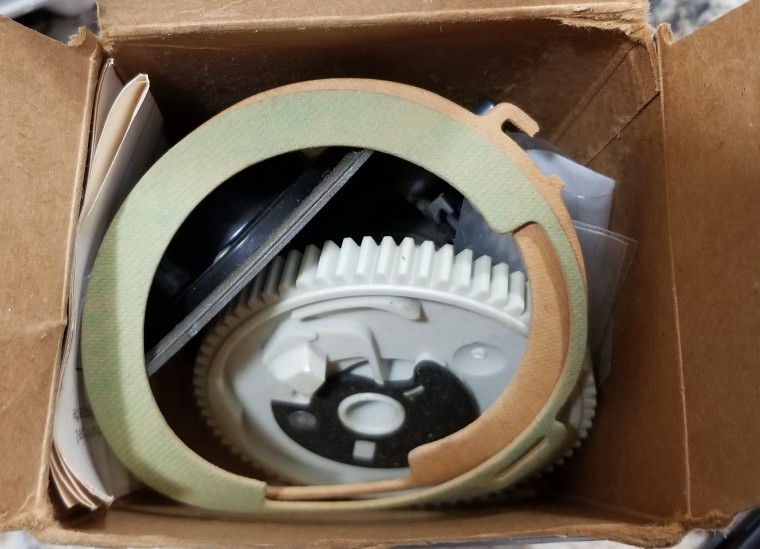
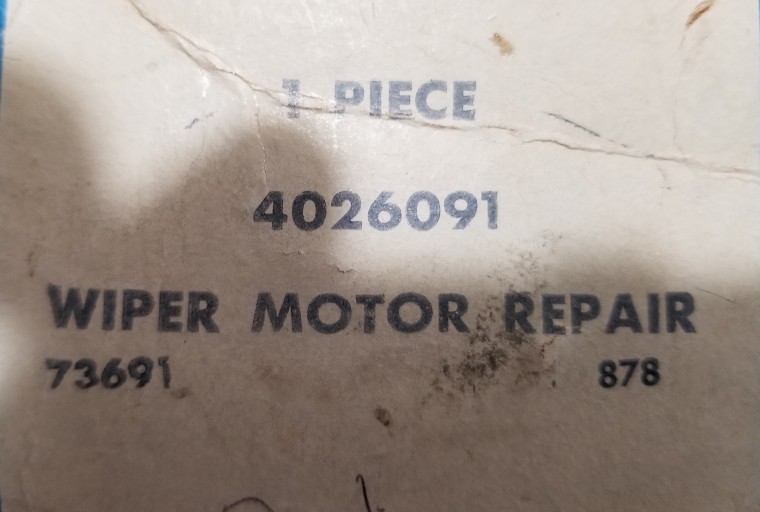
I packed up the wiper motor to send it out for restoration. Of course, I drove all the way to the Post Office before I realized it's a holiday.
Title: Re: '71 Hits the Paint Booth
Post by: Midnight_Rider on January 22, 2018, 04:06:42 PM
Post by: Midnight_Rider on January 22, 2018, 04:06:42 PM
Have you decided on a color yet? I thought the white/black combo looked clean & sharp but I understand wanting to get the bad taste out.
What was the original factory color?
What was the original factory color?
Title: Re: '71 Hits the Paint Booth
Post by: 71charger_fan on January 26, 2018, 09:04:19 PM
Post by: 71charger_fan on January 26, 2018, 09:04:19 PM
Still not settled on a color. My paint guy tells me he has just what I'm looking for after telling him of some of the other purples I like. He sells auto paint for a living, so I'm anxious to see what he's thinking.
I removed the door and trunk weather stripping and have about run out of things I can strip off before it goes to the shop.
The stainless at the bottom of the windshield was deeply scratched. I sanded it with 400, 600, 800, 1000, 1200, 1600, then polished it with a rag and Flitz. I only went to 1600 as I didn't have anything finer on hand. It'll be mostly hidden at the back of hood, so 1600 will be good enough and it looks lots better than it did.
Title: Re: '71 Hits the Paint Booth
Post by: 71charger_fan on January 31, 2018, 08:58:59 AM
Post by: 71charger_fan on January 31, 2018, 08:58:59 AM
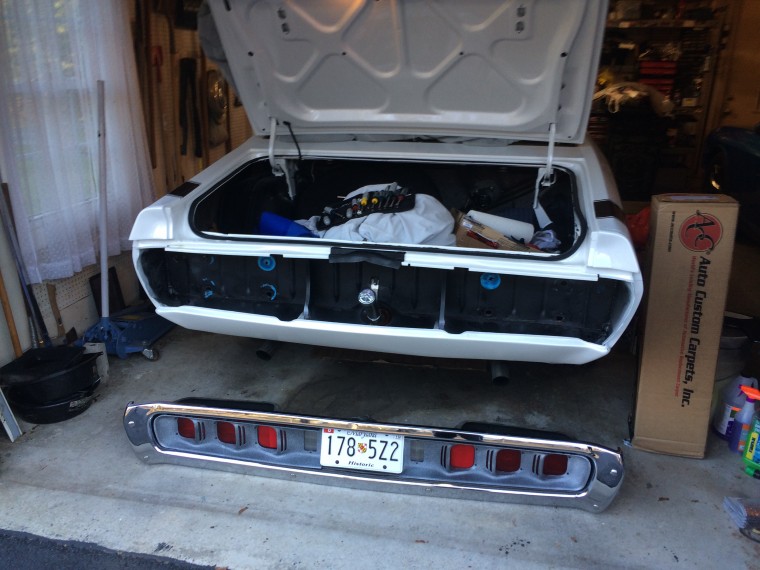
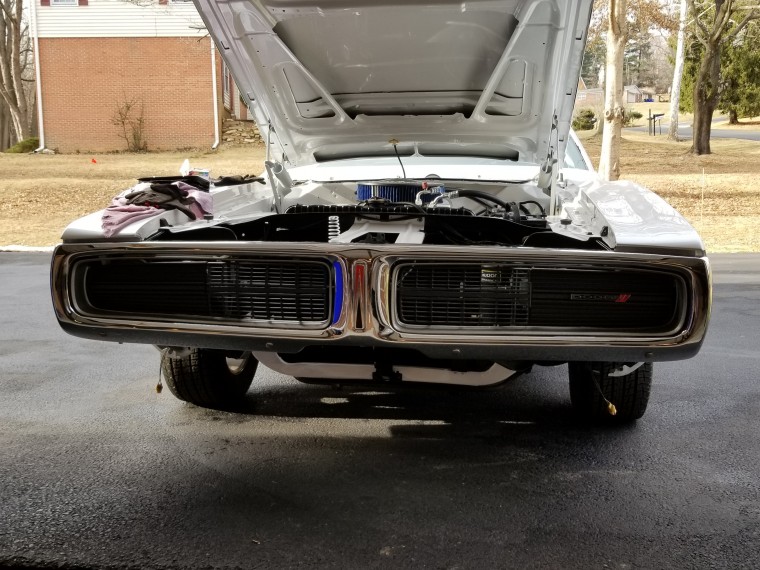
Temperatures have dropped again, cooling my interest in being out in the garage, but I did pull the front bumper.

Title: Re: '71 Hits the Paint Booth
Post by: randy73 on January 31, 2018, 04:55:35 PM
Post by: randy73 on January 31, 2018, 04:55:35 PM
Sweet, wish that is all I have to do to get mine painted.
Good job and good luck, can't wait to see what color you go with.
Good job and good luck, can't wait to see what color you go with.
Title: Re: '71 Hits the Paint Booth
Post by: 71charger_fan on February 02, 2018, 09:35:00 AM
Post by: 71charger_fan on February 02, 2018, 09:35:00 AM
I too can't wait to see what color I go with. I really want to get a look at a 2015 Lincoln MKC in Tahitian Pearl. I periodically check cars.com, but the closest one to me I've found for sale was 75 miles away. I spoke with the local Lincoln dealer and they not only never sold one, they said they hadn't even heard of the color. I was hoping if one had been sold locally, they could put me in touch with the owner.
Title: Re: '71 Hits the Paint Booth
Post by: randy73 on February 02, 2018, 02:14:40 PM
Post by: randy73 on February 02, 2018, 02:14:40 PM
dealers usually have a color chart, it is not exact as it is on paper and your painting metal, but should be pretty close.
Title: Re: '71 Hits the Paint Booth
Post by: JB400 on February 02, 2018, 08:50:22 PM
Post by: JB400 on February 02, 2018, 08:50:22 PM
Nice shade of purple if you go with it.
Title: Re: '71 Hits the Paint Booth
Post by: 71charger_fan on February 03, 2018, 01:29:27 PM
Post by: 71charger_fan on February 03, 2018, 01:29:27 PM
I've found that you have to see the color in person. I saw a Nissan color that looked great online on their configurator; they were putting on Jukes and Maximas. After searching inventories, I found one vehicle painted in that color at the Nissan dealer in Hagerstown. I drove up there, found the car, and, although it looked like a beautiful purple online, it looked brown in person.
Title: Re: '71 Hits the Paint Booth
Post by: 71charger_fan on February 13, 2018, 09:18:35 AM
Post by: 71charger_fan on February 13, 2018, 09:18:35 AM
Yesterday, I fitted new hood pins. As the escutcheon plates are smaller in diameter than the old ones, they needed new holes drilled. Best to get that taken care of before it goes to paint.


Title: Re: '71 Hits the Paint Booth
Post by: 71charger_fan on February 14, 2018, 03:45:06 PM
Post by: 71charger_fan on February 14, 2018, 03:45:06 PM
I think I've stripped it as far as I'm going to.


Title: Re: '71 Hits the Paint Booth
Post by: 71charger_fan on February 16, 2018, 09:48:34 AM
Post by: 71charger_fan on February 16, 2018, 09:48:34 AM
I went ahead and pulled the carpets as I've found they hold unbelievable amounts of body shop dust. I did find the reason my shifter indicator light hasn't worked.

Title: Re: '71 Hits the Paint Booth
Post by: 71charger_fan on March 20, 2018, 09:26:38 AM
Post by: 71charger_fan on March 20, 2018, 09:26:38 AM
Well, crap. My painter flaked on me. After stringing me along all fall and winter, he passed me off to a shop in Chambersburg, PA. Seems like a top-notch shop, but it's almost an hour away. So, I headed over to a local body shop that's worked on the Charger before and has done some work on my '55 Plymouth. They're going to paint it, but they're not sure exactly when they can start. So, looks like a large part of the 2018 season is lost to an unreliable painter who continued to make assurances right up to the point he abandoned the job. Since he gets most of his work by word of mouth, this can't be good for him in the long run as I'm surely going to tell anyone who will listen about how this went down. The part that really pisses me off is that he had me strip it to get a head start. I'm not putting it back together until it's painted.
Title: Re: '71 Hits the Paint Booth
Post by: Bad B-rad on March 20, 2018, 12:43:14 PM
Post by: Bad B-rad on March 20, 2018, 12:43:14 PM
OH man that SUCKS!!!!
What a bunch of $h!T, WHY did he flake?
If he got sick, or family issues I can understand, but to back out just because, that is not cool!!!
And AFTER you stripped it down, and strung you along, yeah your right this can not be good for his word of mouth bizz!!
I have had SO MANY people flake on me like that, I KNOW EXCATLY where you are coming from, I feel your pain!!!
Title: Re: '71 Hits the Paint Booth
Post by: 71charger_fan on March 20, 2018, 03:58:26 PM
Post by: 71charger_fan on March 20, 2018, 03:58:26 PM
If I hadn't stripped it down, I would just use it as is for another season and get it painted next winter. He has a shop at his house and he had another shop in another town. The deal was that he would paint it at his home shop over the winter and I could come and put in sweat equity to hold down the bill. For whatever real reason(s), he lost his other shop. However, he didn't lose his other shop until he should have been done with my car. I'm just at the point where I don't believe anything he tells me, so I have no plans to interact with him again. By Christmas, i was getting a bad feeling about the whole thing and wanted to switch up and take it to the shop where it's going to wind up. However, I kept being told you just have to be patient with this guy and it'll be worth it. BS. I think he knew months ago he wouldn't get to my car. Why he waited so long to admit it, I don't know. He even stopped by the house a week and a half ago to check out the car to make sure we were on the same page as to what was going to happen to it. Fortunately, he doesn't have any of my money.
Title: Re: '71 Hits the Paint Booth
Post by: Midnight_Rider on March 20, 2018, 06:34:47 PM
Post by: Midnight_Rider on March 20, 2018, 06:34:47 PM
Sorry about your luck. On my last car, I had to go to a 2nd, and then a 3rd paint shop to get it done right. :RantExplode:
Title: Re: '71 Hits the Paint Booth
Post by: Bad B-rad on March 21, 2018, 05:00:56 AM
Post by: Bad B-rad on March 21, 2018, 05:00:56 AM
THAT SUCKS, but your right at least he doesn't have your money!!
My father and I had a 66 Charger, we paid the body guy a good down payment to do our car(only needed a lower 1/4 patch and a full paint job)
anyway long story short, I had to STEAL MY CAR from his yard!!!!
Yep, a screw driver and a jumper wire, and I busted my car out of body shop jail, and drove it to my grand parents house.
The State troopers called me to file chargers on the guy, and told me I was very lucky, I took my car back when i did, because a lot of cars that were there left that next morning, and DO NOT EXSIST any more!!!!!
Why are so many good body guys so "hard to work with"?
Title: Re: '71 Hits the Paint Booth
Post by: 71charger_fan on January 24, 2019, 12:23:48 PM
Post by: 71charger_fan on January 24, 2019, 12:23:48 PM
I've finally found a shop with which I feel comfortable entrusting the Charger. I'm throwing the job to Doug Carbaugh's Auto Restoration near Waynesboro, PA. The downside is the Charger is about 7th in the shop's queue, so, at this point, I don't know when it'll actually go in. It was much harder than I imagined it would be to find a shop to do this type of work. Every shop around here only seems to want to do insurance work.
Title: Re: '71 Hits the Paint Booth
Post by: hemi-hampton on January 24, 2019, 01:49:49 PM
Post by: hemi-hampton on January 24, 2019, 01:49:49 PM
Bummer you gotta get it repainted. Tri stage paints like Pearl & Candy (real candy, not these new candy's) can be much more difficult to spray then 2 stage base clear or single stage with no clear. Takes experience. maybe your past painter did not have a lot of experiance painting tri stages? Plus they are always more expensive. I'd advise anybody to avoid these types of paints. LEON.
Title: Re: '71 Hits the Paint Booth
Post by: 71charger_fan on January 28, 2019, 08:53:56 AM
Post by: 71charger_fan on January 28, 2019, 08:53:56 AM
Making the tour of other shops and talking to other body shop operators and painters, I've been told that the shop that applied the tri-coat had severe personnel turnover issues and that they sometimes had top-notch painters, but they rarely stayed for long. Obviously, they didn't have an A-team painter when mine went through the booth.
Title: Re: '71 Hits the Paint Booth
Post by: hemi-hampton on January 28, 2019, 10:42:29 PM
Post by: hemi-hampton on January 28, 2019, 10:42:29 PM
Quote from: 71charger_fan on January 28, 2019, 08:53:56 AM
Making the tour of other shops and talking to other body shop operators and painters, I've been told that the shop that applied the tri-coat had severe personnel turnover issues and that they sometimes had top-notch painters, but they rarely stayed for long. Obviously, they didn't have an A-team painter when mine went through the booth.
I've worked in many body shops like that. Not uncommon unfortunately. LEON.
Title: Re: '71 Hits the Paint Booth
Post by: 71charger_fan on June 05, 2019, 07:50:04 PM
Post by: 71charger_fan on June 05, 2019, 07:50:04 PM
So, I may still be a couple of months from getting the Charger into the shop. So, I decided to rip into the dash and figure out what was going on with my A/C-heater vacuum system. When I did finally get in there and trace things out using the FSM, I found the shop that I'd paid to work on the car had made a mess of it. Dodge made it modular and pretty much idiot proof. No need to remove individual vacuum lines. Alas, nothing is idiot proof. There should have been one hose pulling engine vacuum. They had hooked two lines to engine vacuum and left two vacuum ports open to the atmosphere. Explains why it never seemed to idle correctly after I got it back. Luckily, I had a complete heater-A/C box assembly from a parts car with its vacuum harness intact to use as a guide since there were two hoses marked with white stripes and two with red stripes.

Title: Re: '71 Hits the Paint Booth
Post by: 71charger_fan on August 31, 2019, 07:33:16 PM
Post by: 71charger_fan on August 31, 2019, 07:33:16 PM
I test fit my AMD dual exhaust rear valance. I'm very happy with it. Only one bolt hole didn't line up and that is where the quarter panel got hit about 30 years ago so I assume it's the car and not the quality of the part. Of course the tailpipes are going to have to be modified.


Title: Re: '71 Hits the Paint Booth
Post by: ACUDANUT on August 31, 2019, 08:45:48 PM
Post by: ACUDANUT on August 31, 2019, 08:45:48 PM
VERY Nice 3rd Gen. Love it. :cheers: Unless your going to use the factory exhaust tips, I would have opted for the straight rear valance without exhaust cut outs. :Twocents:
Title: Re: '71 Hits the Paint Booth
Post by: 71charger_fan on August 31, 2019, 09:30:14 PM
Post by: 71charger_fan on August 31, 2019, 09:30:14 PM
The box in the trunk holds a pair of Pypes repro tips.
Title: Re: '71 Hits the Paint Booth
Post by: 71charger_fan on October 23, 2019, 11:21:45 AM
Post by: 71charger_fan on October 23, 2019, 11:21:45 AM
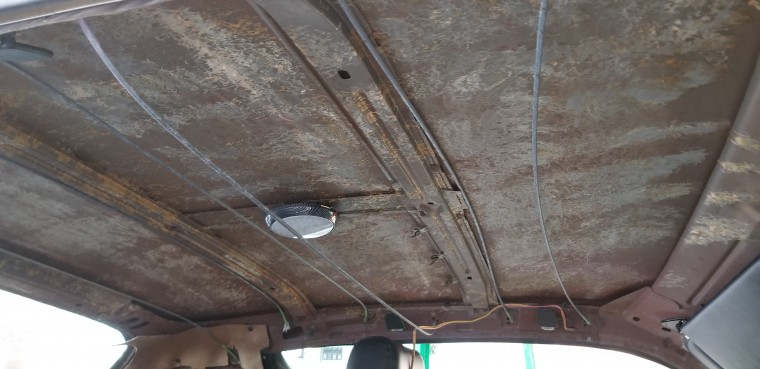
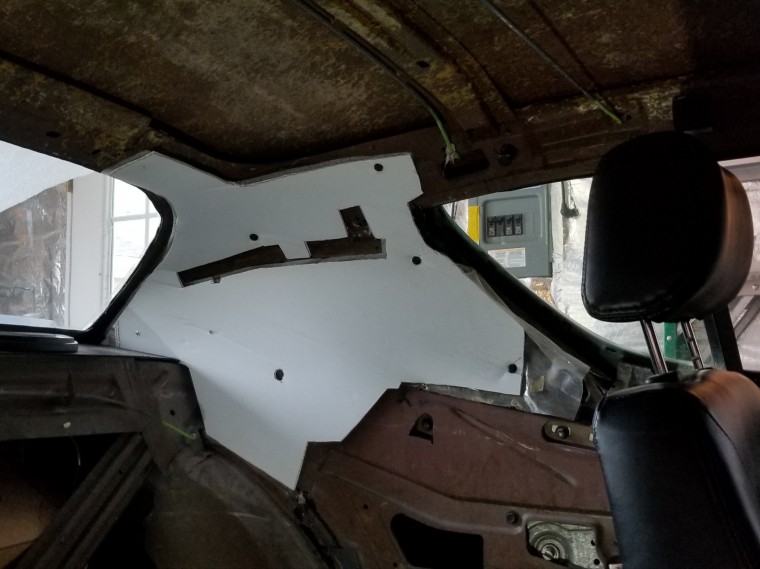
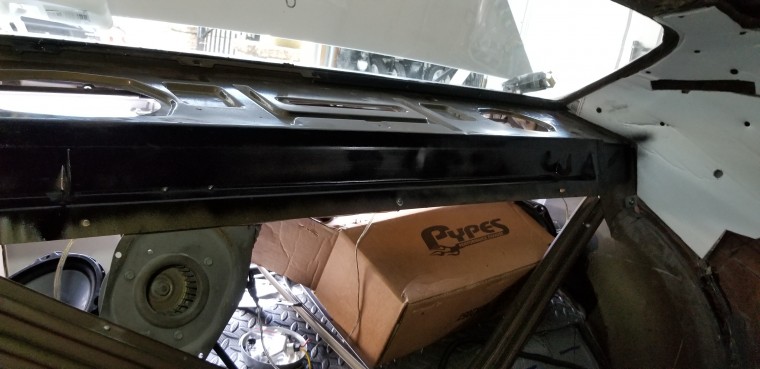
Hopefully, it'll finally be going to the shop next month. I decided, after spending a lot on a good bezel, gauge repair, and a repro radio, to go a completely different route and buy a Classic Dash panel and a set of Autometer Cobalt gauges. Yesterday, I took a good look at the headliner and decided to go ahead and change that too. I moved the RetroSound radio that I had in the dash to the glove box. I will eventually extend the wiring harnesses for the knobs and have a small panel made to attach to the bottom center of the dash to house them and a USB charging hub as well.


Title: Re: '71 Hits the Paint Booth
Post by: 71charger_fan on October 29, 2019, 07:24:32 PM
Post by: 71charger_fan on October 29, 2019, 07:24:32 PM
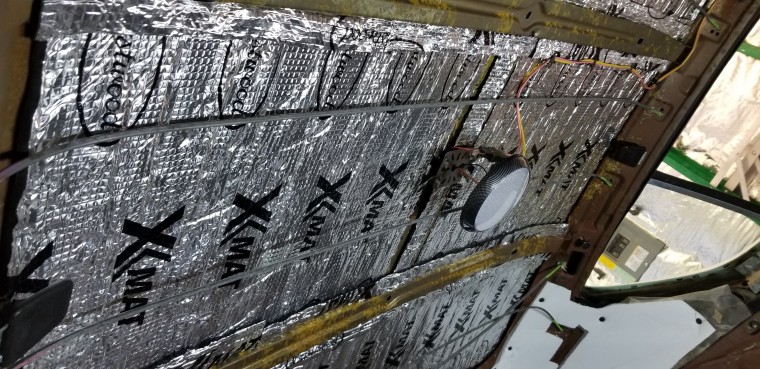
I finished removing the headliner, scraped the residue of the original insulation from the inside of the roof, and test fitted my new LED dome lamp.
Title: Re: '71 Hits the Paint Booth
Post by: 71charger_fan on November 03, 2019, 07:28:52 PM
Post by: 71charger_fan on November 03, 2019, 07:28:52 PM
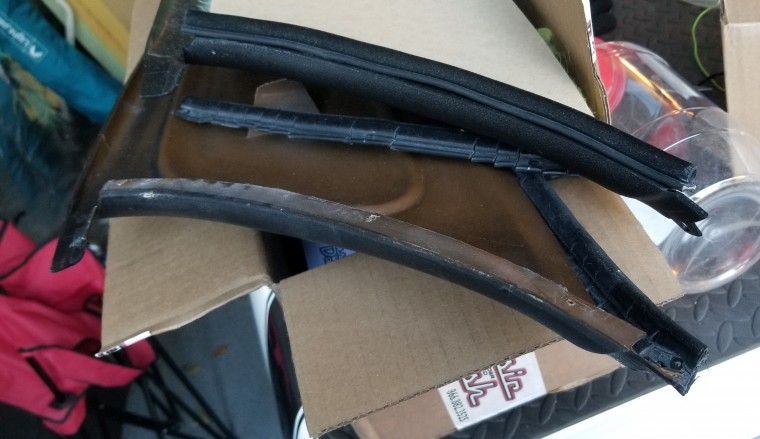
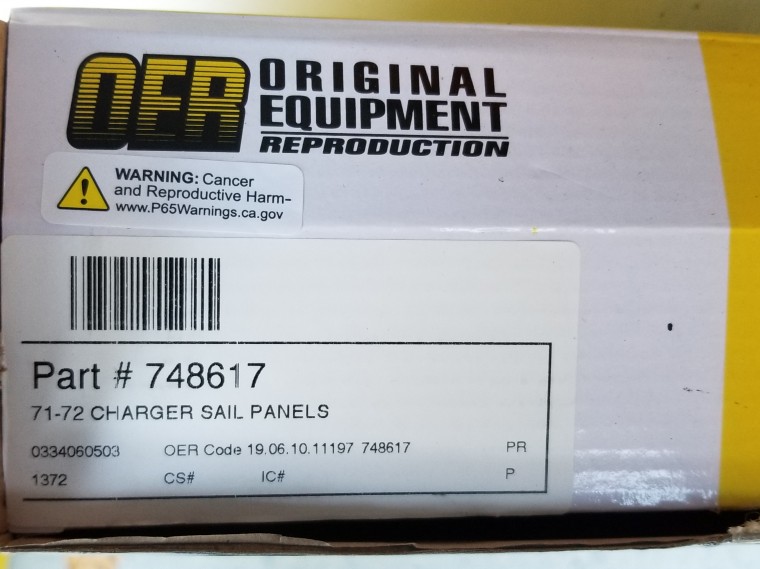
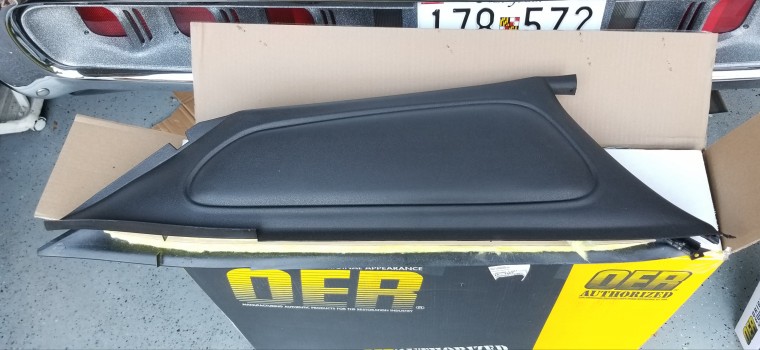
I removed my interior sail panels and installed the "cat whiskers" (or whatever they're called) on the repro ones I bought. The brown ones painted black have lived a long life and are overdue for freshening or replacement.
Title: Re: '71 Hits the Paint Booth
Post by: chapel40 on November 03, 2019, 09:34:20 PM
Post by: chapel40 on November 03, 2019, 09:34:20 PM
How do the cat whiskers attach?
Title: Re: '71 Hits the Paint Booth
Post by: 71charger_fan on November 04, 2019, 09:01:55 AM
Post by: 71charger_fan on November 04, 2019, 09:01:55 AM
The cat whiskers screw to the sail panels. I had to drill three holes in each new panel. I just did a go/no go with the drill bits on the existing holes. Not even sure what size I landed on. I lined the cat whisker up for a best fit on the new sail panel and drilled through the holes already in the cat whisker.
Title: Re: '71 Hits the Paint Booth
Post by: 71charger_fan on November 04, 2019, 01:36:24 PM
Post by: 71charger_fan on November 04, 2019, 01:36:24 PM
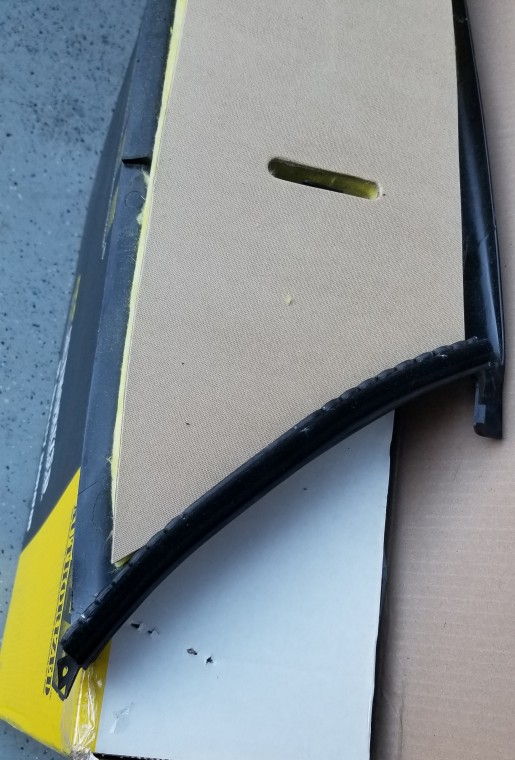
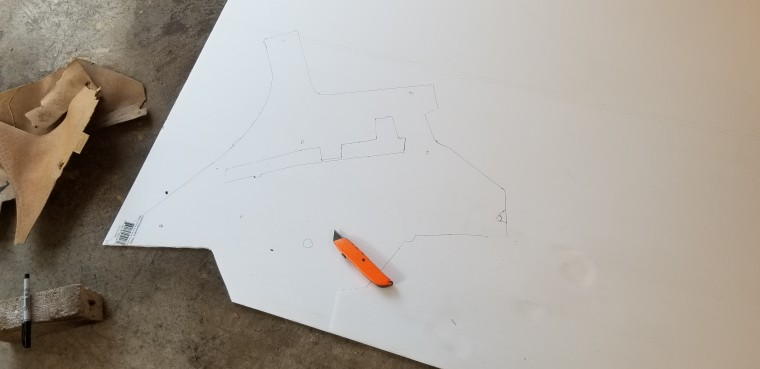
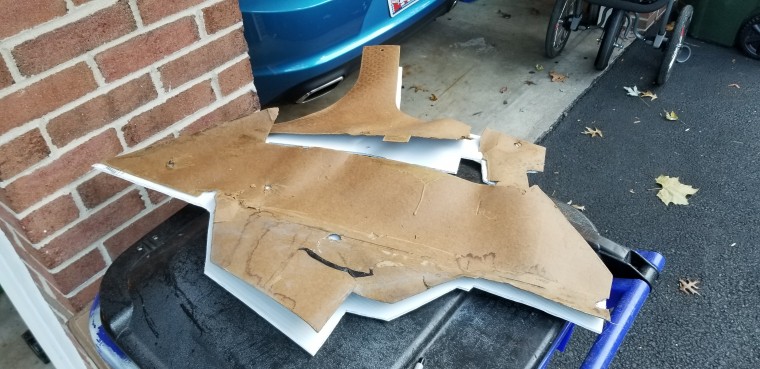
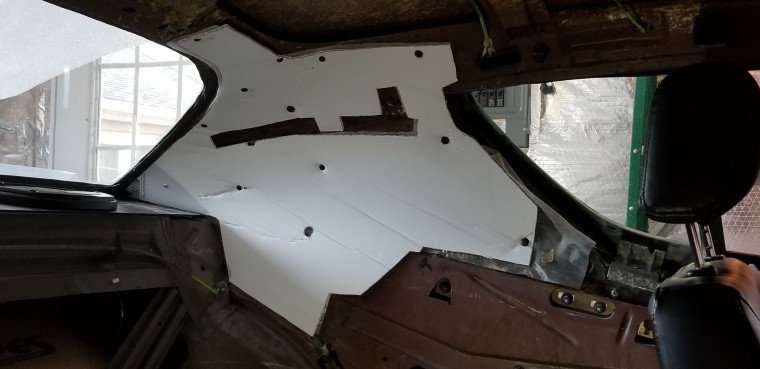
Now I need to use this mess to make a pattern. This was up behind the sail panels between the insulation and the roof. I'm thinking of using Coroplast for the new ones. Either that or I'll coat cardboard with POR-15.

Title: Re: '71 Hits the Paint Booth
Post by: 71charger_fan on November 05, 2019, 05:07:44 PM
Post by: 71charger_fan on November 05, 2019, 05:07:44 PM
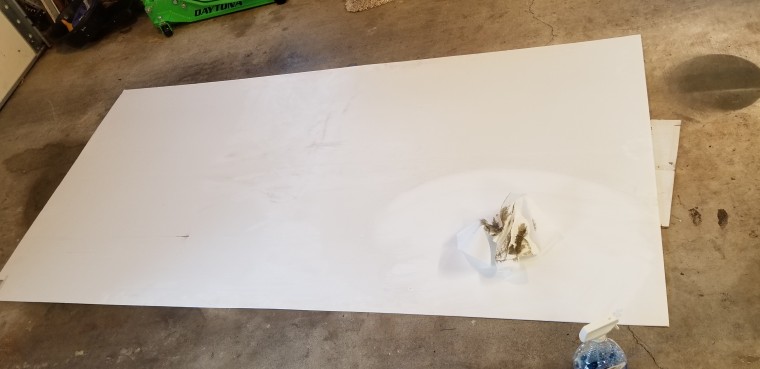
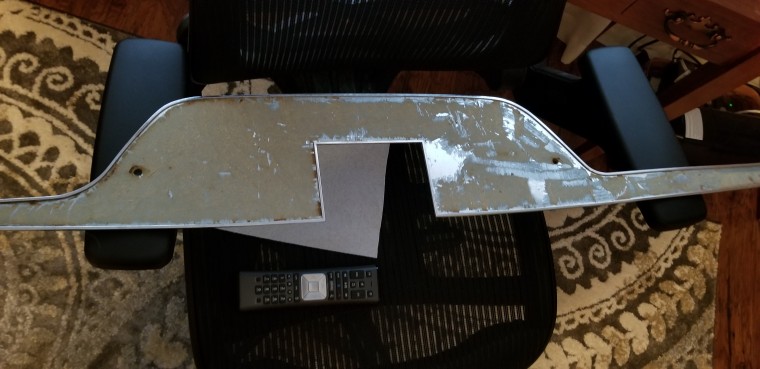
Today, I used that crumbling cardboard to pattern and cut a new piece from a sheet of Coroplast.

Title: Re: '71 Hits the Paint Booth
Post by: 71charger_fan on November 05, 2019, 05:17:37 PM
Post by: 71charger_fan on November 05, 2019, 05:17:37 PM
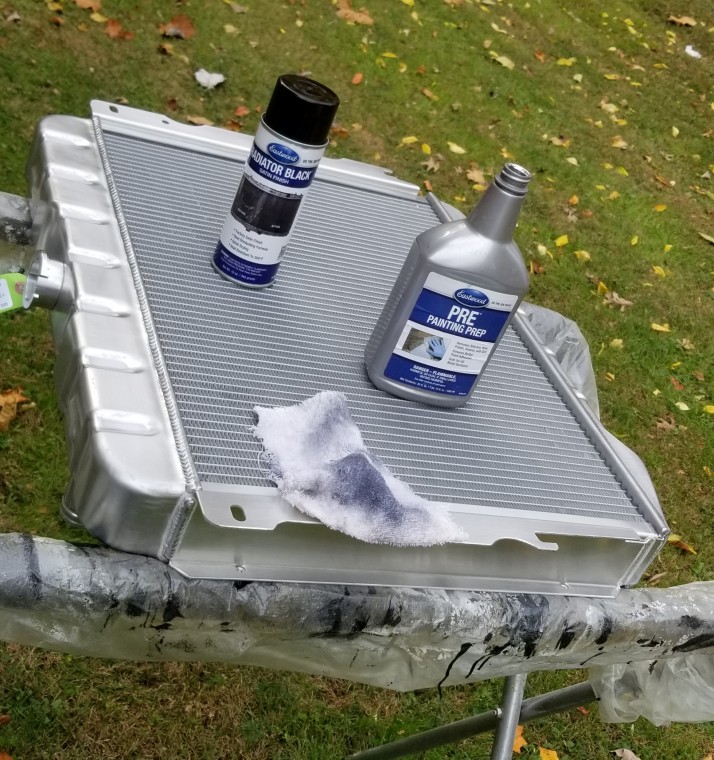
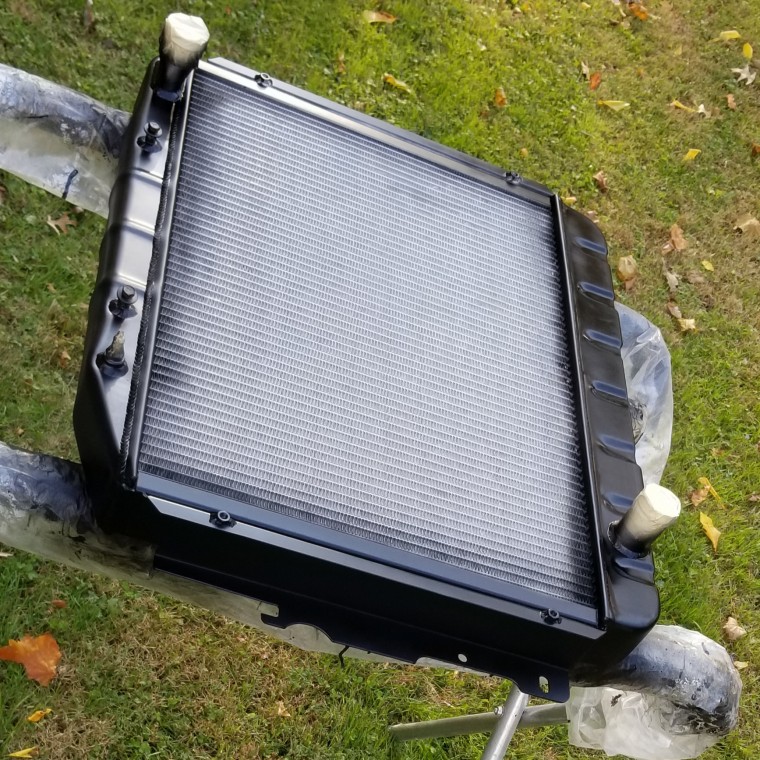
I also painted the new OER radiator.

Title: Re: '71 Hits the Paint Booth
Post by: CDN72SE on November 06, 2019, 01:13:44 PM
Post by: CDN72SE on November 06, 2019, 01:13:44 PM
Looking good. :drool5:
Title: Re: '71 Hits the Paint Booth
Post by: 71charger_fan on November 10, 2019, 04:32:42 PM
Post by: 71charger_fan on November 10, 2019, 04:32:42 PM
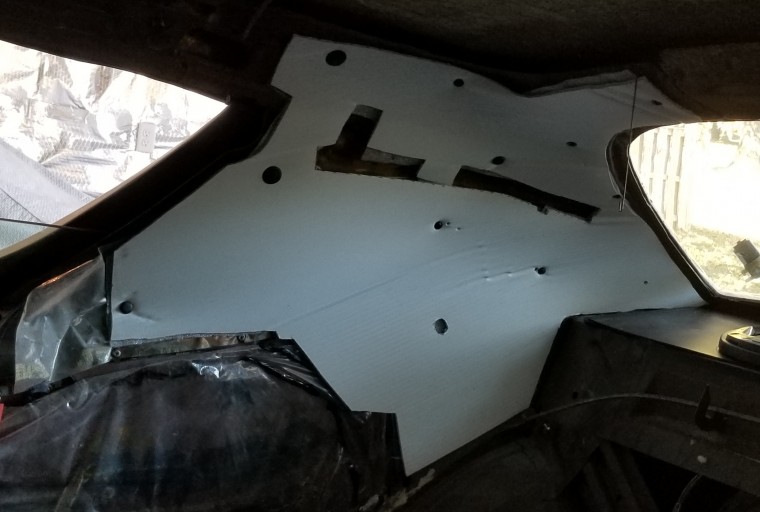
I put a thin layer of closed cell foam on the back of the pieces I made and did a trial fit. Since the plastic is corrugated, it didn't quite want to conform to the curves as the cardboard had. So, I put a few self tapping screws in to force it where I wanted it.
Title: Re: '71 Hits the Paint Booth
Post by: 71charger_fan on November 11, 2019, 01:46:09 PM
Post by: 71charger_fan on November 11, 2019, 01:46:09 PM
Today, I finished cutting and finishing the passenger side piece.
Title: Re: '71 Hits the Paint Booth
Post by: 71charger_fan on November 12, 2019, 04:32:18 PM
Post by: 71charger_fan on November 12, 2019, 04:32:18 PM
Today I worked on getting the woodgrain decal off of the console top. It's a lot harder than I expected.
Title: Re: '71 Hits the Paint Booth
Post by: nchrome on November 12, 2019, 09:24:48 PM
Post by: nchrome on November 12, 2019, 09:24:48 PM
Heat gun may of helped and also speed it up plus less glue to contend with :icon_smile_big:
Title: Re: '71 Hits the Paint Booth
Post by: 71charger_fan on December 04, 2019, 10:36:51 AM
Post by: 71charger_fan on December 04, 2019, 10:36:51 AM
Yesterday, I pulled the package shelf, put a coat of Eastwood radiator paint on the leading edge to hide any hint of the GY9 showing when the interior goes back in and packed up the parts in the trunk as it may finally be headed to the shop next week.

Title: Re: '71 Hits the Paint Booth
Post by: 71charger_fan on December 04, 2019, 07:48:03 PM
Post by: 71charger_fan on December 04, 2019, 07:48:03 PM
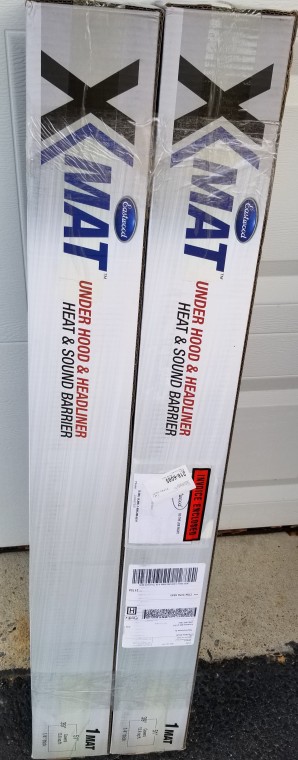
My only Black Friday purchase.
Title: Re: '71 Hits the Paint Booth
Post by: 71charger_fan on December 10, 2019, 08:28:23 PM
Post by: 71charger_fan on December 10, 2019, 08:28:23 PM
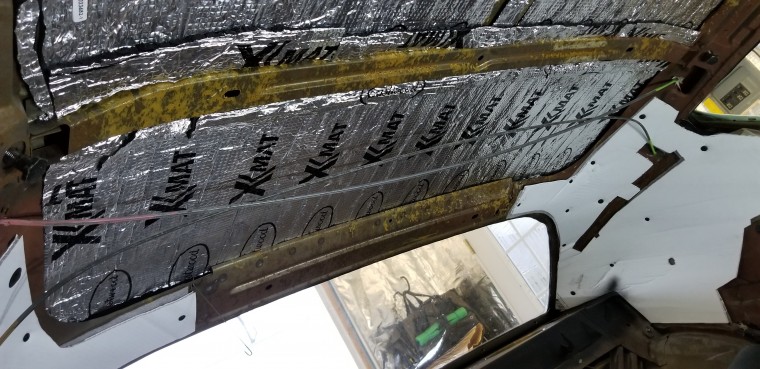
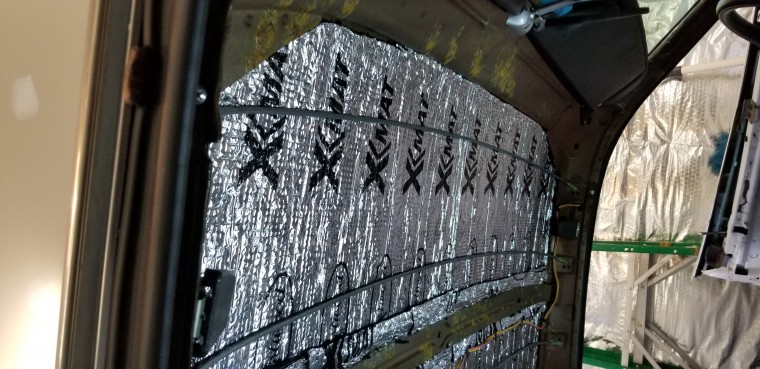
Today, I installed the Xmat.

Title: Re: '71 Hits the Paint Booth
Post by: tan top on December 12, 2019, 05:52:31 AM
Post by: tan top on December 12, 2019, 05:52:31 AM
:2thumbs: :popcrn:
Title: Re: '71 Hits the Paint Booth
Post by: chapel40 on December 13, 2019, 04:48:51 AM
Post by: chapel40 on December 13, 2019, 04:48:51 AM
What size engine does it have?
Title: Re: '71 Hits the Paint Booth
Post by: 71charger_fan on December 13, 2019, 04:04:26 PM
Post by: 71charger_fan on December 13, 2019, 04:04:26 PM
.030 over '77 400
Title: Re: '71 Hits the Paint Booth
Post by: 71charger_fan on December 28, 2019, 10:26:19 AM
Post by: 71charger_fan on December 28, 2019, 10:26:19 AM
Yesterday, my wife followed me when I finally drove it to the shop for work to begin on the color change back to purple. Nice to finally have it out of the garage for a while so I can get some work done on the '55 wagon.
Title: Re: '71 Hits the Paint Booth
Post by: NHCharger on December 29, 2019, 06:36:02 PM
Post by: NHCharger on December 29, 2019, 06:36:02 PM
Did they give you a time frame of when it will be done?
Title: Re: '71 Hits the Paint Booth
Post by: 71charger_fan on December 29, 2019, 08:02:50 PM
Post by: 71charger_fan on December 29, 2019, 08:02:50 PM
No time frame as yet. I'll talk to him after the New Year and give him time to go over the car and inventory the parts packed inside. Then I'll talk to him about how long he expects it to take. I still need to choose a stripe color.
Title: Re: '71 Hits the Paint Booth
Post by: 71charger_fan on June 16, 2020, 02:17:22 PM
Post by: 71charger_fan on June 16, 2020, 02:17:22 PM
Just as they were about to start on it, they had to shut down due to COVID-19. They're back to work and have finally started tearing into it.
https://www.facebook.com/699745276876002/photos/pcb.1450553901795132/1450553771795145/?type=3&theater
https://www.facebook.com/699745276876002/photos/pcb.1450553901795132/1450553771795145/?type=3&theater
Title: Re: '71 Hits the Paint Booth
Post by: 71charger_fan on June 20, 2020, 11:32:25 AM
Post by: 71charger_fan on June 20, 2020, 11:32:25 AM
I put a Detroit Muscle Technologies carbon fiber overlay on the console top.

Title: Re: '71 Hits the Paint Booth
Post by: 71charger_fan on August 27, 2020, 06:35:56 PM
Post by: 71charger_fan on August 27, 2020, 06:35:56 PM
Front fenders are stripped. Rest of the body will probably start getting stripped after Labor Day.

Title: Re: '71 Hits the Paint Booth
Post by: hemi-hampton on August 27, 2020, 11:19:18 PM
Post by: hemi-hampton on August 27, 2020, 11:19:18 PM
Was there something wrong with the Body Work, I just thought the Pearl White paint was mottled & streaked :scratchchin: :shruggy: LEON.
Title: Re: '71 Hits the Paint Booth
Post by: 71charger_fan on August 28, 2020, 08:51:18 AM
Post by: 71charger_fan on August 28, 2020, 08:51:18 AM
The body work was good, paint work was bad. But, there was the factory paint, a repaint in the factory color, a plum crazy repaint, and the ivory tri-coat repaint on there. He convinced me it was best to remove all those layers and know for sure what's under the new paint. Especially since the body shop that did two of those paint jobs no longer exists, so I had no way to know what brand of paint was under there.
Title: Re: '71 Hits the Paint Booth
Post by: hemi-hampton on August 28, 2020, 06:57:39 PM
Post by: hemi-hampton on August 28, 2020, 06:57:39 PM
OK, I didn't know it had so many layers of paint. Guess I just assumed it was stripped to bare metal before Painted Pearl While. Considering all the layers probably best to Strip all that off. Good Luck. LEON.
Title: Re: '71 Hits the Paint Booth
Post by: 71charger_fan on September 15, 2020, 02:34:24 PM
Post by: 71charger_fan on September 15, 2020, 02:34:24 PM
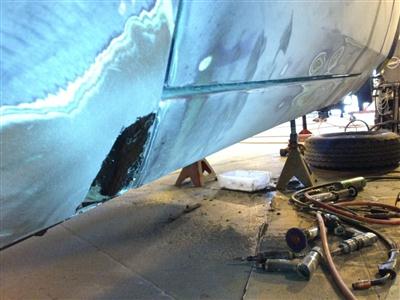
I paid the last body shop to cut out all the rust and weld in new metal. After agreeing with the current shop to that it should be stripped, this is what they found on the front fenders. I fear what may turn up on the rest of the car. Why fix it? The customer is overseas and won't know the difference, just putty over it.


Title: Re: '71 Hits the Paint Booth
Post by: hemi-hampton on September 15, 2020, 09:31:36 PM
Post by: hemi-hampton on September 15, 2020, 09:31:36 PM
Ouchhhhhh, Yeah, That is some ugly terrible hack work, Earl Scheib Special. But after working in many different Body Shops & Resto shops past 35+ years I see this type of work done by others all the time. My last Resto Shop I worked at The Boss insisted I do that type of work & boss got pissed if I tried to do a better job. This place was so bad I couldn't take it anymore & had to quite. Unfortunately lots of places like that out there. I know from Experience. LEON.
Title: Re: '71 Hits the Paint Booth
Post by: 71charger_fan on October 05, 2020, 03:22:07 PM
Post by: 71charger_fan on October 05, 2020, 03:22:07 PM
Engine's finally out and the stripping of the body about to start.


Title: Re: '71 Hits the Paint Booth
Post by: 71charger_fan on October 24, 2020, 08:24:02 AM
Post by: 71charger_fan on October 24, 2020, 08:24:02 AM
The car's apart for paint. There will never be a better time to just rewire the entire thing.

Title: Re: '71 Hits the Paint Booth
Post by: ACUDANUT on October 24, 2020, 09:10:00 AM
Post by: ACUDANUT on October 24, 2020, 09:10:00 AM
Quote from: 71charger_fan on September 15, 2020, 02:34:24 PM
I paid the last body shop to cut out all the rust and weld in new metal. After agreeing with the current shop to that it should be stripped, this is what they found on the front fenders. I fear what may turn up on the rest of the car. Why fix it? The customer is overseas and won't know the difference, just putty over it.
Unfortunately, rust will win with old cars. Just like cancer in humans.
Title: Re: '71 Hits the Paint Booth
Post by: 71charger_fan on October 27, 2020, 08:11:14 AM
Post by: 71charger_fan on October 27, 2020, 08:11:14 AM
The American Autowire kit didn't come with any provision for the concealed headlamp door wiring. So, I took a wire out of the dimmer switch plug, cut off the crimped terminal, doubled up the wire with a signal wire for the door relay and crimped on a new double terminal. I did finish the crimp after I took the photo.

Title: Re: '71 Hits the Paint Booth
Post by: 71charger_fan on October 27, 2020, 06:05:18 PM
Post by: 71charger_fan on October 27, 2020, 06:05:18 PM
He's been working on door and trunk alignment and stripping paint. He got a look at the mess of mirror holes in the door, but welded up those I don't need. I've decided to leave the stainless trim off the tops of the doors, so he's welding in those holes too.


Title: Re: '71 Hits the Paint Booth
Post by: 71charger_fan on October 27, 2020, 06:08:43 PM
Post by: 71charger_fan on October 27, 2020, 06:08:43 PM
Shell is pretty well stripped but remains a roller. Hood is being blocked.


Title: Re: '71 Hits the Paint Booth
Post by: 71charger_fan on October 27, 2020, 06:17:35 PM
Post by: 71charger_fan on October 27, 2020, 06:17:35 PM
After seeing the driver door I knew that stripping it was the right decision.

Title: Re: '71 Hits the Paint Booth
Post by: hemi-hampton on October 27, 2020, 06:57:29 PM
Post by: hemi-hampton on October 27, 2020, 06:57:29 PM
Counting the rings I'm counting 11 layers. What was the original Color? T6? T7? or T8? LEON.
Title: Re: '71 Hits the Paint Booth
Post by: 71charger_fan on October 29, 2020, 08:50:43 AM
Post by: 71charger_fan on October 29, 2020, 08:50:43 AM
It was originally GY9 Dark Gold Metallic although it looked brown to me. After an accident in the '80s it was repainted in the factory color.
Title: Re: '71 Hits the Paint Booth
Post by: 71charger_fan on October 29, 2020, 04:10:46 PM
Post by: 71charger_fan on October 29, 2020, 04:10:46 PM
driver door and hood in epoxy primer


Title: Re: '71 Hits the Paint Booth
Post by: ACUDANUT on October 29, 2020, 05:04:44 PM
Post by: ACUDANUT on October 29, 2020, 05:04:44 PM
Topic: What it's like to be F@#$% by a bodyshop - Rant/warning/advice (Read 1428 times)
According to some here. If it's not a very rare car, don't bother. Topic: What it's like to be F@#$% by a bodyshop - Rant/warning/advice (Read 1428 times)
According to some here. If it's not a very rare car, don't bother. Topic: What it's like to be F@#$% by a bodyshop - Rant/warning/advice (Read 1428 times)
Title: Re: '71 Hits the Paint Booth
Post by: 71charger_fan on October 30, 2020, 05:37:14 PM
Post by: 71charger_fan on October 30, 2020, 05:37:14 PM
After seeing this, I told him to just go ahead and order a quarter panel.


Title: Re: '71 Hits the Paint Booth
Post by: oldgold69 on October 30, 2020, 07:31:41 PM
Post by: oldgold69 on October 30, 2020, 07:31:41 PM
Is that blasting sand or body filler on the floor. If it's filler holy crap :shruggy:
Title: Re: '71 Hits the Paint Booth
Post by: 71charger_fan on October 30, 2020, 08:35:32 PM
Post by: 71charger_fan on October 30, 2020, 08:35:32 PM
Filler
Title: Re: '71 Hits the Paint Booth
Post by: CFMopar on November 02, 2020, 04:11:37 PM
Post by: CFMopar on November 02, 2020, 04:11:37 PM
Subscribing to this since I'll be tackling a 71 soon too :popcrn:
Title: Re: '71 Hits the Paint Booth
Post by: ACUDANUT on November 02, 2020, 07:44:14 PM
Post by: ACUDANUT on November 02, 2020, 07:44:14 PM
http://www.dodgecharger.com/forum/index.php/topic,138778.msg1719591.html#msg1719591
Title: Re: '71 Hits the Paint Booth
Post by: 71charger_fan on November 03, 2020, 12:25:17 PM
Post by: 71charger_fan on November 03, 2020, 12:25:17 PM
A lot more rust has shown up that I already paid to have cut out and replaced. Now, I'm replacing both quarters. Plus, there's rust in the drip rails and windshield surround that was also supposedly repaired before. I'm thinking of having the drip rails shaved off.


Title: Re: '71 Hits the Paint Booth
Post by: 70 sublime on November 03, 2020, 12:34:13 PM
Post by: 70 sublime on November 03, 2020, 12:34:13 PM
Call your car snow ball
Where do you stop looking once you are this far ??
Where do you stop looking once you are this far ??
Title: Re: '71 Hits the Paint Booth
Post by: timmycharger on November 03, 2020, 03:48:11 PM
Post by: timmycharger on November 03, 2020, 03:48:11 PM
Quote from: ACUDANUT on November 02, 2020, 07:44:14 PM
http://www.dodgecharger.com/forum/index.php/topic,138778.msg1719591.html#msg1719591
Dude, you post in riddles, what are you trying to say? You trying to tell him not to bother with a shop?
Title: Re: '71 Hits the Paint Booth
Post by: hemi-hampton on November 03, 2020, 05:32:24 PM
Post by: hemi-hampton on November 03, 2020, 05:32:24 PM
Quote from: timmycharger on November 03, 2020, 03:48:11 PMQuote from: ACUDANUT on November 02, 2020, 07:44:14 PM
http://www.dodgecharger.com/forum/index.php/topic,138778.msg1719591.html#msg1719591
Dude, you post in riddles, what are you trying to say? You trying to tell him not to bother with a shop?
I was wondering the same thing :shruggy: :slap:
Title: Re: '71 Hits the Paint Booth
Post by: ACUDANUT on November 03, 2020, 08:53:50 PM
Post by: ACUDANUT on November 03, 2020, 08:53:50 PM
Quote from: hemi-hampton on November 03, 2020, 05:32:24 PMQuote from: timmycharger on November 03, 2020, 03:48:11 PMQuote from: ACUDANUT on November 02, 2020, 07:44:14 PM
http://www.dodgecharger.com/forum/index.php/topic,138778.msg1719591.html#msg1719591
Dude, you post in riddles, what are you trying to say? You trying to tell him not to bother with a shop?
I was wondering the same thing :shruggy: :slap:
NOT AT ALL. I am all in... It's just that some members here think otherwise.
Title: Re: '71 Hits the Paint Booth
Post by: 71charger_fan on November 04, 2020, 07:24:36 PM
Post by: 71charger_fan on November 04, 2020, 07:24:36 PM
He's getting there


Title: Re: '71 Hits the Paint Booth
Post by: 71charger_fan on November 04, 2020, 07:25:56 PM
Post by: 71charger_fan on November 04, 2020, 07:25:56 PM
I knew there had been rust in the corners. I did not know there was some toward the middle.


Title: Re: '71 Hits the Paint Booth
Post by: 71charger_fan on November 04, 2020, 08:22:55 PM
Post by: 71charger_fan on November 04, 2020, 08:22:55 PM
It's amazing how much damage a vinyl top can inflict.


Title: Re: '71 Hits the Paint Booth
Post by: ACUDANUT on November 04, 2020, 08:35:39 PM
Post by: ACUDANUT on November 04, 2020, 08:35:39 PM
Quote from: timmycharger on November 03, 2020, 03:48:11 PMQuote from: ACUDANUT on November 02, 2020, 07:44:14 PM
http://www.dodgecharger.com/forum/index.php/topic,138778.msg1719591.html#msg1719591
Dude, you post in riddles, what are you trying to say? You trying to tell him not to bother with a shop?
How do I post in riddles CLOWN. ?
Title: Re: '71 Hits the Paint Booth
Post by: 71charger_fan on November 05, 2020, 07:28:28 PM
Post by: 71charger_fan on November 05, 2020, 07:28:28 PM
I opted to shave the drip rails.


Title: Re: '71 Hits the Paint Booth
Post by: timmycharger on November 06, 2020, 07:13:59 AM
Post by: timmycharger on November 06, 2020, 07:13:59 AM
Quote from: ACUDANUT on November 04, 2020, 08:35:39 PMQuote from: timmycharger on November 03, 2020, 03:48:11 PMQuote from: ACUDANUT on November 02, 2020, 07:44:14 PM
http://www.dodgecharger.com/forum/index.php/topic,138778.msg1719591.html#msg1719591
Dude, you post in riddles, what are you trying to say? You trying to tell him not to bother with a shop?
How do I post in riddles CLOWN. ?
Well, if I had to guess, probably when you are hitting the bottle? Anyway.. back to topic.
looking great! :cheers:
Title: Re: '71 Hits the Paint Booth
Post by: 71charger_fan on November 10, 2020, 06:40:39 PM
Post by: 71charger_fan on November 10, 2020, 06:40:39 PM
Attesting to the quality of the most recent repaint, it's falling off the body in the wheel wells. He's got the hinge pillar stripped, epoxy primed, and hit with some base coat.


Title: Re: '71 Hits the Paint Booth
Post by: 71charger_fan on November 10, 2020, 06:44:40 PM
Post by: 71charger_fan on November 10, 2020, 06:44:40 PM
I'm very happy with the windshield opening repairs. Finalizing the drip rail shaving is on hold pending arrival of new quarters and the decision as to how much of them to use.


Title: Re: '71 Hits the Paint Booth
Post by: chapel40 on November 10, 2020, 11:00:57 PM
Post by: chapel40 on November 10, 2020, 11:00:57 PM
Thats incredible that you had it painted and they didnt catch any of that windshield stuff and other spots. Looks like you have pretty much the same repairs my car had. Its a 71 and Vinyl half top.

Title: Re: '71 Hits the Paint Booth
Post by: 71charger_fan on November 11, 2020, 08:41:29 PM
Post by: 71charger_fan on November 11, 2020, 08:41:29 PM
While disappointing, it wasn't surprising to find they had painted over rust on the driver's side hinge pillar.

Title: Re: '71 Hits the Paint Booth
Post by: hemi-hampton on November 11, 2020, 09:15:04 PM
Post by: hemi-hampton on November 11, 2020, 09:15:04 PM
I've seen lots of body shops paint over rust, most of the times it's because Customer is not willing to pay alot, But sometimes they do pay alot & they still paint over Rust or Earl Scheib do low budget work on the car.. Take a air gun ( i prefer a male & female end fitting screwed together) to inner wheel well & see how much Paint you can get to blow off that way. LEON.
Title: Re: '71 Hits the Paint Booth
Post by: 71charger_fan on November 13, 2020, 06:27:27 PM
Post by: 71charger_fan on November 13, 2020, 06:27:27 PM
Painted over rust removed, the area epoxy primed, and behind and the back sides of the hinges hit with base coat.

Title: Re: '71 Hits the Paint Booth
Post by: hemi-hampton on November 14, 2020, 12:05:03 AM
Post by: hemi-hampton on November 14, 2020, 12:05:03 AM
Did you sandblast the rust to remove it? LEON.
Title: Re: '71 Hits the Paint Booth
Post by: 71charger_fan on November 15, 2020, 08:56:44 AM
Post by: 71charger_fan on November 15, 2020, 08:56:44 AM
Not sure exactly what he did to that particular rust, but he's been mechanically removing it and acid treating it before epoxy priming. I can't even hazard a guess as to how much putty he's removed.
Title: Re: '71 Hits the Paint Booth
Post by: hemi-hampton on November 15, 2020, 11:53:15 AM
Post by: hemi-hampton on November 15, 2020, 11:53:15 AM
I had one so bad that after sand blasting was swiss cheese. then cut out all the rust & replaced. LEON.

Title: Re: '71 Hits the Paint Booth
Post by: 71charger_fan on November 16, 2020, 07:34:26 PM
Post by: 71charger_fan on November 16, 2020, 07:34:26 PM
Quarters, outer wheelhouses, and trunk drops arrived today. The trunk drops arrived damaged, so we wait for AMD to send out new ones.

Title: Re: '71 Hits the Paint Booth
Post by: ACUDANUT on November 16, 2020, 11:16:52 PM
Post by: ACUDANUT on November 16, 2020, 11:16:52 PM
Quote from: hemi-hampton on November 15, 2020, 11:53:15 AM
I had one so bad that after sand blasting was swiss cheese. then cut out all the rust & replaced. LEON.
OMG
Title: Re: '71 Hits the Paint Booth
Post by: 71charger_fan on November 17, 2020, 09:57:27 AM
Post by: 71charger_fan on November 17, 2020, 09:57:27 AM
Now I realize that the tires have almost no miles on them but are over 12 years old. So, I'll have to add a new set of tires to the project.
Title: Re: '71 Hits the Paint Booth
Post by: 71charger_fan on November 20, 2020, 06:44:45 PM
Post by: 71charger_fan on November 20, 2020, 06:44:45 PM
Old quarter skin is off which revealed some additional damage in the structure. Old, crappy repairs to the trunklid cut out and a new lip created that actually aligns to the car.


Title: Re: '71 Hits the Paint Booth
Post by: 71charger_fan on November 24, 2020, 04:40:22 PM
Post by: 71charger_fan on November 24, 2020, 04:40:22 PM
The rear most inner part of the quarter was rippled from a rear end collision back in '89. Fortunately, I had bought the pieces from AMD a while ago just in case I ever needed them. I needed them.


Title: Re: '71 Hits the Paint Booth
Post by: 71charger_fan on November 24, 2020, 04:54:14 PM
Post by: 71charger_fan on November 24, 2020, 04:54:14 PM
Only needed part of the AMD outer wheel house.


Title: Re: '71 Hits the Paint Booth
Post by: 71charger_fan on November 24, 2020, 04:59:43 PM
Post by: 71charger_fan on November 24, 2020, 04:59:43 PM
First fitting of AMD quarter skin going well.


Title: Re: '71 Hits the Paint Booth
Post by: 71charger_fan on November 27, 2020, 02:59:04 PM
Post by: 71charger_fan on November 27, 2020, 02:59:04 PM
What? Reproduction quarters don't fit perfectly on the first try? Say it ain't so!


Title: Re: '71 Hits the Paint Booth
Post by: 71charger_fan on December 01, 2020, 10:20:13 AM
Post by: 71charger_fan on December 01, 2020, 10:20:13 AM
I collected the seat belts and gave them a thorough scrubbing.

Title: Re: '71 Hits the Paint Booth
Post by: 71charger_fan on December 11, 2020, 01:02:51 PM
Post by: 71charger_fan on December 11, 2020, 01:02:51 PM
Body guy is back from some time off and work has resumed.


Title: Re: '71 Hits the Paint Booth
Post by: CFMopar on December 13, 2020, 06:32:14 PM
Post by: CFMopar on December 13, 2020, 06:32:14 PM
Work is coming along nicely. :cheers:
Title: Re: '71 Hits the Paint Booth
Post by: 71charger_fan on December 19, 2020, 01:41:39 PM
Post by: 71charger_fan on December 19, 2020, 01:41:39 PM
Final fitting and welding finishing up on driver side.


Title: Re: '71 Hits the Paint Booth
Post by: 71charger_fan on December 19, 2020, 01:44:18 PM
Post by: 71charger_fan on December 19, 2020, 01:44:18 PM
He found more rust in the trunk gutter that the previous shop had hidden using seam sealer and painting over it.

Title: Re: '71 Hits the Paint Booth
Post by: 71charger_fan on December 19, 2020, 06:12:37 PM
Post by: 71charger_fan on December 19, 2020, 06:12:37 PM
Trunk gutter rust fixed.

Title: Re: '71 Hits the Paint Booth
Post by: 71charger_fan on December 21, 2020, 07:21:35 PM
Post by: 71charger_fan on December 21, 2020, 07:21:35 PM
Just about done with the driver quarter panel. Up in the air as to whether to replace the entire passenger side or just the bottom. Probably the whole thing.


Title: Re: '71 Hits the Paint Booth
Post by: 71charger_fan on December 21, 2020, 07:23:45 PM
Post by: 71charger_fan on December 21, 2020, 07:23:45 PM
I had contacts in the door jamb for power windows. A previous shop left me with several dead shorts and I got disgusted with it and pulled the power windows and reinstalled the manual. So, I had him weld up the holes in the jambs.

Title: Re: '71 Hits the Paint Booth
Post by: 71charger_fan on December 21, 2020, 07:24:49 PM
Post by: 71charger_fan on December 21, 2020, 07:24:49 PM
Previous body shop REALLY loved filler.

Title: Re: '71 Hits the Paint Booth
Post by: CFMopar on December 21, 2020, 08:02:30 PM
Post by: CFMopar on December 21, 2020, 08:02:30 PM
:popcrn: The progress is great. At least this shop knows what they're doing.
I was wondering if you considered doing paint removal yourself to save some money?
I was wondering if you considered doing paint removal yourself to save some money?
Title: Re: '71 Hits the Paint Booth
Post by: DownZero on December 21, 2020, 08:16:45 PM
Post by: DownZero on December 21, 2020, 08:16:45 PM
I noticed the Maryland tag. Whereabouts in MD?
Title: Re: '71 Hits the Paint Booth
Post by: 71charger_fan on December 21, 2020, 08:35:31 PM
Post by: 71charger_fan on December 21, 2020, 08:35:31 PM
Just outside the western city limit of Frederick on the north side of US 40.
Title: Re: '71 Hits the Paint Booth
Post by: 71charger_fan on December 21, 2020, 08:37:35 PM
Post by: 71charger_fan on December 21, 2020, 08:37:35 PM
Quote from: CFMopar on December 21, 2020, 08:02:30 PM
:popcrn: The progress is great. At least this shop knows what they're doing.
I was wondering if you considered doing paint removal yourself to save some money?
I didn't know it was going to require stripping until it was already at his shop. Otherwise, I probably would have done a lot of the paint removal myself. Would have saved a lot of money though.
Title: Re: '71 Hits the Paint Booth
Post by: ACUDANUT on December 22, 2020, 01:42:19 AM
Post by: ACUDANUT on December 22, 2020, 01:42:19 AM
Sounds like you found a great shop. !!
Title: Re: '71 Hits the Paint Booth
Post by: 71charger_fan on December 24, 2020, 02:53:24 PM
Post by: 71charger_fan on December 24, 2020, 02:53:24 PM
Moving on to the passenger side. A POR-15 and fiberglass patch I put on back in the '80s finally cut out and fixed properly.


Title: Re: '71 Hits the Paint Booth
Post by: 71charger_fan on December 29, 2020, 01:20:58 PM
Post by: 71charger_fan on December 29, 2020, 01:20:58 PM
Under the quarter, the rocker was pretty rusty. He found that another shop had just welded a plate over the rust. This is passenger side, just ahead of the wheel opening.


Title: Re: '71 Hits the Paint Booth
Post by: 71charger_fan on December 29, 2020, 01:22:00 PM
Post by: 71charger_fan on December 29, 2020, 01:22:00 PM
The bottom of the trunk drop was very rusty and has been rebuilt.

Title: Re: '71 Hits the Paint Booth
Post by: 71charger_fan on December 29, 2020, 01:51:10 PM
Post by: 71charger_fan on December 29, 2020, 01:51:10 PM
A cut off piece of the outer wheelhouse as a cutting guide to make a patch. Another piece I have already paid to have fixed that was just hidden under filler, seam sealer, and undercoating.

Title: Re: '71 Hits the Paint Booth
Post by: 71charger_fan on December 29, 2020, 01:53:25 PM
Post by: 71charger_fan on December 29, 2020, 01:53:25 PM
A few photos I took on my visit to the shop today.


Title: Re: '71 Hits the Paint Booth
Post by: 71charger_fan on January 01, 2021, 08:54:50 AM
Post by: 71charger_fan on January 01, 2021, 08:54:50 AM
Passenger side inner structure has been rebuilt.


Title: Re: '71 Hits the Paint Booth
Post by: 71charger_fan on January 02, 2021, 06:58:28 PM
Post by: 71charger_fan on January 02, 2021, 06:58:28 PM
Seam sealed and the portion that will be pretty much hidden hit with basecoat while it's open. Heat lamp shifts the color toward pink.


Title: Re: '71 Hits the Paint Booth
Post by: 71charger_fan on January 05, 2021, 04:14:39 PM
Post by: 71charger_fan on January 05, 2021, 04:14:39 PM
Passenger quarter fitted, sectioned, clamped, and ready to weld.


Title: Re: '71 Hits the Paint Booth
Post by: 71charger_fan on January 06, 2021, 10:07:15 PM
Post by: 71charger_fan on January 06, 2021, 10:07:15 PM
Passenger quarter on. The panel was poorly made at the top of the leading edge and needed some body work.


Title: Re: '71 Hits the Paint Booth
Post by: hemi-hampton on January 06, 2021, 10:58:45 PM
Post by: hemi-hampton on January 06, 2021, 10:58:45 PM
In the past those 1/4's leading edge I've found to be way to round with no point to them. And they actually bulge out some at the bend/curved edge to make it a high spot all along edge. LEON.
Title: Re: '71 Hits the Paint Booth
Post by: 71charger_fan on January 07, 2021, 11:34:01 AM
Post by: 71charger_fan on January 07, 2021, 11:34:01 AM
Quote from: hemi-hampton on January 06, 2021, 10:58:45 PM
In the past those 1/4's leading edge I've found to be way to round with no point to them. And they actually bulge out some at the bend/curved edge to make it a high spot all along edge. LEON.
It had that going on but is also seemed to have a double stamping with two edges. Not bad enough to send it back, but cost me an extra hour or two in labor to straighten out.
Title: Re: '71 Hits the Paint Booth
Post by: 71charger_fan on January 08, 2021, 09:08:01 PM
Post by: 71charger_fan on January 08, 2021, 09:08:01 PM
The rear of the unibody should soon be in epoxy primer.


Title: Re: '71 Hits the Paint Booth
Post by: CFMopar on January 11, 2021, 03:08:17 PM
Post by: CFMopar on January 11, 2021, 03:08:17 PM
Hey if you don't mind asking your shop next time you're there.
Do they know of a source for Cowels and front frame rails for 71?
Do they know of a source for Cowels and front frame rails for 71?
Title: Re: '71 Hits the Paint Booth
Post by: ACUDANUT on January 11, 2021, 07:35:25 PM
Post by: ACUDANUT on January 11, 2021, 07:35:25 PM
Quote from: 71charger_fan on January 08, 2021, 09:08:01 PM
The rear of the unibody should soon be in epoxy primer.
Looking Great !!
Title: Re: '71 Hits the Paint Booth
Post by: 71charger_fan on January 11, 2021, 09:58:46 PM
Post by: 71charger_fan on January 11, 2021, 09:58:46 PM
Taking it down to bare metal was absolutely the right call. The door jamb was peeling down to the bare metal.


Title: Re: '71 Hits the Paint Booth
Post by: 71charger_fan on January 11, 2021, 10:07:49 PM
Post by: 71charger_fan on January 11, 2021, 10:07:49 PM
Quote from: CFMopar on January 11, 2021, 03:08:17 PM
Hey if you don't mind asking your shop next time you're there.
Do they know of a source for Cowels and front frame rails for 71?
I got my frame rail from auto rust technicians. Now, their website refers you to Classic Industries. I couldn't find their products on Classic Industries' website.
You may be able to use a Challenger/Cuda cowl. They look pretty much the same. If nothing else, you might be able to use one for patches for yours.
Title: Re: '71 Hits the Paint Booth
Post by: 71charger_fan on January 15, 2021, 11:30:44 AM
Post by: 71charger_fan on January 15, 2021, 11:30:44 AM
Two coats of epoxy went on yesterday.

Title: Re: '71 Hits the Paint Booth
Post by: 71charger_fan on January 16, 2021, 10:49:43 PM
Post by: 71charger_fan on January 16, 2021, 10:49:43 PM
Still a long way to go.

Title: Re: '71 Hits the Paint Booth
Post by: NHCharger on January 17, 2021, 08:20:06 AM
Post by: NHCharger on January 17, 2021, 08:20:06 AM
Wow, nice. Glad you finally found a reputable shop.
you need to hustle if you plan on making Carlisle this year.
Are you planning on going?
you need to hustle if you plan on making Carlisle this year.
Are you planning on going?
Title: Re: '71 Hits the Paint Booth
Post by: 71charger_fan on January 17, 2021, 12:36:41 PM
Post by: 71charger_fan on January 17, 2021, 12:36:41 PM
I've pre-registered. I hope to bring the Charger. If it's not ready, I might just switch the registration to the '55 Plymouth (again) or to my '15 Scat Pack and ride up there in air conditioning. The front fenders need a few patches, then it's into body work then paint. I'll do the interior at the house myself.
It's a sad commentary on body shops that it's so hard to find someone who cares about the product he puts out.
It's a sad commentary on body shops that it's so hard to find someone who cares about the product he puts out.
Title: Re: '71 Hits the Paint Booth
Post by: NHCharger on January 17, 2021, 03:32:54 PM
Post by: NHCharger on January 17, 2021, 03:32:54 PM
Quote from: 71charger_fan on January 17, 2021, 12:36:41 PM
It's a sad commentary on body shops that it's so hard to find someone who cares about the product he puts out.
Yup. That's why I ended up doing everything myself. The guy that did my 71 Charger did do a good job but he was rather quirky and difficult to deal with at times.
Probably 20+ years of paint fumes has done a number on him. ;)
I'm going to register for Carlisle this week.
Title: Re: '71 Hits the Paint Booth
Post by: hemi-hampton on January 17, 2021, 05:12:49 PM
Post by: hemi-hampton on January 17, 2021, 05:12:49 PM
Quote from: NHCharger on January 17, 2021, 03:32:54 PMQuote from: 71charger_fan on January 17, 2021, 12:36:41 PM
It's a sad commentary on body shops that it's so hard to find someone who cares about the product he puts out.
Yup. That's why I ended up doing everything myself. The guy that did my 71 Charger did do a good job but he was rather quirky and difficult to deal with at times.
Probably 20+ years of paint fumes has done a number on him. ;)
I'm going to register for Carlisle this week.
So, that's what's wrong with me :scratchchin:
Title: Re: '71 Hits the Paint Booth
Post by: NHCharger on January 19, 2021, 08:40:55 PM
Post by: NHCharger on January 19, 2021, 08:40:55 PM
Quote from: hemi-hampton on January 17, 2021, 05:12:49 PMQuote from: NHCharger on January 17, 2021, 03:32:54 PMQuote from: 71charger_fan on January 17, 2021, 12:36:41 PM
It's a sad commentary on body shops that it's so hard to find someone who cares about the product he puts out.
Yup. That's why I ended up doing everything myself. The guy that did my 71 Charger did do a good job but he was rather quirky and difficult to deal with at times.
Probably 20+ years of paint fumes has done a number on him. ;)
I'm going to register for Carlisle this week.
So, that's what's wrong with me :scratchchin:
That's ok, we still luv ya.
All kidding aside, I know two local bodyshop guys that spent the majority of their lives in the trade. One NEVER wore a mask except for final paint, the other would actually smoke a cigarette while sanding and priming. Both are now suffering a slow miserable death. I'll wear a full respirator even when I'm just sanding filler.
Title: Re: '71 Hits the Paint Booth
Post by: 71charger_fan on January 23, 2021, 09:57:53 PM
Post by: 71charger_fan on January 23, 2021, 09:57:53 PM
Now the epoxy, seam sealer, etc can cure while a Mustang gets its paint.


Title: Re: '71 Hits the Paint Booth
Post by: 71charger_fan on March 02, 2021, 01:02:19 PM
Post by: 71charger_fan on March 02, 2021, 01:02:19 PM
With the doors properly aligned to the quarters, the car now needs fiddling to align the fenders to the doors.


Title: Re: '71 Hits the Paint Booth
Post by: tan top on March 02, 2021, 01:59:58 PM
Post by: tan top on March 02, 2021, 01:59:58 PM
Quote from: hemi-hampton on January 17, 2021, 05:12:49 PMQuote from: NHCharger on January 17, 2021, 03:32:54 PMQuote from: 71charger_fan on January 17, 2021, 12:36:41 PM
It's a sad commentary on body shops that it's so hard to find someone who cares about the product he puts out.
Yup. That's why I ended up doing everything myself. The guy that did my 71 Charger did do a good job but he was rather quirky and difficult to deal with at times.
Probably 20+ years of paint fumes has done a number on him. ;)
I'm going to register for Carlisle this week.
So, that's what's wrong with me :scratchchin:
;) me too :scratchchin:
Quote from: NHCharger on January 19, 2021, 08:40:55 PMQuote from: hemi-hampton on January 17, 2021, 05:12:49 PMQuote from: NHCharger on January 17, 2021, 03:32:54 PMQuote from: 71charger_fan on January 17, 2021, 12:36:41 PM
It's a sad commentary on body shops that it's so hard to find someone who cares about the product he puts out.
Yup. That's why I ended up doing everything myself. The guy that did my 71 Charger did do a good job but he was rather quirky and difficult to deal with at times.
Probably 20+ years of paint fumes has done a number on him. ;)
I'm going to register for Carlisle this week.
So, that's what's wrong with me :scratchchin:
That's ok, we still luv ya.
All kidding aside, I know two local bodyshop guys that spent the majority of their lives in the trade. One NEVER wore a mask except for final paint, the other would actually smoke a cigarette while sanding and priming. Both are now suffering a slow miserable death. I'll wear a full respirator even when I'm just sanding filler.
i use to also when blocking filler, in the end i become over sensitised all the fumes of everything in a body / paint shop , i would even wear a proper charcoal mask when even just mixing filler & troweling it on :P. even just mixing paint / primers & cleaning guns. was better when we changed to waterbase 20 yeas ago , but still used 2k MS HS solids & clear coats primers ,
use to wear all the correct safety gear masks suits gloves full face airs feds & still affected me , in the end even just the smell of cutting / polishing compound would affect me :icon_smile_blackeye: :yesnod: sorry for the mini hijack , just take no chances guys
Quote from: 71charger_fan on March 02, 2021, 01:02:19 PM
With the doors properly aligned to the quarters, the car now needs fiddling to align the fenders to the doors.
:coolgleamA: looks good ! :popcrn:
Title: Re: '71 Hits the Paint Booth
Post by: AKcharger on March 02, 2021, 10:39:51 PM
Post by: AKcharger on March 02, 2021, 10:39:51 PM
Quote from: hemi-hampton on January 17, 2021, 05:12:49 PM
So, that's what's wrong with me :scratchchin:
It's true! that's why Leon hastled me during my bodywork/paint! :hah:
So glad that it finally looks like a car again!!
Title: Re: '71 Hits the Paint Booth
Post by: ACUDANUT on March 02, 2021, 11:14:21 PM
Post by: ACUDANUT on March 02, 2021, 11:14:21 PM
I love it. Although some here hate 3rd gen Chargers. FT. I own 3. :nana:
Title: Re: '71 Hits the Paint Booth
Post by: hemi-hampton on March 03, 2021, 12:13:15 AM
Post by: hemi-hampton on March 03, 2021, 12:13:15 AM
Do all the body lines line up. LEON.
Title: Re: '71 Hits the Paint Booth
Post by: 71charger_fan on March 03, 2021, 11:32:16 AM
Post by: 71charger_fan on March 03, 2021, 11:32:16 AM
Once the driver fender gets dialed in all the body lines will be lined up.
Title: Re: '71 Hits the Paint Booth
Post by: 71charger_fan on March 18, 2021, 08:25:34 PM
Post by: 71charger_fan on March 18, 2021, 08:25:34 PM
After some persuasion, the front fenders are aligned to the doors and the gaps are set.


Title: Re: '71 Hits the Paint Booth
Post by: hemi-hampton on March 18, 2021, 09:09:34 PM
Post by: hemi-hampton on March 18, 2021, 09:09:34 PM
was that persuasion with a hammer?
Title: Re: '71 Hits the Paint Booth
Post by: 71charger_fan on March 19, 2021, 07:07:12 AM
Post by: 71charger_fan on March 19, 2021, 07:07:12 AM
That's what it took.
Title: Re: '71 Hits the Paint Booth
Post by: 71charger_fan on March 19, 2021, 01:52:44 PM
Post by: 71charger_fan on March 19, 2021, 01:52:44 PM
A hit on the driver side fender dating back before I owned the car is complicating getting the hood to fender gaps right.


Title: Re: '71 Hits the Paint Booth
Post by: hemi-hampton on March 19, 2021, 07:34:59 PM
Post by: hemi-hampton on March 19, 2021, 07:34:59 PM
Yeah, That don't look to good. Looks like both the Fender & Hood is part of the Problem unfortunately. :scratchchin: Good Luck :scratchchin:

Title: Re: '71 Hits the Paint Booth
Post by: 71charger_fan on March 20, 2021, 09:13:55 AM
Post by: 71charger_fan on March 20, 2021, 09:13:55 AM
The hood's a '74. But, the original hood rubbed at the front driver side corner since I bought the car in '86. If I have to accept a less-than-ideal hood to fender gap, I can live with it.
Title: Re: '71 Hits the Paint Booth
Post by: hemi-hampton on March 20, 2021, 12:52:46 PM
Post by: hemi-hampton on March 20, 2021, 12:52:46 PM
You shouldn't have to live with that, it can be made straight, i've done many before, may not be easy though, sometimes you gotta cut & weld ect., ect., I had one bowed out so bad (gap like over 1 inch wide) I had to weld a long steel plate along top of fender edge & pull on frame machine. Good Luck
Title: Re: '71 Hits the Paint Booth
Post by: 71charger_fan on March 20, 2021, 07:27:55 PM
Post by: 71charger_fan on March 20, 2021, 07:27:55 PM
I was thinking a couple of relief cuts on the inside of the forward third of the driver fender might do the trick. I'm sure my body guy will get it. He's very, very picky. I'll probably drive up there Monday or Tuesday and see how it's going.
Title: Re: '71 Hits the Paint Booth
Post by: 71charger_fan on March 25, 2021, 09:05:12 PM
Post by: 71charger_fan on March 25, 2021, 09:05:12 PM
When I talked to him on Monday, he was confident that he'd get it all aligned. He was hoping to start body work on the rest of the car this week.
Title: Re: '71 Hits the Paint Booth
Post by: 71charger_fan on April 01, 2021, 05:32:20 PM
Post by: 71charger_fan on April 01, 2021, 05:32:20 PM
Got it in position to bodywork the lower parts of the car.

Title: Re: '71 Hits the Paint Booth
Post by: ACUDANUT on April 01, 2021, 10:43:14 PM
Post by: ACUDANUT on April 01, 2021, 10:43:14 PM
Awesome work. I prefer the 71-72 Charger looks. Looks like it is going 200mph standing still. :cheers: :cheers: :cheers: :cheers: :cheers:
Title: Re: '71 Hits the Paint Booth
Post by: 71charger_fan on April 06, 2021, 05:04:54 PM
Post by: 71charger_fan on April 06, 2021, 05:04:54 PM
Gaps just about dialed in.


Title: Re: '71 Hits the Paint Booth
Post by: CFMopar on April 08, 2021, 07:00:15 PM
Post by: CFMopar on April 08, 2021, 07:00:15 PM
Man that photo just inspires me to keep plugging away at mine. Looks great at that angle!
Quote from: 71charger_fan on April 01, 2021, 05:32:20 PM
Got it in position to bodywork the lower parts of the car.
Title: Re: '71 Hits the Paint Booth
Post by: 71charger_fan on April 08, 2021, 07:42:22 PM
Post by: 71charger_fan on April 08, 2021, 07:42:22 PM
The unibody wasn't as solid as it is now when the car was new.
Title: Re: '71 Hits the Paint Booth
Post by: 71charger_fan on April 11, 2021, 11:38:13 AM
Post by: 71charger_fan on April 11, 2021, 11:38:13 AM
Rust "repair" to the lower fender done by the previous shop cut out and done correctly.


Title: Re: '71 Hits the Paint Booth
Post by: 71charger_fan on April 11, 2021, 11:40:51 AM
Post by: 71charger_fan on April 11, 2021, 11:40:51 AM
Let the blocking begin.


Title: Re: '71 Hits the Paint Booth
Post by: CDN72SE on April 12, 2021, 11:56:37 AM
Post by: CDN72SE on April 12, 2021, 11:56:37 AM
Looking good.
Title: Re: '71 Hits the Paint Booth
Post by: AKcharger on April 12, 2021, 08:15:13 PM
Post by: AKcharger on April 12, 2021, 08:15:13 PM
Lines look sharp!
Title: Re: '71 Hits the Paint Booth
Post by: 71charger_fan on April 13, 2021, 03:08:00 PM
Post by: 71charger_fan on April 13, 2021, 03:08:00 PM
Feathering in the AMD full quarter is going well. I'm very happy I had the drip rails shaved. Also a close up of a "repair" done by the previous shop that was cut out and replaced. It's the back side of the lower front fender patch. This car has not been driven in the rain since it was last painted and has only been washed maybe three times. When a shop doesn't give a #$%^, it shows.


Title: Re: '71 Hits the Paint Booth
Post by: 71charger_fan on April 20, 2021, 06:25:08 PM
Post by: 71charger_fan on April 20, 2021, 06:25:08 PM
From the doors back, she's about ready for primer. The hood hinges that Resto Rick did for me look great.


Title: Re: '71 Hits the Paint Booth
Post by: 71charger_fan on April 21, 2021, 05:57:52 PM
Post by: 71charger_fan on April 21, 2021, 05:57:52 PM
Blending the quarter panel end caps.


Title: Re: '71 Hits the Paint Booth
Post by: 71charger_fan on April 27, 2021, 01:07:53 PM
Post by: 71charger_fan on April 27, 2021, 01:07:53 PM
Another previous "repair" cut out and redone properly.


Title: Re: '71 Hits the Paint Booth
Post by: 71charger_fan on April 27, 2021, 01:15:46 PM
Post by: 71charger_fan on April 27, 2021, 01:15:46 PM
should be in primer from the doors back by this weekend. Unfortunately, I see no way it'll be done by Carlisle.


Title: Re: '71 Hits the Paint Booth
Post by: timmycharger on April 27, 2021, 01:21:44 PM
Post by: timmycharger on April 27, 2021, 01:21:44 PM
Looking really good!! :cheers:
Man, I honestly never gave the 71 Charger a good look until this thread. One of side shot pictures really shows off the lines and curves of the car. Keep posting pics!!
:popcrn: :popcrn:
Man, I honestly never gave the 71 Charger a good look until this thread. One of side shot pictures really shows off the lines and curves of the car. Keep posting pics!!
:popcrn: :popcrn:
Title: Re: '71 Hits the Paint Booth
Post by: 71charger_fan on April 27, 2021, 02:23:36 PM
Post by: 71charger_fan on April 27, 2021, 02:23:36 PM
Body alignment was a mess before. Looking like it should have looked when new now.
Title: Re: '71 Hits the Paint Booth
Post by: hemi-hampton on April 27, 2021, 09:33:53 PM
Post by: hemi-hampton on April 27, 2021, 09:33:53 PM
How'd the Hood to Fender gaps come out :scratchchin: :shruggy:
Title: Re: '71 Hits the Paint Booth
Post by: 71charger_fan on April 28, 2021, 07:32:51 AM
Post by: 71charger_fan on April 28, 2021, 07:32:51 AM
They look good. Haven't seen it with the restored hinges installed. Front fenders still need some metal work and will need a lot of blocking. I'll probably retrieve the dash and associated components next week and start rewiring and reassembling that myself.
Title: Re: '71 Hits the Paint Booth
Post by: 73chgrSE on April 28, 2021, 09:24:41 AM
Post by: 73chgrSE on April 28, 2021, 09:24:41 AM
Wow, this thread started in 2014. I admire your dedication to this project. It's gonna be epic! :cheers:
Title: Re: '71 Hits the Paint Booth
Post by: CFMopar on April 28, 2021, 08:57:57 PM
Post by: CFMopar on April 28, 2021, 08:57:57 PM
Those shaved drip rails look great. I thought about that on mine but still not sure about it....
Title: Re: '71 Hits the Paint Booth
Post by: 71charger_fan on April 29, 2021, 10:00:28 AM
Post by: 71charger_fan on April 29, 2021, 10:00:28 AM
I paid the previous shop to fix the rusted out drip rails. I thought they had. Turns out, they just filled the rust holes with seam sealer and painted over it. So, the cost to remove them and the cost to fix them was about the same, so I told him to take them off.
Title: Re: '71 Hits the Paint Booth
Post by: 71charger_fan on April 30, 2021, 03:22:24 PM
Post by: 71charger_fan on April 30, 2021, 03:22:24 PM
A fresh coat of satin black on the dash frame.

Title: Re: '71 Hits the Paint Booth
Post by: 71charger_fan on May 04, 2021, 07:40:22 PM
Post by: 71charger_fan on May 04, 2021, 07:40:22 PM
Primed from doors back


Title: Re: '71 Hits the Paint Booth
Post by: 71charger_fan on May 09, 2021, 10:05:27 AM
Post by: 71charger_fan on May 09, 2021, 10:05:27 AM
Restored '73/'74 hinges installed and hood aligned.


Title: Re: '71 Hits the Paint Booth
Post by: 71charger_fan on May 13, 2021, 11:15:28 AM
Post by: 71charger_fan on May 13, 2021, 11:15:28 AM
Firewall stripped. I collected the dash pieces yesterday to reassemble it myself. I didn't take it apart. Any photos of 3rd gen dashes from the firewall side would be greatly appreciated.


Title: Re: '71 Hits the Paint Booth
Post by: 71charger_fan on May 19, 2021, 09:02:49 PM
Post by: 71charger_fan on May 19, 2021, 09:02:49 PM
Today, I started putting the dash back together. Since I didn't take it apart, it'll take me a while to get it back together. I don't even know that I all the parts. I bought a Classic Dash gauge cluster. However, I am not happy with the fit and will likely just eat the cost of it and go back to the factory cluster.


Title: Re: '71 Hits the Paint Booth
Post by: CFMopar on May 19, 2021, 09:46:54 PM
Post by: CFMopar on May 19, 2021, 09:46:54 PM
Ah that's shit. I thought of buying that but got a great deal on a 2nd rally cluster and plan to retro fit it with new gauges.
Title: Re: '71 Hits the Paint Booth
Post by: ACUDANUT on May 20, 2021, 09:53:57 AM
Post by: ACUDANUT on May 20, 2021, 09:53:57 AM
I don't think it looks like shit. Kinda cool :cheers: :cheers:
Title: Re: '71 Hits the Paint Booth
Post by: 71charger_fan on May 20, 2021, 10:37:51 AM
Post by: 71charger_fan on May 20, 2021, 10:37:51 AM
Passenger fender done, on to the driver fender.


Title: Re: '71 Hits the Paint Booth
Post by: CFMopar on May 20, 2021, 01:09:56 PM
Post by: CFMopar on May 20, 2021, 01:09:56 PM
Quote from: ACUDANUT on May 20, 2021, 09:53:57 AM
I don't think it looks like shit. Kinda cool :cheers: :cheers:
Sorry not saying it looks like shit. It's shit that he's not happy with fit.
Title: Re: '71 Hits the Paint Booth
Post by: 71charger_fan on May 21, 2021, 08:23:27 PM
Post by: 71charger_fan on May 21, 2021, 08:23:27 PM
Front clip primed and now it cures for a few weeks.


Title: Re: '71 Hits the Paint Booth
Post by: 71charger_fan on May 21, 2021, 09:56:38 PM
Post by: 71charger_fan on May 21, 2021, 09:56:38 PM
Dashboard slowly going back together. I went back to a factory cluster using an AM/FM Bluetooth radio from antiqueautomobileradio.com. Not sure if I have the ashtray in correctly or the bracket for the ductwork attached in the correct place.


Title: Re: '71 Hits the Paint Booth
Post by: 71charger_fan on May 25, 2021, 01:43:47 PM
Post by: 71charger_fan on May 25, 2021, 01:43:47 PM
Went to the shop today to pick up my old dash harness and snapped some photos.


Title: Re: '71 Hits the Paint Booth
Post by: 71charger_fan on May 26, 2021, 08:50:03 PM
Post by: 71charger_fan on May 26, 2021, 08:50:03 PM
The American Autowire update wiring harness I'm using has no provision for the concealed headlamp doors. Today, I unwrapped the dash harness that came out of the car to separate out the blue/yellow and black/red wire pair that carry the open/close signal from the relay to the motor.


Title: Re: '71 Hits the Paint Booth
Post by: AKcharger on May 27, 2021, 08:23:28 AM
Post by: AKcharger on May 27, 2021, 08:23:28 AM
Not sure if your past this point but heres some photos of dash/firewall
Title: Re: '71 Hits the Paint Booth
Post by: 71charger_fan on May 27, 2021, 02:47:52 PM
Post by: 71charger_fan on May 27, 2021, 02:47:52 PM
I would love some dash/firewall photos.
Title: Re: '71 Hits the Paint Booth
Post by: AKcharger on May 27, 2021, 08:08:52 PM
Post by: AKcharger on May 27, 2021, 08:08:52 PM
Sorry boss, forgot the link
http://www.dodgecharger.com/forum/index.php/topic,138138.msg1712150.html#msg1712150
http://www.dodgecharger.com/forum/index.php/topic,138138.msg1712150.html#msg1712150
Title: Re: '71 Hits the Paint Booth
Post by: ACUDANUT on May 28, 2021, 09:35:15 PM
Post by: ACUDANUT on May 28, 2021, 09:35:15 PM
No paint in 8 years ??
Title: Re: '71 Hits the Paint Booth
Post by: 71charger_fan on May 29, 2021, 06:55:06 AM
Post by: 71charger_fan on May 29, 2021, 06:55:06 AM
Quote from: ACUDANUT on May 28, 2021, 09:35:15 PMIt was painted and looked good under fluorescent light. When I got it out in the sun, the search began for someone who could do it over and do it well.
No paint in 8 years ??
Title: Re: '71 Hits the Paint Booth
Post by: 71charger_fan on May 29, 2021, 09:09:27 PM
Post by: 71charger_fan on May 29, 2021, 09:09:27 PM
I worked out all the hookups from the American Autowire harness to the factory cluster. Now to unplug everything and make it neat. I'm thinking of wiring a second, single DIN, modern radio, mounted in the glovebox in to the mix. I could just turn off the repro one in the dash and use the JVC with a couple thousand songs on a thumb drive for road trips. I have the radio and there are extra accessory circuits.

Title: Re: '71 Hits the Paint Booth
Post by: 71charger_fan on May 31, 2021, 02:08:01 PM
Post by: 71charger_fan on May 31, 2021, 02:08:01 PM
He thinks he's about a month away from cut and buff.


Title: Re: '71 Hits the Paint Booth
Post by: 71charger_fan on May 31, 2021, 02:36:41 PM
Post by: 71charger_fan on May 31, 2021, 02:36:41 PM
Getting a handle on taming the wiring rat's nest.

Title: Re: '71 Hits the Paint Booth
Post by: 71charger_fan on June 01, 2021, 12:53:32 PM
Post by: 71charger_fan on June 01, 2021, 12:53:32 PM
Coming together.


Title: Re: '71 Hits the Paint Booth
Post by: 71charger_fan on June 03, 2021, 11:55:53 AM
Post by: 71charger_fan on June 03, 2021, 11:55:53 AM
Fully blocked and in final prime. Sand the gloss off of the final prime, sealer, then, finally, color.


Title: Re: '71 Hits the Paint Booth
Post by: 71charger_fan on June 05, 2021, 07:54:54 PM
Post by: 71charger_fan on June 05, 2021, 07:54:54 PM
This afternoon, I integrated my American Autowire harness with my Flaming River steering column. The turn signal switch pin outs on the column matched the American Autowire connector but it was not plug and play. The column connector was a Pack-Con and the harness connector was Delco-Remy. So I had to unpin the Flaming River connector and put those pins into the connector that came with the harness. Then I had to connect the ignition switch to the harness.


Title: Re: '71 Hits the Paint Booth
Post by: 71charger_fan on June 09, 2021, 08:23:37 PM
Post by: 71charger_fan on June 09, 2021, 08:23:37 PM
The inside of the driver frame rail had a rust through that had been covered up with seam sealer then painted over. Now, it's actually fixed with steel.


Title: Re: '71 Hits the Paint Booth
Post by: 71charger_fan on June 09, 2021, 08:29:12 PM
Post by: 71charger_fan on June 09, 2021, 08:29:12 PM
More rust turned up in the corners of the engine compartment that had been covered with seam sealer and painted over.


Title: Re: '71 Hits the Paint Booth
Post by: 71charger_fan on June 11, 2021, 09:54:42 AM
Post by: 71charger_fan on June 11, 2021, 09:54:42 AM
Broken spot weld on the core support that had been "fixed" with seam sealer and painted over.

Title: Re: '71 Hits the Paint Booth
Post by: 71charger_fan on June 11, 2021, 09:34:34 PM
Post by: 71charger_fan on June 11, 2021, 09:34:34 PM
Originally thought that the engine bay was good to go, but after all the half-assed body work that had been done to the rest of the car it too was stripped and treated.


Title: Re: '71 Hits the Paint Booth
Post by: 71charger_fan on June 12, 2021, 11:32:15 AM
Post by: 71charger_fan on June 12, 2021, 11:32:15 AM
I switched the wires in the American Autowire front lighting plug to the factory color scheme.

Title: Re: '71 Hits the Paint Booth
Post by: 71charger_fan on June 14, 2021, 02:47:33 PM
Post by: 71charger_fan on June 14, 2021, 02:47:33 PM
What I truly hope are the last two rust holes. They're in the back side of the core support on the passenger side. A patch cut out of an old Chevy truck cab corner and it's good as new.


Title: Re: '71 Hits the Paint Booth
Post by: 71charger_fan on June 14, 2021, 02:54:32 PM
Post by: 71charger_fan on June 14, 2021, 02:54:32 PM
The front lighting harness is done and ready to go in. I checked continuity through the whole thing today. I've taken the engine/ignition harness as far as I can without the engine and transmission in the car. I have to make the plug that connects to the neutral safety/reverse light switch but that has to wait until I can be certain how long to make the leads. I also have to determine length for the electric choke lead and ignition power and tach leads.


Title: Re: '71 Hits the Paint Booth
Post by: 71charger_fan on June 17, 2021, 09:28:16 PM
Post by: 71charger_fan on June 17, 2021, 09:28:16 PM
The engine bay is stripped, de-rusted, and zinc treated.


Title: Re: '71 Hits the Paint Booth
Post by: 71charger_fan on June 19, 2021, 11:56:21 AM
Post by: 71charger_fan on June 19, 2021, 11:56:21 AM
Bed liner instead of paint for inside the front fenders should prove much more protective.


Title: Re: '71 Hits the Paint Booth
Post by: ACUDANUT on June 20, 2021, 09:34:15 AM
Post by: ACUDANUT on June 20, 2021, 09:34:15 AM
Why didn't the factory do this ?
Title: Re: '71 Hits the Paint Booth
Post by: 71charger_fan on June 20, 2021, 10:24:00 AM
Post by: 71charger_fan on June 20, 2021, 10:24:00 AM
There's no upside for the manufacturer to make it last forever.
Title: Re: '71 Hits the Paint Booth
Post by: hemi-hampton on June 20, 2021, 01:00:43 PM
Post by: hemi-hampton on June 20, 2021, 01:00:43 PM
They did put some heavy duty under coating in some of these front Fenders Backsides. LEON.
Title: Re: '71 Hits the Paint Booth
Post by: 71charger_fan on June 21, 2021, 09:13:39 PM
Post by: 71charger_fan on June 21, 2021, 09:13:39 PM
He just keeps finding rust that had been hidden under seam sealer and paint. Fortunately, since he worked from back to front, he's about out of possible places to find more.


Title: Re: '71 Hits the Paint Booth
Post by: 71charger_fan on June 22, 2021, 09:53:40 PM
Post by: 71charger_fan on June 22, 2021, 09:53:40 PM
After finding, and fixing, one more rust through, the front of the unibody got a coat of epoxy primer.


Title: Re: '71 Hits the Paint Booth
Post by: 71charger_fan on June 23, 2021, 11:25:43 AM
Post by: 71charger_fan on June 23, 2021, 11:25:43 AM
More bedliner. Engine bay color probably tomorrow.


Title: Re: '71 Hits the Paint Booth
Post by: 71charger_fan on June 24, 2021, 08:33:58 AM
Post by: 71charger_fan on June 24, 2021, 08:33:58 AM
Previous body shop painted over rust inside the front valance. Of course they did.


Title: Re: '71 Hits the Paint Booth
Post by: 71charger_fan on June 24, 2021, 03:27:12 PM
Post by: 71charger_fan on June 24, 2021, 03:27:12 PM
Finally have base coat going on. Too bad the lighting washes out the color.


Title: Re: '71 Hits the Paint Booth
Post by: Bob T on June 24, 2021, 04:24:28 PM
Post by: Bob T on June 24, 2021, 04:24:28 PM
Good efforts man :2thumbs:
Bedliner was the right call under the fenders too I reckon.
Bedliner was the right call under the fenders too I reckon.
Title: Re: '71 Hits the Paint Booth
Post by: hemi-hampton on June 24, 2021, 08:02:37 PM
Post by: hemi-hampton on June 24, 2021, 08:02:37 PM
is that FC7 Plum Crazy Purple?
Title: Re: '71 Hits the Paint Booth
Post by: 71charger_fan on June 24, 2021, 08:29:26 PM
Post by: 71charger_fan on June 24, 2021, 08:29:26 PM
Quote from: hemi-hampton on June 24, 2021, 08:02:37 PM
is that FC7 Plum Crazy Purple?
Looks like Plum Crazy under florescent light, but it's actually Stryker Purple.
https://m.facebook.com/Doug-Carbaughs-Auto-Restorations-699745276876002/posts/?ref=page_internal&mt_nav=0
Title: Re: '71 Hits the Paint Booth
Post by: 71charger_fan on June 26, 2021, 09:35:49 PM
Post by: 71charger_fan on June 26, 2021, 09:35:49 PM
I got the dash assembled. I still have to retrieve the ashtray and glovebox doors, but I think it's 95% done.


Title: Re: '71 Hits the Paint Booth
Post by: 71charger_fan on June 29, 2021, 11:58:23 AM
Post by: 71charger_fan on June 29, 2021, 11:58:23 AM
Color looks better with the car out of the booth but it's still florescent light.


Title: Re: '71 Hits the Paint Booth
Post by: 71charger_fan on June 30, 2021, 08:42:53 PM
Post by: 71charger_fan on June 30, 2021, 08:42:53 PM
Fenders back on for what I really hope is the last time. Previous sad attempt to fix the trunk lip cut out and redone and underside of the trunk in primer.


Title: Re: '71 Hits the Paint Booth
Post by: 71charger_fan on July 02, 2021, 08:51:50 PM
Post by: 71charger_fan on July 02, 2021, 08:51:50 PM
More body color went on today.


Title: Re: '71 Hits the Paint Booth
Post by: 71charger_fan on July 07, 2021, 08:13:42 AM
Post by: 71charger_fan on July 07, 2021, 08:13:42 AM
Not much to see as work has moved to prepping inside the trunk.


Title: Re: '71 Hits the Paint Booth
Post by: 71charger_fan on July 09, 2021, 09:29:30 PM
Post by: 71charger_fan on July 09, 2021, 09:29:30 PM
Bedliner on the trunk floor, bedliner tinted body color inside the quarter panels and behind the bumper.


Title: Re: '71 Hits the Paint Booth
Post by: 71charger_fan on July 13, 2021, 02:31:53 PM
Post by: 71charger_fan on July 13, 2021, 02:31:53 PM
The rust hidden under paint and seam sealer on the front valance has been blasted away.

Title: Re: '71 Hits the Paint Booth
Post by: AKcharger on July 14, 2021, 09:46:09 AM
Post by: AKcharger on July 14, 2021, 09:46:09 AM
well...that car will be solid till at least 2310!
Title: Re: '71 Hits the Paint Booth
Post by: 71charger_fan on July 14, 2021, 02:08:40 PM
Post by: 71charger_fan on July 14, 2021, 02:08:40 PM
All it takes is one idiot texting while driving and it's all for nothing.
Title: Re: '71 Hits the Paint Booth
Post by: 71charger_fan on July 14, 2021, 03:05:40 PM
Post by: 71charger_fan on July 14, 2021, 03:05:40 PM
Mirrors, bezels, valances getting color.


Title: Re: '71 Hits the Paint Booth
Post by: tan top on July 14, 2021, 04:03:51 PM
Post by: tan top on July 14, 2021, 04:03:51 PM
:2thumbs: awesome color :popcrn:
Title: Re: '71 Hits the Paint Booth
Post by: 71charger_fan on July 16, 2021, 03:00:56 PM
Post by: 71charger_fan on July 16, 2021, 03:00:56 PM
Stopped by the shop today and the PPG rep was there. My plan was a white bumblebee stripe with pearl. He suggested that I think about a silver as most pearl has at least a hint of blue in it. So, after much discussion, I've landed on "Icing on Cake" silver for the stripe.


Title: Re: '71 Hits the Paint Booth
Post by: 71charger_fan on July 17, 2021, 06:37:58 PM
Post by: 71charger_fan on July 17, 2021, 06:37:58 PM
Ready for it's final, pre-paint sanding.

Title: Re: '71 Hits the Paint Booth
Post by: AKcharger on July 18, 2021, 10:10:00 AM
Post by: AKcharger on July 18, 2021, 10:10:00 AM
ALMOST there!!!!
Title: Re: '71 Hits the Paint Booth
Post by: 71charger_fan on July 21, 2021, 07:44:11 PM
Post by: 71charger_fan on July 21, 2021, 07:44:11 PM
More color


Title: Re: '71 Hits the Paint Booth
Post by: 71charger_fan on July 26, 2021, 12:57:54 PM
Post by: 71charger_fan on July 26, 2021, 12:57:54 PM
https://m.facebook.com/Doug-Carbaughs-Auto-Restorations-699745276876002/videos/clear-coat-tomorrow-its-another-fighter-15-hours-invested-so-far-to-get-to-this-/543019550168195/
Title: Re: '71 Hits the Paint Booth
Post by: Highbanked Hauler on July 30, 2021, 08:51:01 AM
Post by: Highbanked Hauler on July 30, 2021, 08:51:01 AM
Looking good there man !!
Title: Re: '71 Hits the Paint Booth
Post by: 71charger_fan on August 02, 2021, 03:15:00 PM
Post by: 71charger_fan on August 02, 2021, 03:15:00 PM
First two coats of clear sanded and two more laid down.


Title: Re: '71 Hits the Paint Booth
Post by: 71charger_fan on August 06, 2021, 02:07:48 PM
Post by: 71charger_fan on August 06, 2021, 02:07:48 PM
Time for more sanding then, finally, buffing.


Title: Re: '71 Hits the Paint Booth
Post by: timmycharger on August 06, 2021, 02:50:53 PM
Post by: timmycharger on August 06, 2021, 02:50:53 PM
YES!!! looking fantastic! :cheers: :popcrn:
Title: Re: '71 Hits the Paint Booth
Post by: 71charger_fan on August 11, 2021, 08:02:57 PM
Post by: 71charger_fan on August 11, 2021, 08:02:57 PM
Cut and buff looking good.


Title: Re: '71 Hits the Paint Booth
Post by: 71charger_fan on August 13, 2021, 06:19:57 PM
Post by: 71charger_fan on August 13, 2021, 06:19:57 PM
Cut and buff progressing nicely.


Title: Re: '71 Hits the Paint Booth
Post by: 70 sublime on August 13, 2021, 06:51:24 PM
Post by: 70 sublime on August 13, 2021, 06:51:24 PM
I hope when you get the car home and all finished off you only wash it once because you are spending so much time driving it getting bugs stuck in the grill and squished on the windshield :icon_smile_wink:
Than the other way around spending more time washing it to keep it clean and fear driving it and getting it dirty :brickwall:
Than the other way around spending more time washing it to keep it clean and fear driving it and getting it dirty :brickwall:
Title: Re: '71 Hits the Paint Booth
Post by: 71charger_fan on August 14, 2021, 08:03:59 PM
Post by: 71charger_fan on August 14, 2021, 08:03:59 PM
Tires have started to arrive. Fronts came today. Rears should be here Monday.

Title: Re: '71 Hits the Paint Booth
Post by: 71charger_fan on August 17, 2021, 03:31:57 PM
Post by: 71charger_fan on August 17, 2021, 03:31:57 PM
Starting to go back together. About a year from starting to get blown apart to starting to go back together.


Title: Re: '71 Hits the Paint Booth
Post by: ACUDANUT on August 17, 2021, 04:38:55 PM
Post by: ACUDANUT on August 17, 2021, 04:38:55 PM
Looking nice !!
Title: Re: '71 Hits the Paint Booth
Post by: 71charger_fan on August 18, 2021, 12:08:42 PM
Post by: 71charger_fan on August 18, 2021, 12:08:42 PM
Doors after final polish.


Title: Re: '71 Hits the Paint Booth
Post by: CRW-FK5 on August 18, 2021, 12:23:41 PM
Post by: CRW-FK5 on August 18, 2021, 12:23:41 PM
Coming along great. Thanks for the pictures. Keep them coming.
Title: Re: '71 Hits the Paint Booth
Post by: 71charger_fan on August 19, 2021, 09:05:54 PM
Post by: 71charger_fan on August 19, 2021, 09:05:54 PM
My paint guy pointed out that my master cylinder was all rusty and asked if I really wanted to reinstall that over fresh paint. So, this arrived today.

Title: Re: '71 Hits the Paint Booth
Post by: 71charger_fan on August 20, 2021, 04:24:43 PM
Post by: 71charger_fan on August 20, 2021, 04:24:43 PM
I decided to try Eastwood's brake paint.


Title: Re: '71 Hits the Paint Booth
Post by: 71charger_fan on August 24, 2021, 07:46:56 PM
Post by: 71charger_fan on August 24, 2021, 07:46:56 PM
Going back together


Title: Re: '71 Hits the Paint Booth
Post by: Midnight_Rider on August 24, 2021, 08:07:58 PM
Post by: Midnight_Rider on August 24, 2021, 08:07:58 PM
Very nice! Love me some purple. :cheers:
Title: Re: '71 Hits the Paint Booth
Post by: ACUDANUT on August 25, 2021, 04:13:03 PM
Post by: ACUDANUT on August 25, 2021, 04:13:03 PM
Quote from: 71charger_fan on August 20, 2021, 04:24:43 PM
I decided to try Eastwood's brake paint.
I wonder if I can spray this into my military gas tanks, to keep my filler neck from rusting out ??
Title: Re: '71 Hits the Paint Booth
Post by: 71charger_fan on August 25, 2021, 08:58:14 PM
Post by: 71charger_fan on August 25, 2021, 08:58:14 PM
The reassembly takes a surprisingly long time.

Title: Re: '71 Hits the Paint Booth
Post by: 71charger_fan on August 26, 2021, 09:26:31 PM
Post by: 71charger_fan on August 26, 2021, 09:26:31 PM
Doors going on, valance and spoiler on. Don't remember the routing for the hood release cable though.


Title: Re: '71 Hits the Paint Booth
Post by: 71charger_fan on August 28, 2021, 09:11:29 PM
Post by: 71charger_fan on August 28, 2021, 09:11:29 PM
Coming together. I had a hard time choosing between chrome and body color mirrors.


Title: Re: '71 Hits the Paint Booth
Post by: 71charger_fan on August 31, 2021, 09:14:43 PM
Post by: 71charger_fan on August 31, 2021, 09:14:43 PM
Today was glass day.


Title: Re: '71 Hits the Paint Booth
Post by: hemi-hampton on August 31, 2021, 11:07:23 PM
Post by: hemi-hampton on August 31, 2021, 11:07:23 PM
Looks Nice, Congrats. :2thumbs: LEON.
Title: Re: '71 Hits the Paint Booth
Post by: NHCharger on September 01, 2021, 08:27:36 PM
Post by: NHCharger on September 01, 2021, 08:27:36 PM
Looking good Terry. :cheers: :cheers:
Title: Re: '71 Hits the Paint Booth
Post by: ACUDANUT on September 01, 2021, 10:48:42 PM
Post by: ACUDANUT on September 01, 2021, 10:48:42 PM
Now it needs white R/T stripes. :cheers: :cheers:
Title: Re: '71 Hits the Paint Booth
Post by: 71charger_fan on September 05, 2021, 08:54:16 PM
Post by: 71charger_fan on September 05, 2021, 08:54:16 PM
When you've just finished installing an A/C compressor this is not the optimal outcome when you go to hook up the line. Fortunately, I had a spare compressor.

Title: Re: '71 Hits the Paint Booth
Post by: 71charger_fan on September 06, 2021, 08:58:33 PM
Post by: 71charger_fan on September 06, 2021, 08:58:33 PM
I ran and hooked up the A/C lines and the heater hoses. There's no decent heater hose diagram in the FSM for Charger/Coronet/Satellite with big block and A/C. So, I don't know if it's right or not. I also reinstalled the brake hardlines/distribution valve/master cylinder. I was working alone so had to improvise to hold up the MC while I went under the dash to install the washers and nuts.


Title: Re: '71 Hits the Paint Booth
Post by: 71charger_fan on September 13, 2021, 09:16:15 PM
Post by: 71charger_fan on September 13, 2021, 09:16:15 PM
I put the front bumper/grill assembly back together today.


Title: Re: '71 Hits the Paint Booth
Post by: 71charger_fan on September 13, 2021, 09:17:48 PM
Post by: 71charger_fan on September 13, 2021, 09:17:48 PM
I also swapped out the cruddy calipers for a freshly painted pair.


Title: Re: '71 Hits the Paint Booth
Post by: 71charger_fan on September 14, 2021, 08:57:42 PM
Post by: 71charger_fan on September 14, 2021, 08:57:42 PM
Today, got the brakes bled, front bumper/grill on, dome light wire fished through the A-pillar and a few other random things that needed to be done.

Title: Re: '71 Hits the Paint Booth
Post by: 71charger_fan on September 15, 2021, 09:23:12 PM
Post by: 71charger_fan on September 15, 2021, 09:23:12 PM
Getting very close.


Title: Re: '71 Hits the Paint Booth
Post by: tan top on September 16, 2021, 11:03:44 AM
Post by: tan top on September 16, 2021, 11:03:44 AM
:2thumbs: :coolgleamA: :cheers:
Title: Re: '71 Hits the Paint Booth
Post by: 71charger_fan on September 17, 2021, 09:04:15 PM
Post by: 71charger_fan on September 17, 2021, 09:04:15 PM
Now to get the hood adjusted, install the steering wheel, hook up the battery, and hope for the best.


Title: Re: '71 Hits the Paint Booth
Post by: ACUDANUT on September 18, 2021, 09:32:38 AM
Post by: ACUDANUT on September 18, 2021, 09:32:38 AM
No R/T Stripes ? You added a front R/T spoiler...Very nice either way. Cheers.
Title: Re: '71 Hits the Paint Booth
Post by: AKcharger on September 18, 2021, 10:01:34 AM
Post by: AKcharger on September 18, 2021, 10:01:34 AM
It's gonna move under it's own power soon!!!
Title: Re: '71 Hits the Paint Booth
Post by: 71charger_fan on September 18, 2021, 09:40:38 PM
Post by: 71charger_fan on September 18, 2021, 09:40:38 PM
Column is in and wheel is on. Now to figure out why the horn won't shut up. That's a job for Monday.


Title: Re: '71 Hits the Paint Booth
Post by: NHCharger on September 19, 2021, 08:06:56 PM
Post by: NHCharger on September 19, 2021, 08:06:56 PM
Is that a Flaming river steering column?
Title: Re: '71 Hits the Paint Booth
Post by: 71charger_fan on September 20, 2021, 08:32:58 PM
Post by: 71charger_fan on September 20, 2021, 08:32:58 PM
Flaming River column, adapter, and wheel. The only real problem is that the Flaming River column is smaller diameter than the original column and the floor mount doesn't capture it correctly. I bought the Flaming River E-body floor mount. We had to enlarge a couple of the holes, but it worked fine.
Title: Re: '71 Hits the Paint Booth
Post by: 71charger_fan on September 20, 2021, 08:54:41 PM
Post by: 71charger_fan on September 20, 2021, 08:54:41 PM
What a relief to pull the headlight switch and have the lights come on and the headlight doors open.


Title: Re: '71 Hits the Paint Booth
Post by: 71charger_fan on September 21, 2021, 11:06:12 AM
Post by: 71charger_fan on September 21, 2021, 11:06:12 AM
Of course, now I have another big thing to store.

Title: Re: '71 Hits the Paint Booth
Post by: 71charger_fan on September 22, 2021, 07:45:30 AM
Post by: 71charger_fan on September 22, 2021, 07:45:30 AM
What is this? Shop note on the tape just said "left frame rail." Where on the frame rail? Pointing up? Down? Forward? Back?


Title: Re: '71 Hits the Paint Booth
Post by: 70 sublime on September 22, 2021, 11:36:54 AM
Post by: 70 sublime on September 22, 2021, 11:36:54 AM
Does it go below the brake booster area on the frame rail to hold the cables going to the starter ?
Title: Re: '71 Hits the Paint Booth
Post by: 71charger_fan on September 22, 2021, 03:13:14 PM
Post by: 71charger_fan on September 22, 2021, 03:13:14 PM
That makes sense. Looks like I no longer need it. With the Schumacher headers and the mini starter, the starter wire now goes down the side of the block.
Title: Re: '71 Hits the Paint Booth
Post by: 71charger_fan on September 24, 2021, 07:56:24 PM
Post by: 71charger_fan on September 24, 2021, 07:56:24 PM
Found these two things in one of my containers of extra clips, bolts, screws, etc. Anyone recognize them? Where they attach? What they're for?


Title: Re: '71 Hits the Paint Booth
Post by: 71charger_fan on September 25, 2021, 09:47:25 PM
Post by: 71charger_fan on September 25, 2021, 09:47:25 PM
Interior trim cleaned up and refinished.
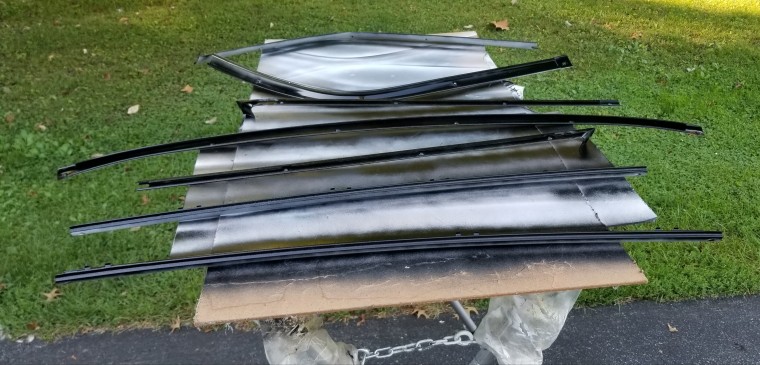
Title: Re: '71 Hits the Paint Booth
Post by: 71charger_fan on September 26, 2021, 08:44:36 PM
Post by: 71charger_fan on September 26, 2021, 08:44:36 PM
It's finally home.
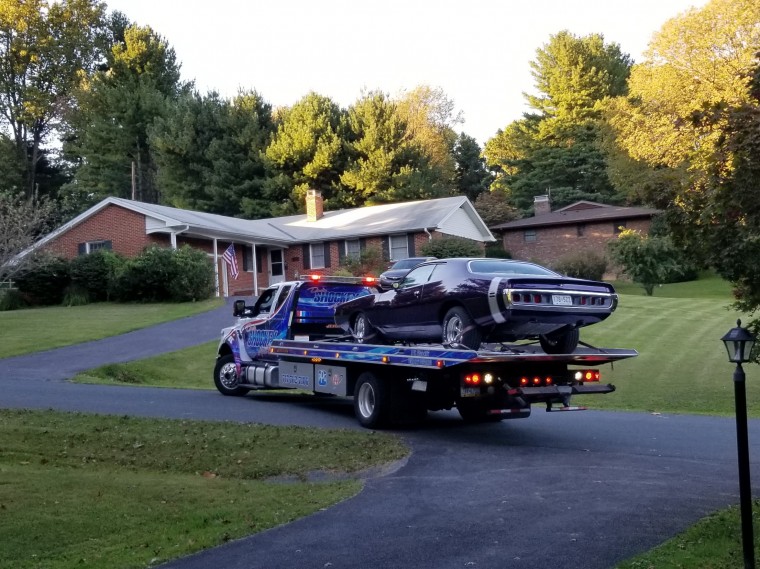
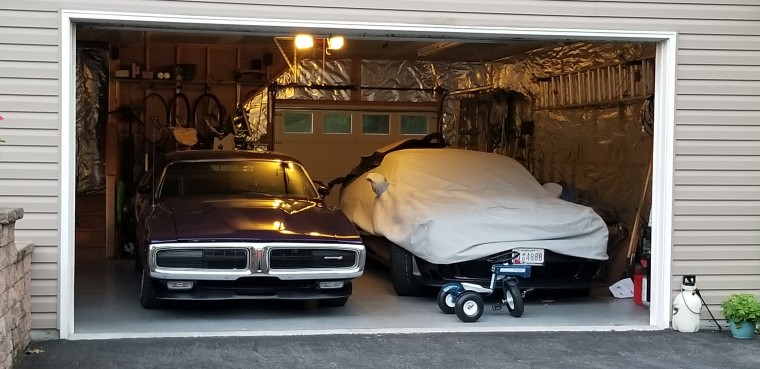
Title: Re: '71 Hits the Paint Booth
Post by: 71charger_fan on September 27, 2021, 05:45:28 PM
Post by: 71charger_fan on September 27, 2021, 05:45:28 PM
Finally got it out in the sun


Title: Re: '71 Hits the Paint Booth
Post by: birdsandbees on September 27, 2021, 06:13:16 PM
Post by: birdsandbees on September 27, 2021, 06:13:16 PM
:cheers: :2thumbs:
Title: Re: '71 Hits the Paint Booth
Post by: DownZero on September 27, 2021, 07:47:00 PM
Post by: DownZero on September 27, 2021, 07:47:00 PM
Nice !!
Title: Re: '71 Hits the Paint Booth
Post by: CDN72SE on September 29, 2021, 07:22:32 PM
Post by: CDN72SE on September 29, 2021, 07:22:32 PM
:2thumbs: :drool5:
Title: Re: '71 Hits the Paint Booth
Post by: 71charger_fan on September 29, 2021, 08:58:57 PM
Post by: 71charger_fan on September 29, 2021, 08:58:57 PM
Since only one hole on the package shelf is a speaker hole and the other is for the defogger, I wanted the screw heads for the second speaker to sit flush so I cobbled together a tool to dimple the flat sheetmetal.
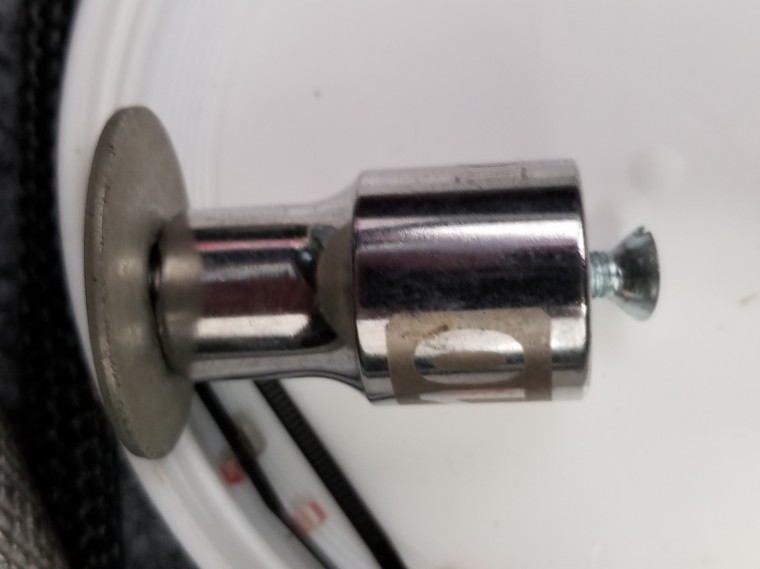
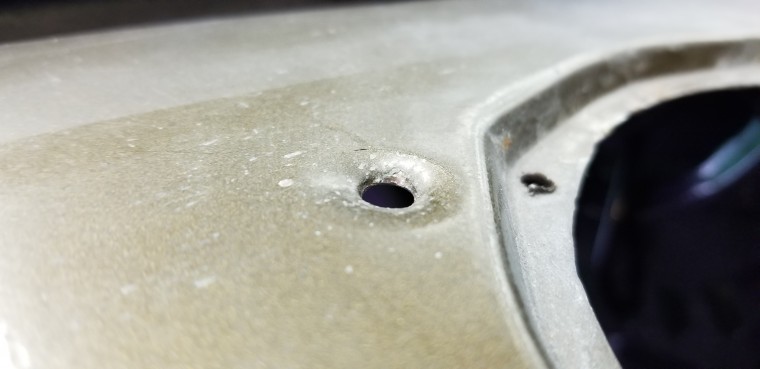
Title: Re: '71 Hits the Paint Booth
Post by: 71charger_fan on September 29, 2021, 09:14:11 PM
Post by: 71charger_fan on September 29, 2021, 09:14:11 PM
When I realized that my spare was almost 30 years old, it was time to buy a new one for the next 30 years. Found a dealer in Texas who had one of these left and got it for $60, including shipping.
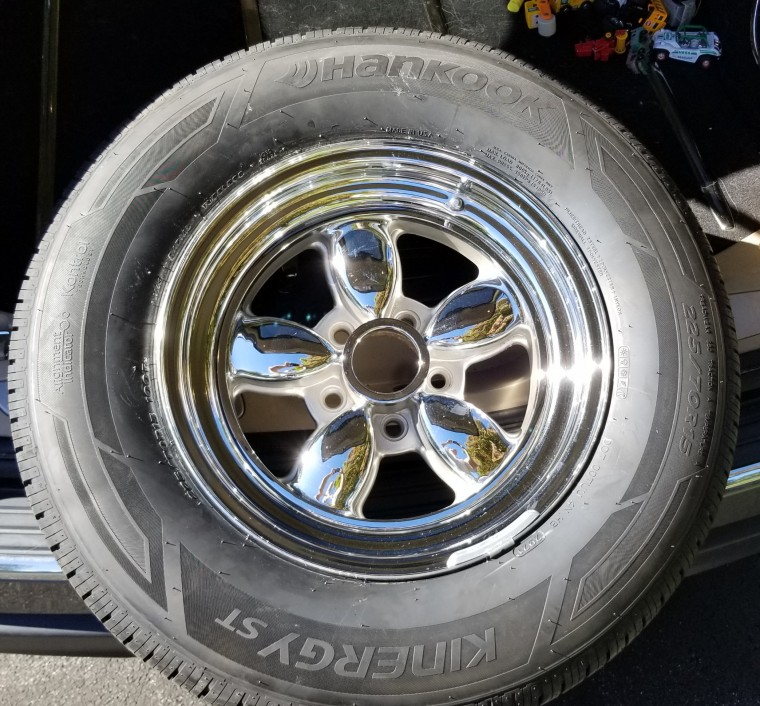
Title: Re: '71 Hits the Paint Booth
Post by: 71charger_fan on September 29, 2021, 09:40:52 PM
Post by: 71charger_fan on September 29, 2021, 09:40:52 PM
I got the inside of the trunk finished. I found some carpet underlay and cut a piece to fit the package shelf, glued it on, and installed the shelf. Now, I'm not sure the order of how it's supposed to be assembled. I have the interior quarter trim on top of the package shelf but I'm wondering if it should go under.

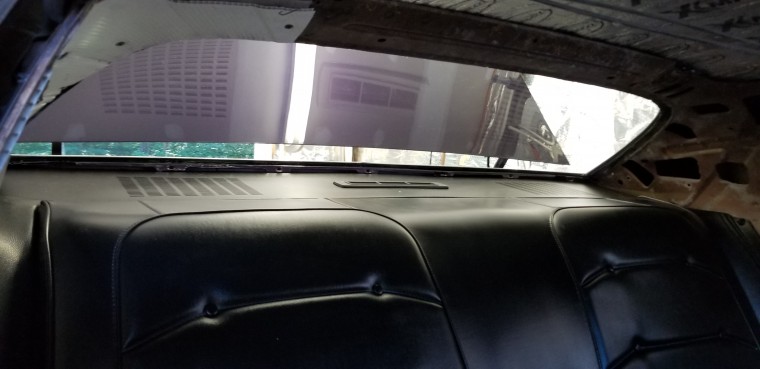
Title: Re: '71 Hits the Paint Booth
Post by: NHCharger on October 05, 2021, 03:59:59 PM
Post by: NHCharger on October 05, 2021, 03:59:59 PM
Nice. Hope to see it at Carlisle next year.
Title: Re: '71 Hits the Paint Booth
Post by: 71charger_fan on October 06, 2021, 09:09:21 PM
Post by: 71charger_fan on October 06, 2021, 09:09:21 PM
Today was tailpipe day/exhaust tip day.

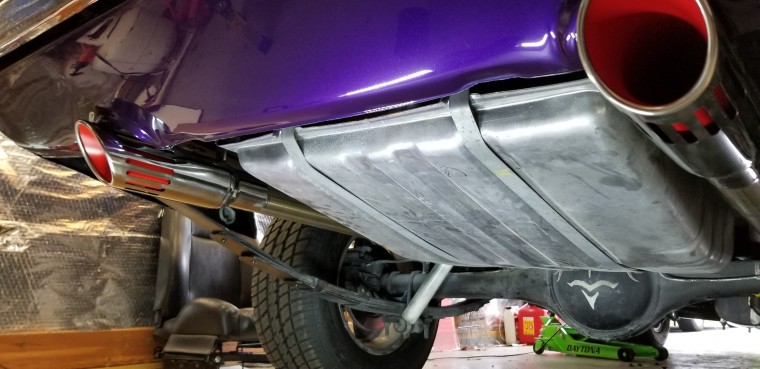
Title: Re: '71 Hits the Paint Booth
Post by: CDN72SE on October 07, 2021, 01:27:39 PM
Post by: CDN72SE on October 07, 2021, 01:27:39 PM
Best looking tips around. :2thumbs:
Title: Re: '71 Hits the Paint Booth
Post by: 71charger_fan on October 11, 2021, 08:50:24 PM
Post by: 71charger_fan on October 11, 2021, 08:50:24 PM
Finally got the carpet in. I hate doing carpet.
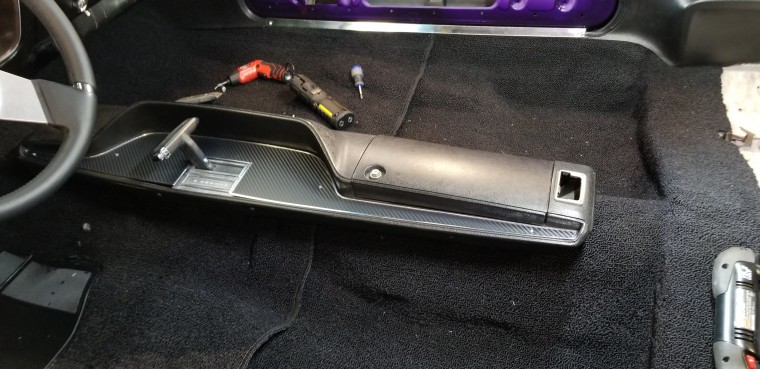
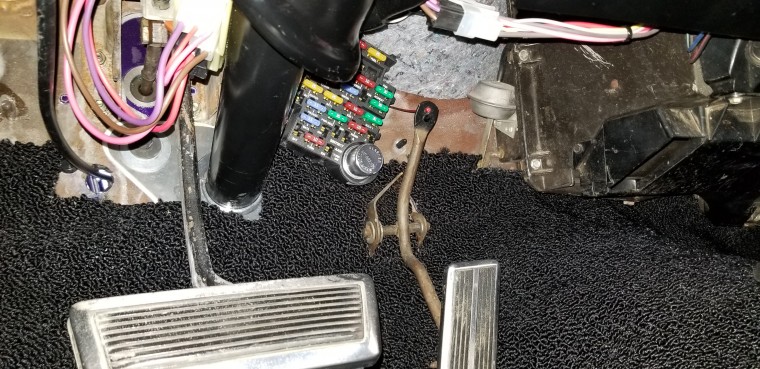
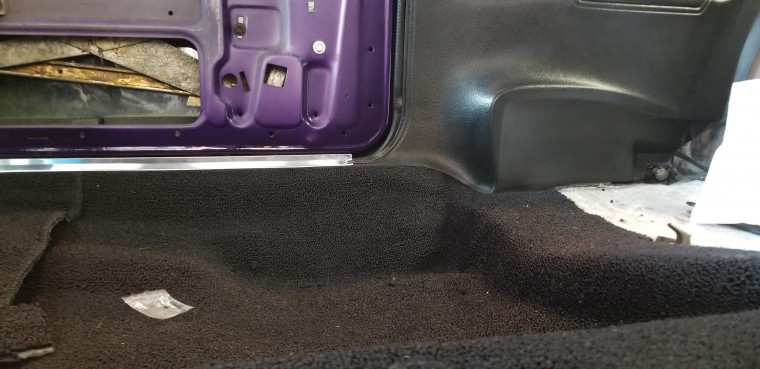
Title: Re: '71 Hits the Paint Booth
Post by: 71charger_fan on October 11, 2021, 09:12:17 PM
Post by: 71charger_fan on October 11, 2021, 09:12:17 PM
Installing the plastic sheeting is almost as tedious as installing the carpet.
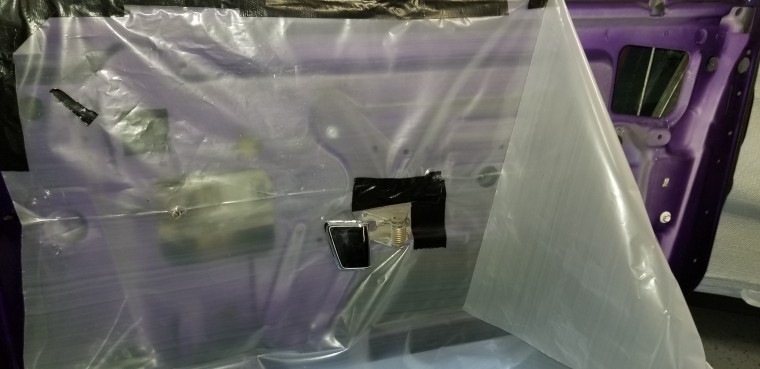
Title: Re: '71 Hits the Paint Booth
Post by: 71charger_fan on October 14, 2021, 09:12:44 PM
Post by: 71charger_fan on October 14, 2021, 09:12:44 PM
The headliner has been folded up in the box for a couple of years. Now to try and relax out the creases.
Title: Re: '71 Hits the Paint Booth
Post by: 71charger_fan on October 14, 2021, 09:14:36 PM
Post by: 71charger_fan on October 14, 2021, 09:14:36 PM
Dodge didn't insulate the rear inner wheel wells. I had some leftover material from the '55 Plymouth wagon project so I put it to use.
Title: Re: '71 Hits the Paint Booth
Post by: 71charger_fan on October 14, 2021, 09:15:54 PM
Post by: 71charger_fan on October 14, 2021, 09:15:54 PM
I saw in the seat belt section of the service manual a mention of anti-rattle washers. I didn't have any such thing so I improvised.
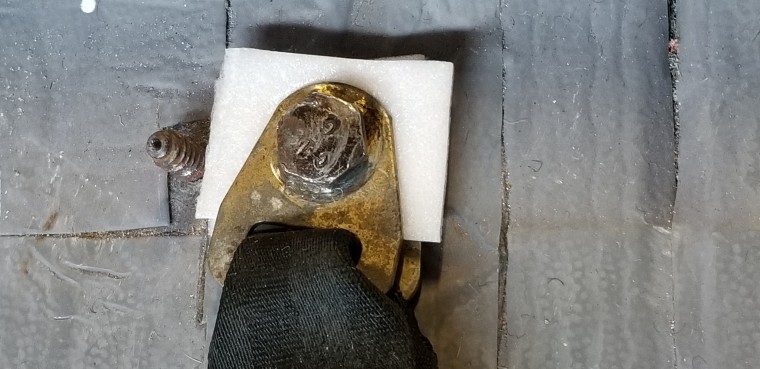
Title: Re: '71 Hits the Paint Booth
Post by: 71charger_fan on October 22, 2021, 09:17:41 PM
Post by: 71charger_fan on October 22, 2021, 09:17:41 PM
Finally on the alignment rack.
I really screwed up my headliner installation. So, now I'm waiting on one backordered at Year One. I guess I will go ahead and fit all the trim to make sure it's good while I wait for the headliner.
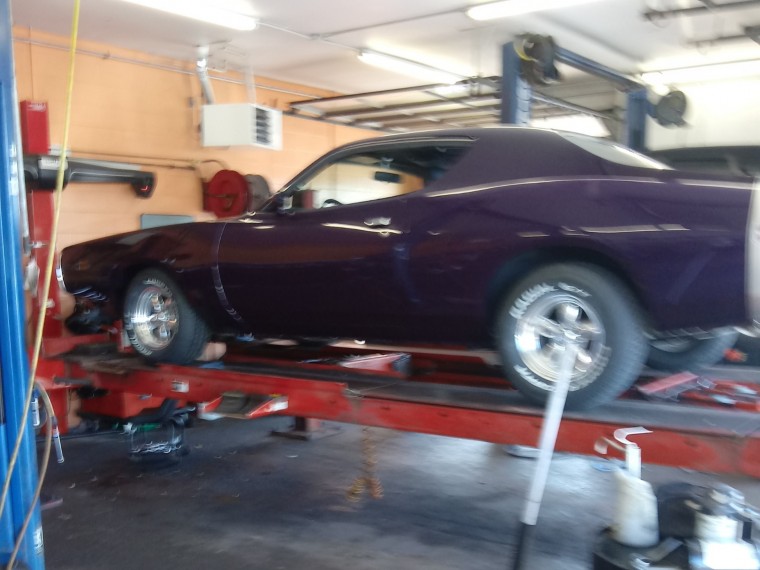
I really screwed up my headliner installation. So, now I'm waiting on one backordered at Year One. I guess I will go ahead and fit all the trim to make sure it's good while I wait for the headliner.
Title: Re: '71 Hits the Paint Booth
Post by: 71charger_fan on October 29, 2021, 12:02:58 PM
Post by: 71charger_fan on October 29, 2021, 12:02:58 PM
Up in the air for transmission filter change. One of the three screws that hold the filter snapped so I'm waiting on delivery of some 10-24 by 2.25" to finish the job. Likely, I'll put a few miles on it, then do it again to make sure to get out any sludge loosened by this change.

Title: Re: '71 Hits the Paint Booth
Post by: 71charger_fan on November 04, 2021, 01:55:58 PM
Post by: 71charger_fan on November 04, 2021, 01:55:58 PM
Yesterday, I took it to Freestate Auto Repair in Frederick, MD and had the tailpipes modified so that the tips fit properly in the valance and got the A/C charged. Good work, fairly priced.
Still waiting for a back ordered headliner to replace the one I messed up.
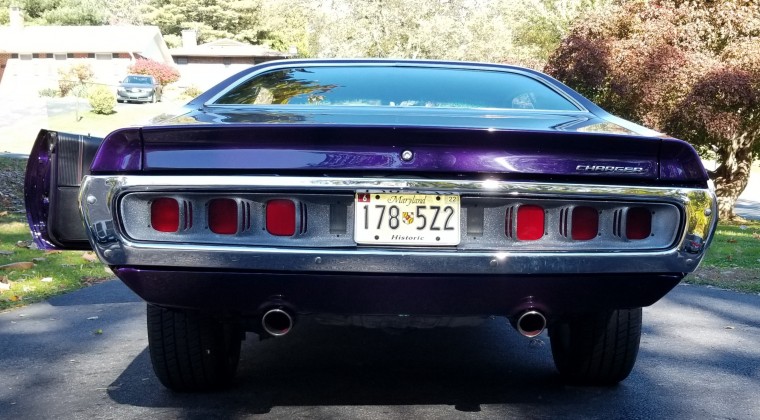
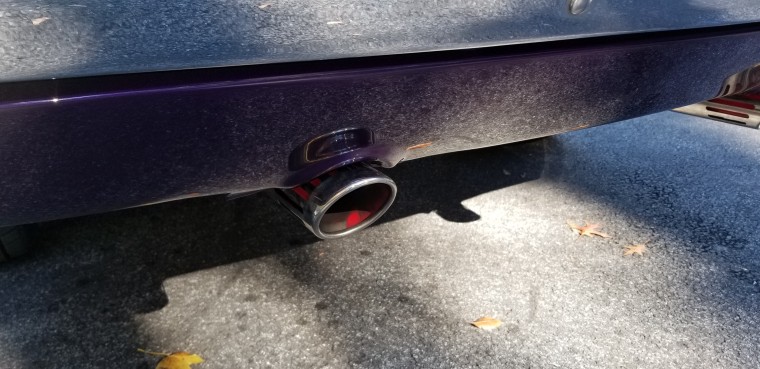
Still waiting for a back ordered headliner to replace the one I messed up.
Title: Re: '71 Hits the Paint Booth
Post by: JB400 on November 04, 2021, 08:34:27 PM
Post by: JB400 on November 04, 2021, 08:34:27 PM
New style emblem looks good on there
Title: Re: '71 Hits the Paint Booth
Post by: 71charger_fan on November 04, 2021, 09:19:39 PM
Post by: 71charger_fan on November 04, 2021, 09:19:39 PM
I bought three of them but decided to keep it simple and just put the one on the trunk lid. I bought one fender star in silver that came on Neons and put that on the right fender. Plus the modern Dodge emblem on the headlight door is all the external badging it's getting.
Title: Re: '71 Hits the Paint Booth
Post by: 71charger_fan on November 10, 2021, 12:28:16 PM
Post by: 71charger_fan on November 10, 2021, 12:28:16 PM
After an accident back in '89 that partially collapsed the quarter panel and the recent quarter panel replacement, I couldn't get the driver side rear window top adjusted out far enough. I finally pulled the adjuster out of the car and flipped the sliding part around and gained about an extra 1/4" of adjustment. Just what I needed to get the glass where it needed to be.
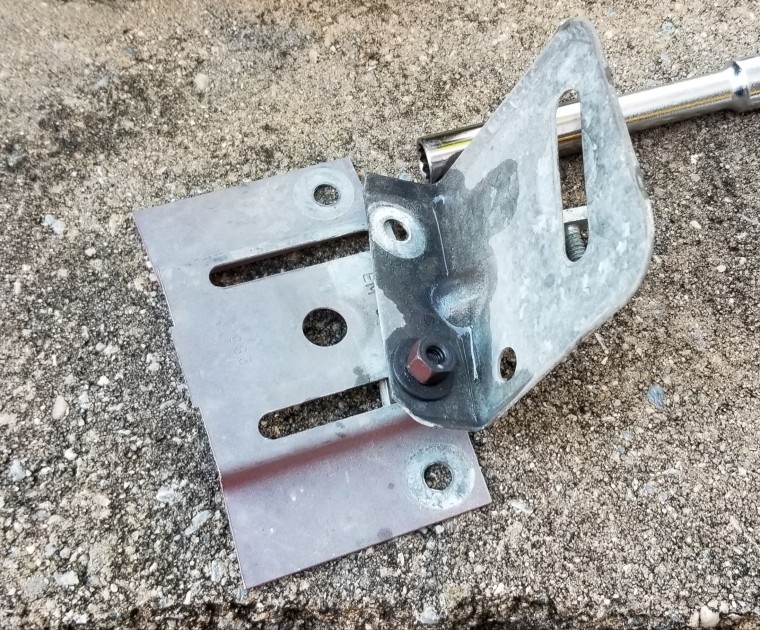
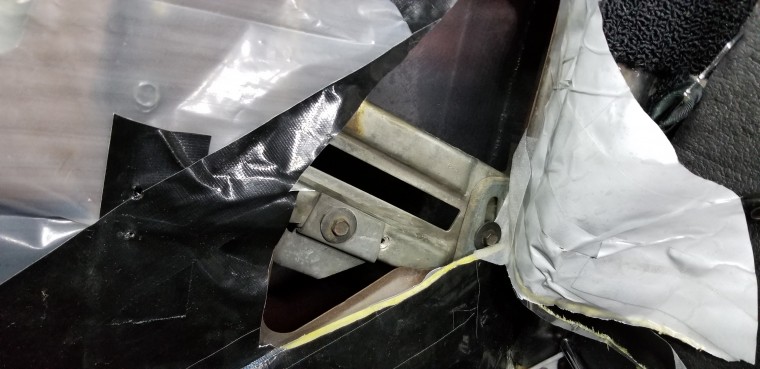
Title: Re: '71 Hits the Paint Booth
Post by: 71charger_fan on November 25, 2021, 04:22:28 PM
Post by: 71charger_fan on November 25, 2021, 04:22:28 PM
When I put the grille together, I was missing a headlight door bushing. I finally found another one in my stash and decided to put it in today. It was so much easier when the bumper was off the car.
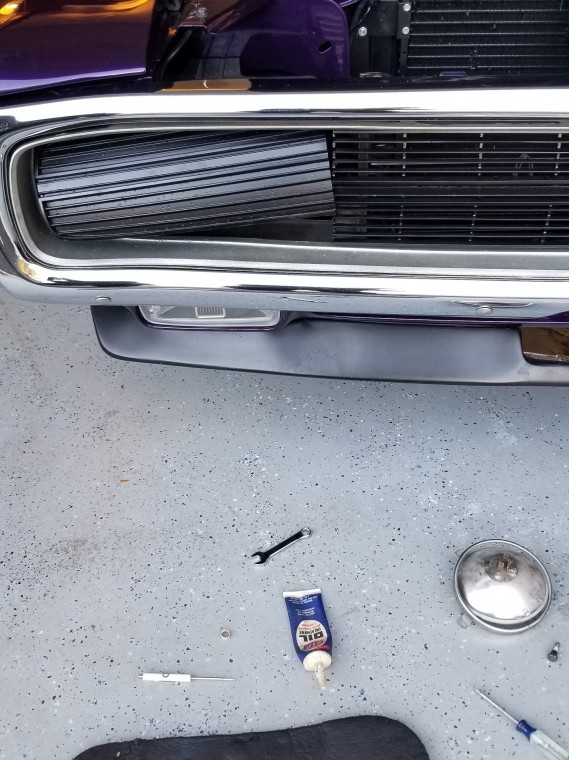
Title: Re: '71 Hits the Paint Booth
Post by: 71charger_fan on February 12, 2022, 09:53:30 AM
Post by: 71charger_fan on February 12, 2022, 09:53:30 AM
Warmer temps meant it was time to pull the Charger out of hibernation and take another run at the headliner. First, I have to remove the remnants of the first failed attempt.
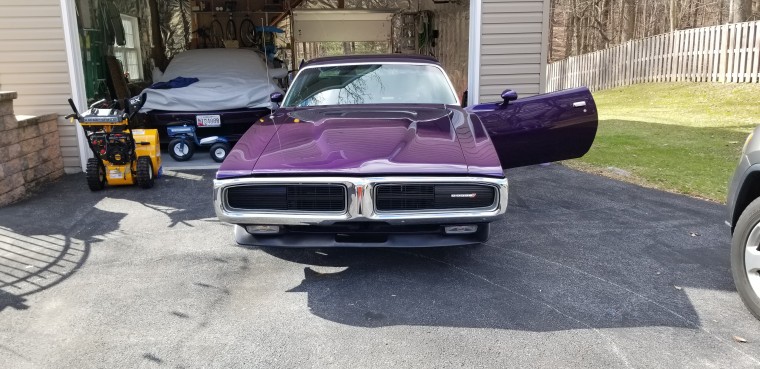
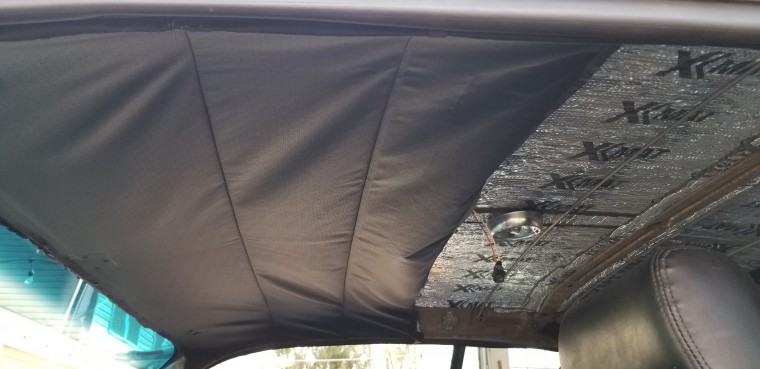
Title: Re: '71 Hits the Paint Booth
Post by: NHCharger on February 13, 2022, 07:14:47 AM
Post by: NHCharger on February 13, 2022, 07:14:47 AM
Headliner, one of my least favorite jobs.
Title: Re: '71 Hits the Paint Booth
Post by: 71charger_fan on February 13, 2022, 10:00:50 AM
Post by: 71charger_fan on February 13, 2022, 10:00:50 AM
I'm not enjoying it.
Title: Re: '71 Hits the Paint Booth
Post by: ACUDANUT on February 18, 2022, 02:53:18 PM
Post by: ACUDANUT on February 18, 2022, 02:53:18 PM
How does one get 16 pages on such a investment I can't get one.lol.
Title: Re: '71 Hits the Paint Booth
Post by: 71charger_fan on February 19, 2022, 08:24:36 AM
Post by: 71charger_fan on February 19, 2022, 08:24:36 AM
Pay people you trusted but shouldn't have a lot of money to do it wrong. Then, pay the right guy even more money to redo it and get it right.
Title: Re: '71 Hits the Paint Booth
Post by: 71charger_fan on March 28, 2022, 03:16:05 PM
Post by: 71charger_fan on March 28, 2022, 03:16:05 PM
https://photos.app.goo.gl/bHNyLcivectTeqng6
Title: Re: '71 Hits the Paint Booth
Post by: 71charger_fan on May 01, 2022, 03:24:03 PM
Post by: 71charger_fan on May 01, 2022, 03:24:03 PM
Finally getting it out.
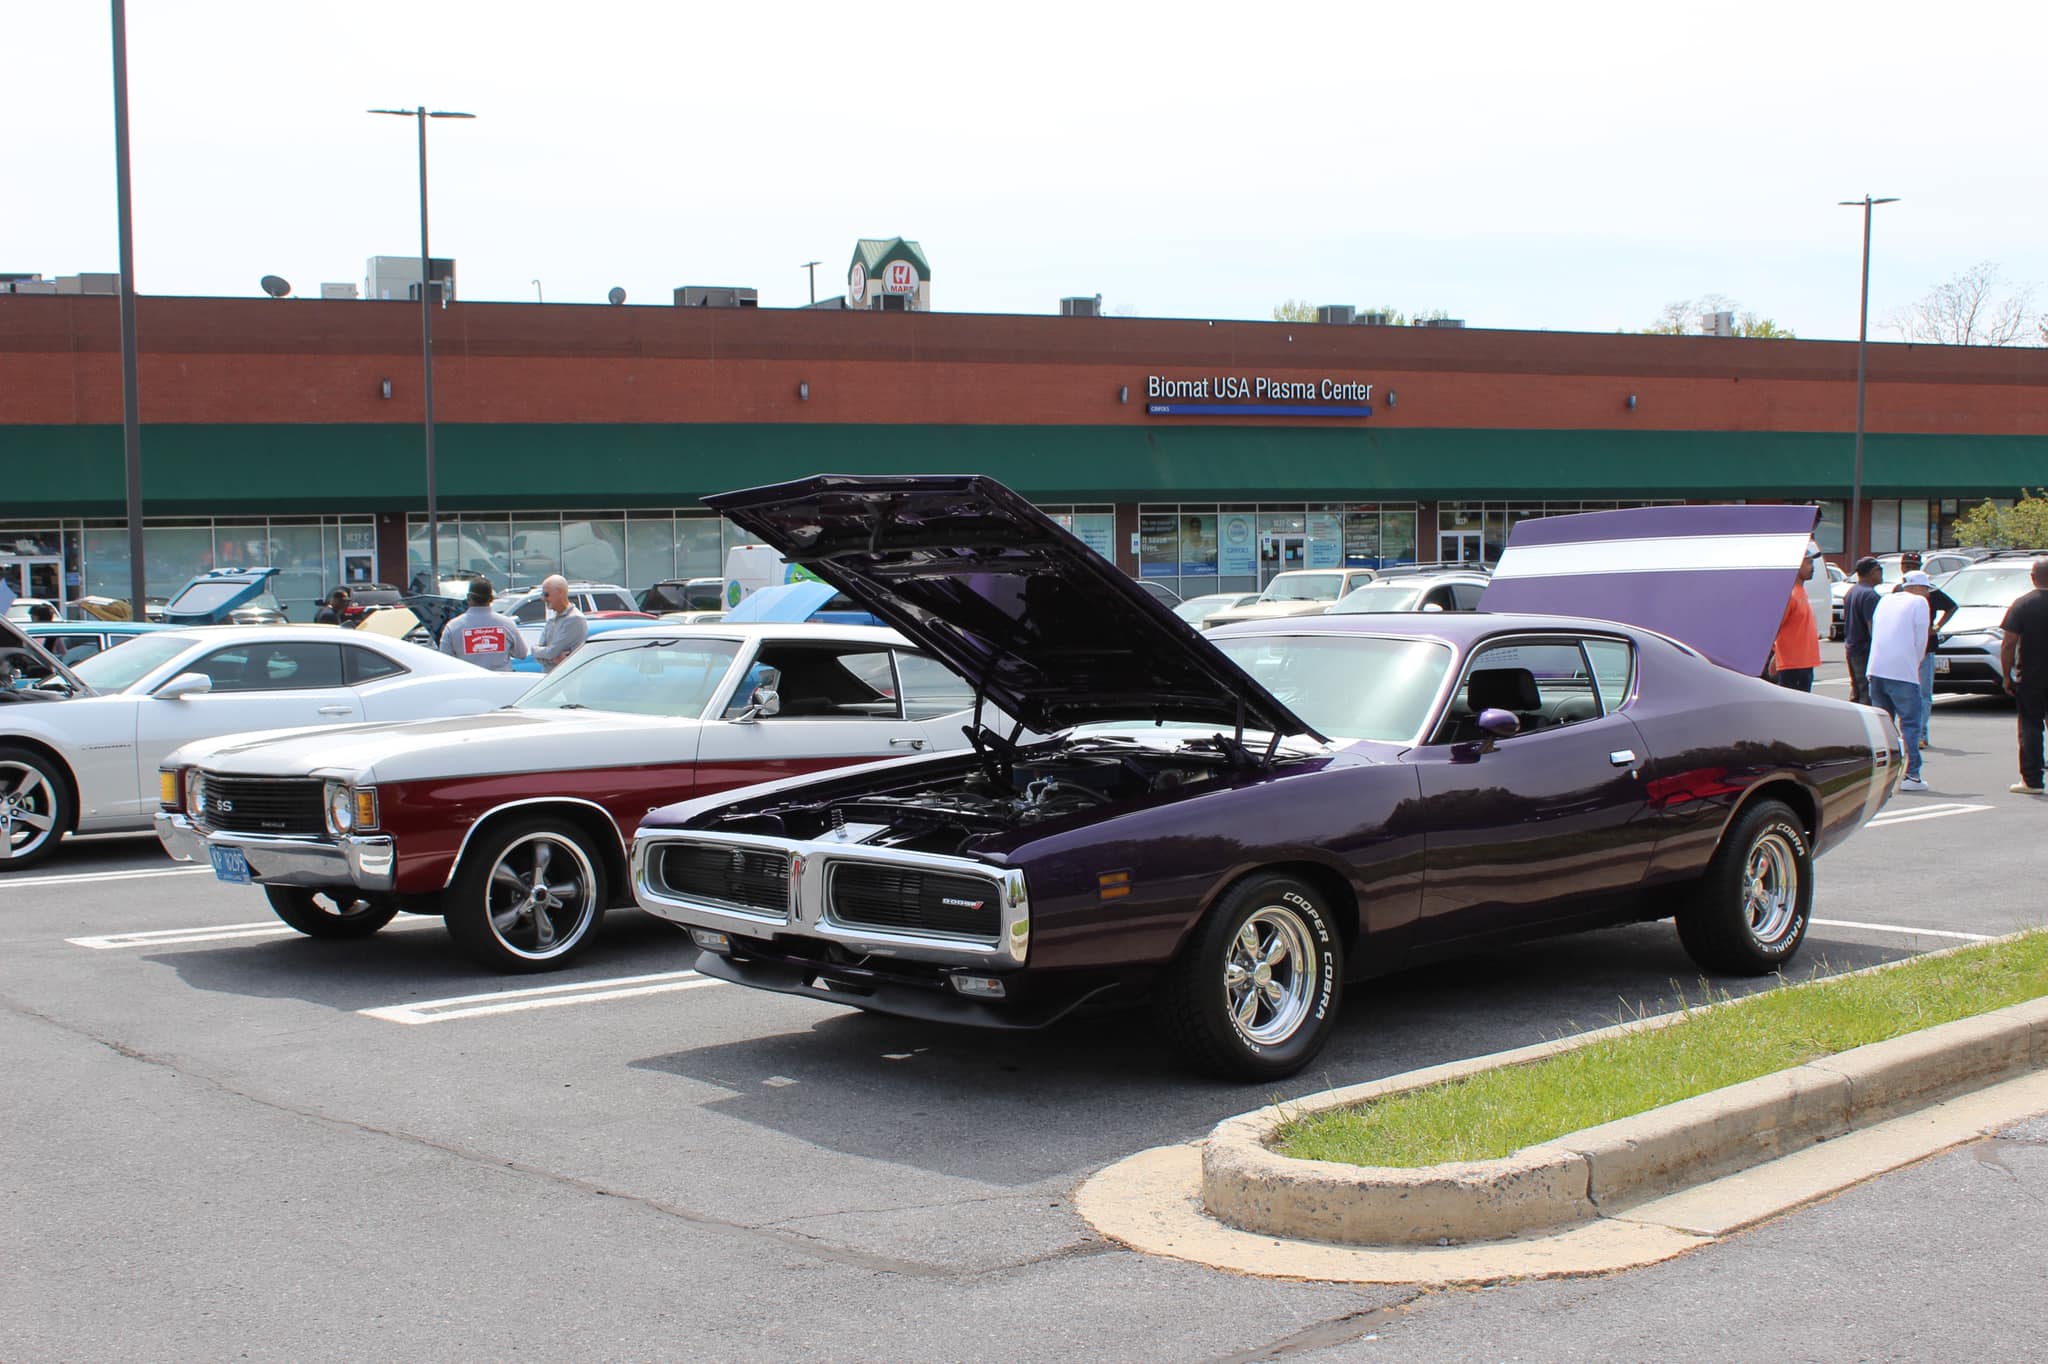
Title: Re: '71 Hits the Paint Booth
Post by: JB400 on May 01, 2022, 09:02:48 PM
Post by: JB400 on May 01, 2022, 09:02:48 PM
Looks like it was in good company
Title: Re: '71 Hits the Paint Booth
Post by: ACUDANUT on May 03, 2022, 07:26:18 PM
Post by: ACUDANUT on May 03, 2022, 07:26:18 PM
Very Nice !!
Title: Re: '71 Hits the Paint Booth
Post by: 71charger_fan on May 16, 2022, 08:18:07 AM
Post by: 71charger_fan on May 16, 2022, 08:18:07 AM
At the Mason Dixon Dragway Mopar show yesterday.
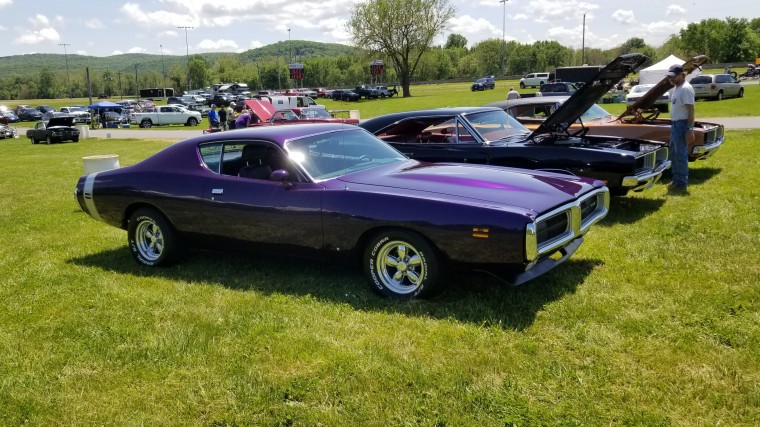
Title: Re: '71 Hits the Paint Booth
Post by: 71charger_fan on June 19, 2022, 09:41:15 PM
Post by: 71charger_fan on June 19, 2022, 09:41:15 PM
Driving to and from a car show this past weekend, it looked as if my hood latches were barely adequate to keep my hood from flying open. So, after paying my body guy to fill in the hood pin holes, I decided to bite the bullet and drill through my fresh paint to install hood pins for my peace of mind.
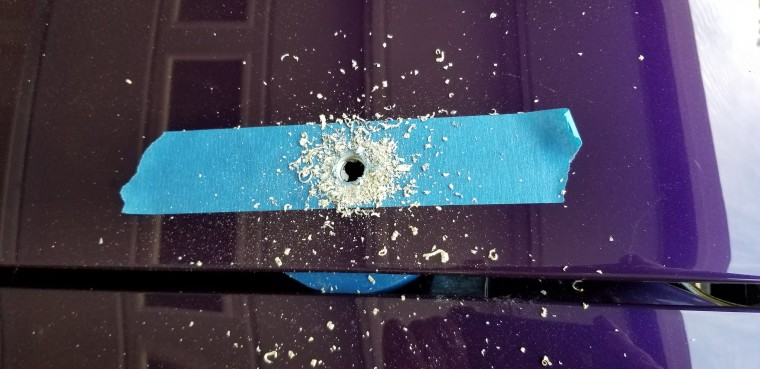
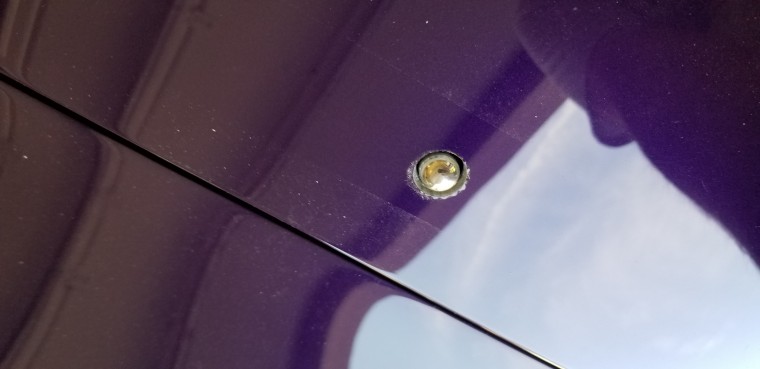

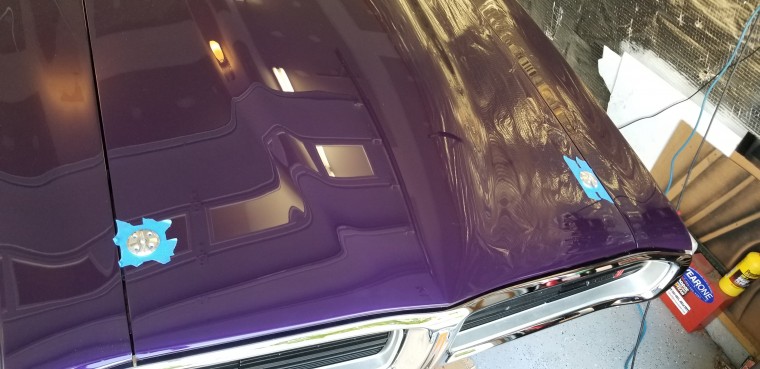
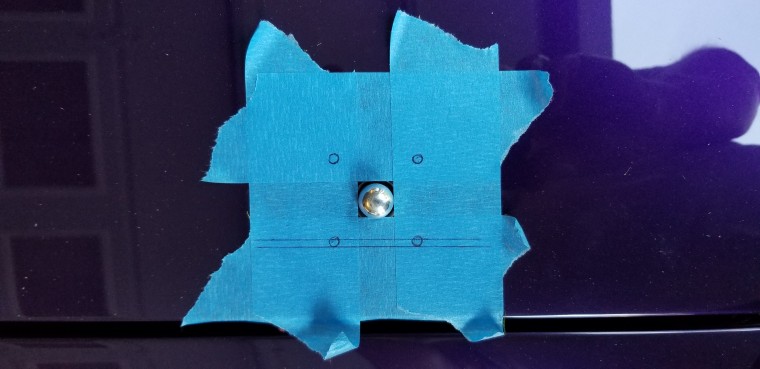
Title: Re: '71 Hits the Paint Booth
Post by: 71charger_fan on June 26, 2022, 03:47:46 PM
Post by: 71charger_fan on June 26, 2022, 03:47:46 PM
Hit the weekly cruise in at the Valley Mall in Hagerstown last night.

Title: Re: '71 Hits the Paint Booth
Post by: tan top on June 26, 2022, 09:02:16 PM
Post by: tan top on June 26, 2022, 09:02:16 PM
love the color :yesnod: :coolgleamA: :2thumbs:
Title: Re: '71 Hits the Paint Booth
Post by: 71charger_fan on July 12, 2022, 01:57:50 PM
Post by: 71charger_fan on July 12, 2022, 01:57:50 PM
I realized that the previous shop had spray bombed black over rust on my front license plate bracket. So, I dragged out the blasting cabinet, stripped it to bare metal, and gave it a coat of rustoleum. After that, four coats of Plasti-Dip.
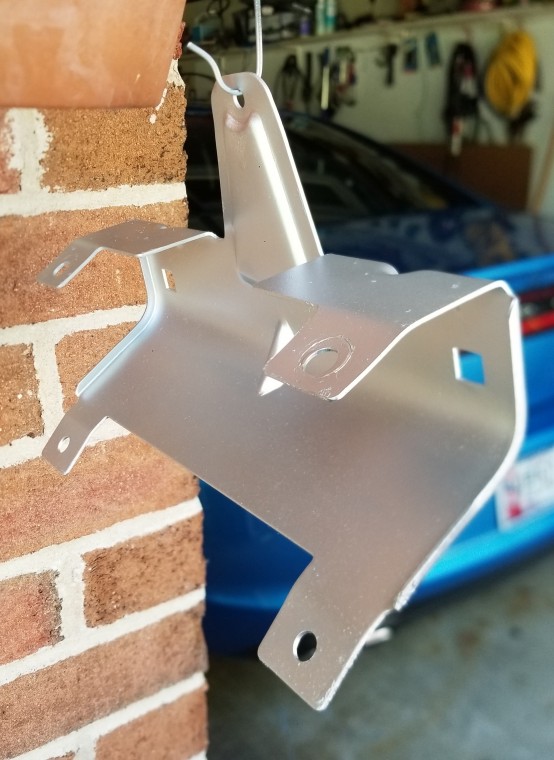

Title: Re: '71 Hits the Paint Booth
Post by: 71charger_fan on September 18, 2022, 09:17:25 PM
Post by: 71charger_fan on September 18, 2022, 09:17:25 PM
Got a sponsor's choice at a car show today hosted by a local Chevy club.

Title: Re: '71 Hits the Paint Booth
Post by: 71charger_fan on May 27, 2023, 08:48:00 PM
Post by: 71charger_fan on May 27, 2023, 08:48:00 PM
Local car show today.
Title: Re: '71 Hits the Paint Booth
Post by: b5blue on May 27, 2023, 08:53:58 PM
Post by: b5blue on May 27, 2023, 08:53:58 PM
Sharp! :cheers: